How to Condition Tap Water for Betta Fish
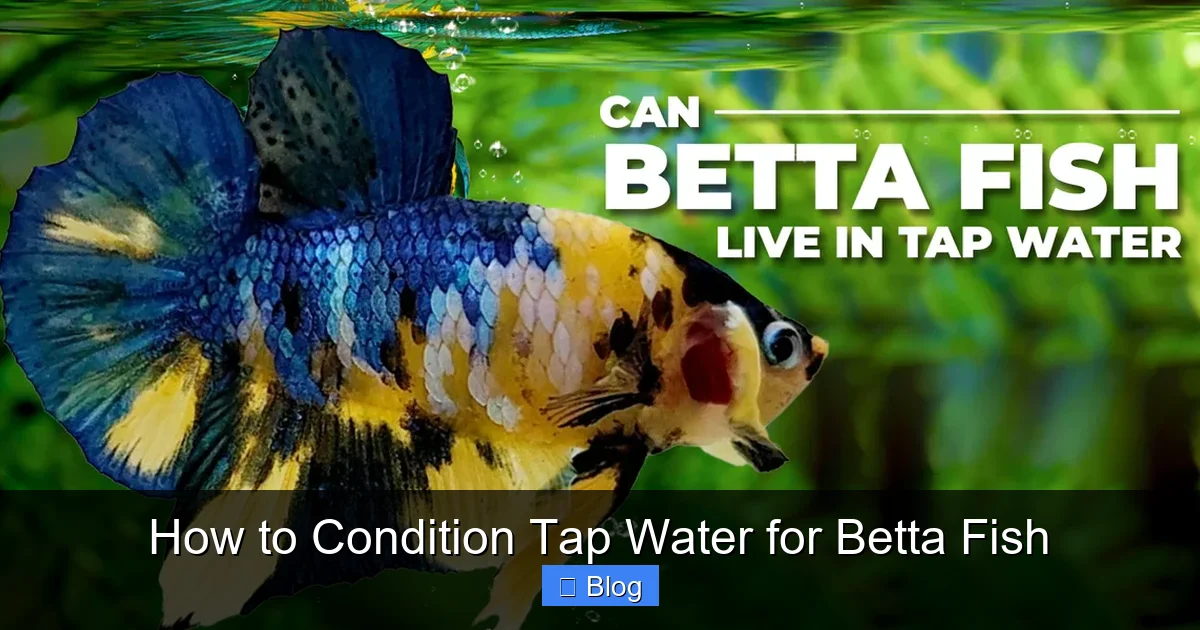
Conditioning tap water is non-negotiable for betta fish health. Untreated tap water contains chlorine, chloramines, and heavy metals that are lethal to bettas. You must use a reliable water conditioner/dechlorinator to neutralize these toxins before every single water change. Proper conditioning, combined with correct temperature matching and acclimation, creates the safe, stable environment your betta needs to thrive.
You’ve set up the perfect betta tank. You’ve got the beautiful substrate, the gentle filter, the cozy hiding spot, and maybe even a charming little ceramic log. You’re ready to bring home your new aquatic roommate. But here’s the thing you might not realize: the very water flowing from your kitchen faucet is a chemical weapon to your betta fish. It’s not an exaggeration. Understanding how to properly condition tap water for betta fish is the single most critical skill you can learn as a betta keeper. It’s the absolute foundation of their health. Skip this step, and you’re signing up for a world of stress, disease, and heartbreak. Get it right, and you’ve created the clean, safe home your vibrant, personality-filled betta deserves.
This guide will walk you through everything, from the science of what’s in your tap to the exact, simple steps you’ll take before every water change. We’ll bust common myths, recommend products, and give you the confidence to know your water chemistry is truly betta-safe. Let’s dive in.
Key Takeaways
- Tap water is toxic: Municipal tap water contains chlorine and chloramines to kill bacteria, but these chemicals will burn a betta’s gills and are fatal.
- conditioner is essential: A quality water conditioner instantly neutralizes chlorine, chloramines, and detoxifies heavy metals like copper found in tap water.
- Condition every water change: You must treat all new tap water—even for small top-offs—before it touches your betta or tank.
- Match temperature precisely: Conditioned water must be within 1-2°F (0.5-1°C) of your tank’s temperature to prevent thermal shock.
- Acclimation is still required: Even with perfect water, slowly acclimate your betta to the new water chemistry using the drip or floating bag method.
- Test your water: Use a liquid test kit to confirm chlorine/chloramine are gone and monitor ammonia, nitrite, nitrate, and pH levels regularly.
- Dosage matters: Always follow the conditioner’s label instructions based on your water volume; more is not better and can be harmful.
📑 Table of Contents
Understanding What’s Really in Your Tap Water
Before we talk about solutions, we need to understand the enemy. Your local water treatment plant adds chemicals to your tap for a very good reason: to protect human health by killing pathogens in the municipal supply. Unfortunately, those same chemicals are devastatingly toxic to the sensitive gills and skin of a betta fish. The two primary villains are chlorine and chloramines.
Chlorine: The Evaporating Threat
Chlorine has been used for over a century to disinfect drinking water. It’s effective and, at the levels in tap water, generally safe for humans. For fish, it’s a different story. Chlorine is a powerful oxidizing agent. When it enters a betta’s gills, it causes severe tissue damage, essentially burning the delicate filaments responsible for oxygen absorption. A betta exposed to chlorine will gasp at the surface, clamp its fins, and can die within minutes to hours depending on the concentration.
The old advice was to “let water sit out for 24 hours” to let the chlorine evaporate. This works for chlorine alone because it is a gas that will off-gas from standing water. However, this method is completely unreliable and dangerous today because most municipalities now use chloramines.
Chloramines: The Stable, Persistent Danger
Chloramines are formed when chlorine is combined with ammonia. Water treatment plants use them because they are much more stable and last longer in the water pipes, providing a persistent disinfectant residual. Here’s the crucial point: chloramines do NOT evaporate. You could let water sit for a week, and the chloramines will still be there, actively harming your fish. They are even more damaging to fish gills than chlorine alone. Any advice suggesting that aging tap water is sufficient is outdated and potentially deadly. This is why a chemical water conditioner is absolutely mandatory.
Other Unwanted Guests: Heavy Metals & Chemicals
Beyond chlorine and chloramines, your tap water can contain traces of other substances that are harmful to fish in the long term. These include:
- Heavy Metals: Copper, lead, and zinc can leach from old pipes. Copper is particularly toxic to invertebrates but also stresses fish, impairing their immune systems and gill function.
- Ammonia/Nitrites: While unlikely in significant amounts from the tap, some well water sources can contain these nitrogen compounds.
- Other Treatment Byproducts: The process of chlorination can create compounds like chloramines, but trace amounts of other byproducts may exist.
A good water conditioner doesn’t just remove chlorine and chloramines; it also chelates or detoxifies many of these heavy metals, making the water safer for your aquatic life.
Choosing the Right Water Conditioner for Your Betta
Not all water conditioners are created equal. Walking into a pet store and grabbing any bottle with “dechlorinator” on it is a good start, but you can make a smarter choice. For a betta—a fish often kept in smaller volumes of water where water quality fluctuations are more pronounced—you want a product that does the job thoroughly and safely.
Visual guide about How to Condition Tap Water for Betta Fish
Image source: fishtanksetups.com
The Gold Standard: Sodium Thiosulfate-Based Conditioners
This is the active ingredient you’re looking for. Sodium thiosulfate is a reducing agent that instantly neutralizes both chlorine and chloramines. It works by converting chlorine into harmless chloride ions and breaking the bond in chloramines, neutralizing the chlorine and releasing a tiny, harmless amount of ammonia. That last part is key. When chloramine is broken down, the ammonia molecule is freed. In a fully cycled tank, your beneficial bacteria will process that tiny amount of ammonia almost instantly. However, in a new tank or during a full water change in an uncycled “hospital” setup, that ammonia spike, while small, is something to be aware of.
Conditioner Plus: Detoxifying Heavy Metals & More
Many modern conditioners, like Seachem Prime or API Stress Coat+, go beyond basic dechlorination. They contain additional agents that:
- Detoxify ammonia, nitrite, and nitrate: This is a huge benefit. These products bind to these nitrogen compounds, rendering them non-toxic to your fish for up to 48 hours. This gives your biofilter extra time to process them. This is invaluable during a tank emergency or a water change in a new tank.
- Chelate heavy metals: They bind to metals like copper, preventing them from being absorbed by your fish’s gills.
- Promote slime coat: Some, like Stress Coat+, contain aloe vera or other compounds to help heal and protect your betta’s natural slime coat, which is its first line of defense against pathogens.
Recommendation: For a betta keeper, having a conditioner that detoxifies ammonia (like Seachem Prime) is a fantastic safety net. It’s a bit more expensive per dose, but the peace of mind is worth it.
What to Avoid
- “Tap Water Filters” for Fish: These are usually just carbon filters. They do not remove chloramines effectively and are not a substitute for chemical conditioning.
- Using Table Salt or Baking Soda: These adjust pH or hardness but do nothing for chlorine/chloramines. Using them incorrectly can cause osmotic shock.
- Over-dosing: More is not better. Follow the label. Excessive amounts of some conditioners can strip oxygen from the water or be directly toxic.
The Step-by-Step Guide: How to Condition Tap Water for Your Betta
Now for the practical part. Here is the foolproof process for preparing betta-safe water. We’ll cover two common scenarios: a full water change (for a small betta-only tank or hospital cup) and a partial water change (for a cycled community tank).
Visual guide about How to Condition Tap Water for Betta Fish
Image source: ouraquariumlife.com
Gather Your Tools
Before you start, have everything ready. This minimizes stress for you and your fish.
- Clean Buckets or Containers: Designate specific buckets for aquarium use only. Never use buckets that have held soap, chemicals, or have been used for cleaning. A 5-gallon bucket is ideal for a 5-gallon tank.
- Water Conditioner: Your chosen product (e.g., Seachem Prime, API Stress Coat+).
- Gravel Vacuum/Siphon: For removing old water and debris.
- Thermometer: To ensure temperature matching.
- Water Test Kit: Liquid test kit (like API Freshwater Master Test Kit) is highly recommended over test strips for accuracy.
- Clean Cloth or Paper Towels: For wiping up spills.
Scenario A: Full Water Change (e.g., for a 2.5-gallon uncycled betta tank)
Important: A fully cycled tank should never need 100% water changes. This method is for new setups, hospital tanks, or extreme contamination.
- Prepare the New Water: Fill your clean bucket with the exact amount of new tap water you will need. Do not add your betta yet.
- Condition the Water: Add the correct dosage of water conditioner to the bucket of new tap water. Stir gently. The label will say something like “1 ml per 10 gallons” or “1 capful (5 ml) per 25 gallons.” Use a dosing syringe or the bottle cap for accuracy. Do not skip this step.
- Temperature Match: This is critical. Place your thermometer in the bucket of conditioned water. You need this water to be within 1-2°F (0.5-1°C) of your current tank water temperature. If it’s too cold, use an immersion heater in the bucket to warm it. If it’s too warm, let it sit or add a little cooler water. Never add water that is a drastically different temperature.
- Test (Optional but Recommended): If you have a chlorine test (part of some kits), you can test the conditioned water to confirm the chlorine/chloramine is gone. It should read zero.
- Remove Your Betta (if in the tank): Carefully net your betta and place it in a clean, conditioned holding cup (like a large plastic pitcher) with some of its original tank water. Keep it in a safe, stable place.
- Empty the Tank: Use your siphon to completely empty the tank. Scrape any algae and rinse decorations in the old tank water (not tap water!) to preserve beneficial bacteria if the tank was cycled. If it’s a new, uncycled tank, you can wash everything with conditioned tap water.
- Refill and Reintroduce: Pour the new, conditioned, temperature-matched water into the clean tank. Reinstall your filter, heater, and decorations. Gently place your betta back into its fresh environment. Do not pour the fish in; use a net.
Scenario B: Partial Water Change (25-50% for a cycled 5-gallon tank)
This is the standard, weekly maintenance routine.
- Prepare the New Water: Fill your clean bucket with the volume of water you plan to remove (e.g., 2.5 gallons for a 50% change in a 5-gallon tank).
- Condition Immediately: Add the correct dosage of conditioner to this bucket of fresh tap water. Stir. Conditioning must happen before the water enters the tank.
- Temperature Match: Check and adjust the temperature of the new water to match the tank water exactly. This is even more important for partial changes because the fish remain in the tank.
- Test Your Tap Water (Pro Tip): Once a month, test your untreated tap water for ammonia, nitrite, and nitrate. You should get zeros. If you get a reading, you need to investigate your source water and possibly use a more robust conditioner or a reverse osmosis (RO) system with remineralizer.
- Siphon the Old Water: While the new water is conditioning, use your gravel vacuum to siphon out the planned volume of old tank water. Vacuum the substrate thoroughly, removing any uneaten food or waste. Try not to disturb the filter media, as it houses your beneficial bacteria.
- Slow Refill: Gently pour the conditioned, temperature-matched new water back into the tank. You can pour it against the glass or use a jug with a spout to avoid disturbing the substrate and stressing your betta. Do not dump it in.
- Monitor: After the water change, check your filter and heater to ensure they are running properly. Observe your betta for any signs of stress (gasping, lethargy).
Water Parameters: Testing for True Confidence
Conditioning removes the immediate toxins (chlorine/chloramines). But a healthy betta tank is about stable water chemistry. A conditioner does not make your water “perfect” for fish; it just makes it non-lethal at the moment of entry. You need to monitor the other parameters that affect long-term health.
Visual guide about How to Condition Tap Water for Betta Fish
Image source: thegoldfishtank.com
The Essential Test Kit
Invest in a liquid drop test kit, like the API Freshwater Master Test Kit. It’s more accurate than strips and cheaper per test in the long run. You need to understand these parameters:
- Ammonia (NH3/NH4+): Should be 0 ppm. Any detectable ammonia is toxic and indicates an issue with the cycle or overstocking/overfeeding.
- Nitrite (NO2-): Should be 0 ppm. Highly toxic, it prevents blood from carrying oxygen.
- Nitrate (NO3-): Should be <20 ppm for a betta tank. Nitrate is less toxic but accumulates and causes stress and poor health. It is removed by water changes and plants.
- pH: Bettas prefer a stable pH between 6.5 and 7.5. They can adapt to a range, but stability is more important than a perfect number. Do not chase pH with chemicals; adjust it slowly if needed via natural methods like driftwood or almond leaves.
- Temperature: 78-80°F (25.5-26.5°C) is ideal. Use a reliable aquarium thermometer.
When to Test
- Weekly: Test all parameters during your regular water change routine.
- After a Water Change: Test 30-60 minutes after refilling to ensure levels are stable.
- If Your Betta Looks Sick: Always test first. Symptoms like gasping, clamped fins, or lethargy are often water-quality related.
- When Setting Up a New Tank: Test daily during the cycling process.
Common Mistakes & Advanced Tips
Even with the best intentions, mistakes happen. Let’s cover the most frequent pitfalls and how to avoid them.
Mistake 1: Forgetting to Condition the Water
The most common and deadly error. You filled the bucket, grabbed the siphon, and started draining. Stop. The moment you turn on the tap to start filling your bucket, you must be thinking about conditioner. Get in the habit: Tap on -> Bucket fills -> Conditioner in -> Stir -> Temperature check -> Then, and only then, add to tank.
Mistake 2: Adding Conditioner to the Tank First
Some people add conditioner directly to the tank *before* adding new water. This is not ideal. The high concentration of conditioner in one spot can stress fish. It’s designed to be diluted in the entire volume of new water first. Always condition the new water in a separate bucket.
Mistake 3: Not Matching Temperature
This causes thermal shock. A betta’s body functions are temperature-dependent. A 10°F drop can shut down its immune system and digestion. Always use a thermometer. Don’t guess.
Mistake 4: Over-Dosing or Using “Extra” Conditioner
More is not better. Some conditioners contain ammonia detoxifiers that can bind to oxygen in very high doses. Follow the label. If you overdose slightly, it’s usually not catastrophic, but don’t make a habit of it.
Advanced Tip: The Drip Acclimation Method
Even with perfect water parameters, the chemistry of your new water (mineral content, pH) will differ slightly from the store’s water or your old tank water. For a new betta, especially one shipped or from a store with different source water, drip acclimation is the gold standard. After you have your conditioned, temperature-matched water in the tank, place the sealed bag or cup with your betta and its original water into the tank to float (for temperature). Then, use airline tubing to create a siphon from the tank into the bag, dripping at a rate of 1-2 drops per second. After 30-60 minutes, the water in the bag will be a 50/50 mix. Then, gently net the betta out and place it in the tank. Do not pour the store water into your tank.
Advanced Tip: Using Reverse Osmosis (RO) Water
If your tap water is extremely hard, has high chlorine/chloramine levels, or contains other problematic contaminants, you might consider an RO/DI system. This strips all minerals from the water, creating a pure “blank slate.” However, you cannot use RO water directly—it is devoid of all essential minerals and will leach them from your fish’s body (osmotic shock). You must remineralize it with a commercial RO remineralizer (like Seachem Equilibrium) to restore calcium, magnesium, and other ions to a safe level for bettas. This is an advanced, more expensive route for persistent water quality issues.
Conclusion: Conditioning is the First Step to Success
Conditioning your tap water isn’t just a chore; it’s the fundamental act of care that makes everything else possible. A beautiful tank, a perfect diet, and the best filter in the world mean nothing if the water you put in is toxic. By understanding the threats in your tap, choosing the right conditioner, and following a disciplined, temperature-matched process for every single water change, you eliminate the #1 cause of betta fish mortality.
Remember this mantra: Tap water is for humans. Conditioned water is for bettas. Make it a non-negotiable part of your routine. Pair it with regular water testing and stable parameters, and you’re not just keeping a fish—you’re providing a pristine, thriving home for one of the most intelligent and captivating aquatic pets in the hobby. Your betta’s vibrant colors, active exploration, and beautiful finnage will be your reward. Now, go check that thermometer and get that conditioner ready.
Frequently Asked Questions
Can I use bottled spring water instead of tap water for my betta?
You can, but it’s often not ideal. Bottled water varies wildly in mineral content (pH, hardness). Some is too soft, some may have added minerals. It’s expensive and creates plastic waste. Properly conditioned tap water is almost always a more consistent and economical choice. If your tap water is very poor, an RO system with remineralizer is a better long-term solution than bottled water.
My water conditioner says it’s safe for all fish. Do I still need to be careful?
Yes. “Safe for all fish” means it won’t harm them when used correctly. It does not mean you can be lax with dosage, temperature matching, or acclimation. The conditioner neutralizes toxins in the *new* water you add, but it does not fix poor water parameters (high nitrate, unstable pH) in your existing tank. It’s a crucial tool, not a magic fix-all.
How long should I wait after conditioning tap water before adding it to the tank?
Once you’ve added the conditioner to the bucket and stirred, it works instantly—within seconds. The waiting period is for temperature matching. You should wait until the new water is within 1-2°F of your tank temperature. This usually takes a few minutes if you’re using a heater in the bucket or letting it sit. The conditioner is already working.
Is it okay to use less conditioner than the bottle recommends?
No. Always use the full dosage for the volume of water you are treating. Under-dosing may not fully neutralize all chlorine/chloramines, leaving your betta exposed. The dosage is calculated to handle typical municipal water levels. If you have exceptionally high chlorine (you can smell it strongly), you may need a slightly higher dose, but follow the product’s guidelines for “high chlorine” situations.
Can I use the same conditioner for my betta tank and my freshwater community tank?
Absolutely. A good water conditioner is safe for all freshwater fish, invertebrates (shrimp, snails), and plants. Just be aware that some conditioners contain ammonia detoxifiers that are harmless to fish but can sometimes interfere with specific plant nutrient uptake in very rare cases. For a betta tank, this is not a concern.
My betta is in a cup from the store. Do I need to condition the water in the cup before I transfer him to his new tank?
No. The water in the store cup already contains conditioner (or should). Your job is to condition the *new* tap water for his permanent tank. When you acclimate him, you are slowly mixing the store water (with its conditioner) into your new, conditioned tank water. The conditioner in both sources is compatible. The key is that the water *entering* your tank system must be conditioned.