How to Clean a Betta Fish Tank for Beginners

Cleaning your betta’s tank is a simple, non-negotiable part of fish care that directly impacts their health and happiness. It’s not about a full scrub-down every time; it’s about regular, partial water changes and gentle maintenance to remove waste and toxins. By using dechlorinated water, avoiding soap, and preserving beneficial bacteria, you create a stable, clean environment. Mastering this routine prevents common illnesses and ensures your vibrant betta thrives for years.
Congratulations on welcoming a beautiful betta fish into your home! Those flowing fins and vibrant colors are a joy to watch. But to keep your new aquatic friend thriving, you’ve taken the first, most important step: learning how to properly care for its environment. A clean tank isn’t just about looks; it’s the foundation of your betta’s health, preventing disease and stress. If the idea of cleaning a fish tank feels daunting, take a deep breath. It’s a straightforward, learnable skill. This complete, beginner-friendly guide will walk you through every single step, from gathering your supplies to the final top-off. We’ll focus on safe, effective methods that prioritize your betta’s well-being, turning a chore into a confident part of your routine. Let’s dive in and get your betta’s home sparkling and safe.
Key Takeaways
- Consistency is Key: Small, frequent partial water changes (25-50% weekly) are far better and safer for your betta than rare, large cleanings that disrupt the tank’s ecosystem.
- Never Use Soap or Chemicals: Even a tiny residue of household cleaner is deadly to fish. Use only designated aquarium-safe products or plain water for scrubbing decorations and the glass.
- Condition Tap Water Always: Tap water contains chlorine and chloramines that are toxic to fish. You must treat every bucket of new water with a reliable water conditioner before it touches your tank.
- Protect Your Filter’s Bacteria: Never rinse your filter media (sponges, cartridges) in untreated tap water. Use a bucket of old tank water to gently squeeze out debris, preserving the essential beneficial bacteria.
- Match Water Temperature: The new water you add must be within 1-2°F (0.5-1°C) of the tank’s current temperature to prevent stressful thermal shock to your betta.
- Test Your Water: Using an affordable liquid test kit is the only way to truly know if your tank is cycled and safe. It measures ammonia, nitrite, and nitrate, the critical parameters for fish health.
- Observe Your Fish: Your betta is the best indicator of tank health. Watch for signs of stress like lethargy, faded colors, or clamped fins after cleaning, which can signal a problem with your process.
📑 Table of Contents
- Why Cleaning a Betta Tank is Non-Negotiable
- Essential Supplies: Your Betta Tank Cleaning Kit
- The Step-by-Step Cleaning Process: A Calm & Safe Routine
- Understanding the Nitrogen Cycle & Water Testing
- Common Beginner Mistakes & How to Avoid Them
- Establishing a Long-Term Maintenance Schedule
- Conclusion: A Clean Tank is a Happy Home
Why Cleaning a Betta Tank is Non-Negotiable
Before we get our hands wet, it’s crucial to understand why this routine matters so much. A betta fish tank is a closed ecosystem. Unlike a flowing river, waste products have nowhere to go unless you remove them. Your betta produces ammonia through its gills and waste. Uneaten food and decaying plant matter also decompose, creating more toxins. In a cycled tank, beneficial bacteria colonies convert this toxic ammonia first to nitrite (also toxic) and then to nitrate (less toxic but still problematic in high amounts).
Without regular cleaning, nitrate levels climb, ammonia and nitrite can spike if the bacterial colony is disturbed, and the water becomes cloudy with organic particles. This poor water quality is the #1 cause of stress and illness in captive fish, leading to conditions like fin rot, ich, and dropsy. A clean tank with stable water parameters is a strong immune system booster for your betta. It also keeps the water clear, allowing you to better enjoy your fish and notice any early signs of health issues. Cleaning isn’t a suggestion; it’s a core responsibility of being a pet owner.
The Myth of the “Low-Maintenance” Betta
You may have heard bettas called “low-maintenance” or seen them in tiny, dirty cups at a store. This is a dangerous misconception. Bettas are incredibly hardy for a fish, but they have specific needs. They originate from slow-moving, warm, plant-filled waters in Southeast Asia. In captivity, they require warm, clean water with a stable cycle. The “low-maintenance” label often refers to their ability to survive in poor conditions, not to thrive. A properly set-up and maintained tank (minimum 5 gallons is widely recommended) with regular cleanings is what allows your betta to display its full personality, stunning colors, and active behavior. Skipping cleanings because you think they’re “tough” is a fast track to a sick or deceased fish.
Essential Supplies: Your Betta Tank Cleaning Kit
Having everything ready before you start makes the process smooth and fast, minimizing stress for you and your fish. You don’t need expensive, specialized gear. Here’s your basic checklist:
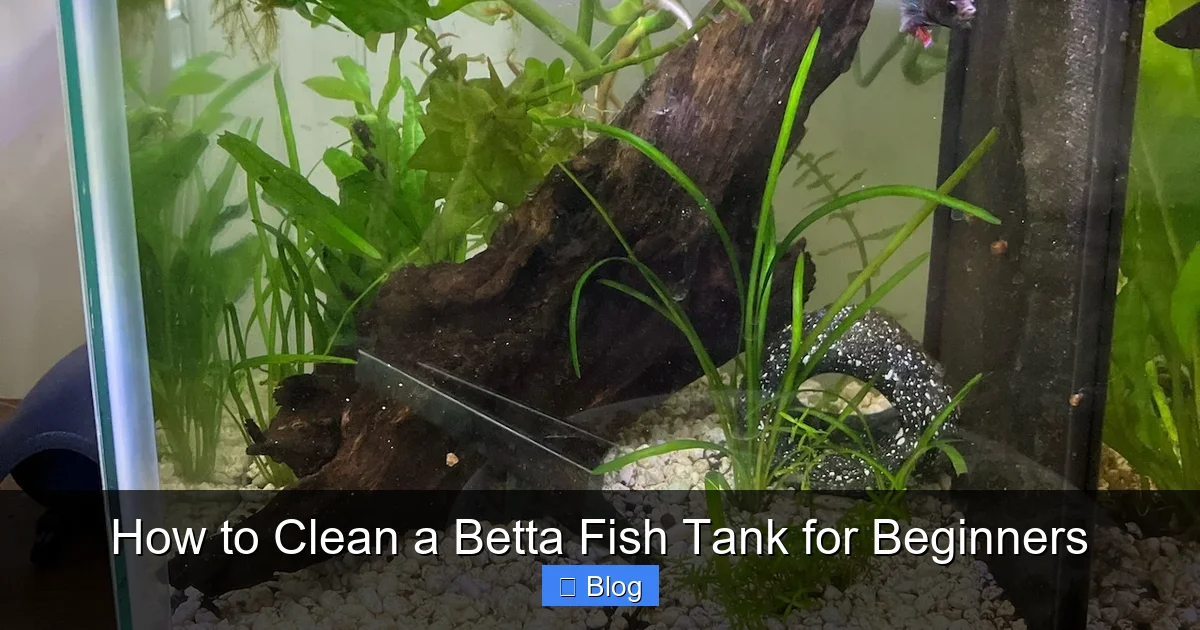
Visual guide about How to Clean a Betta Fish Tank for Beginners
Image source: wildbettablog.com
- Two Clean Buckets or Containers: Designate one exclusively for dirty tank water (the water you remove) and one for new, treated water. Never mix them up! Using food-safe plastic buckets is ideal. Never use buckets that have held soap, chemicals, or cleaning agents.
- Water Conditioner (Dechlorinator): This is absolutely mandatory. It neutralizes chlorine, chloramines, and heavy metals in tap water. Seachem Prime is a popular, highly trusted brand, but any reputable aquarium water conditioner will work. Have it ready to dose your new water immediately.
- Gravel Vacuum/Siphon: This is your #1 tool. A simple plastic siphon with a wide, angled end (like the Python or Aqueon brands) allows you to remove debris from the substrate while performing a water change. It uses gravity to suck water out, so no pumps are needed.
- Algae Scraper or Pad: For glass tanks, a magnetic algae scraper is fantastic as it lets you clean the inside without sticking your arm in. For acrylic tanks, use a soft plastic pad or a dedicated acrylic scraper to avoid scratching. A simple scrub pad from the aquarium section works.
- Soft Cloths or Paper Towels: Dedicated, clean microfiber cloths are perfect for wiping down the outside glass and any splashes. Do not use paper towels with lotion or fragrance.
- Bucket for Filter Media (Optional but Recommended): A small, clean container to rinse your filter media in old tank water.
- Thermometer: To verify the temperature of your new water matches the tank.
- Net (Optional): Some people temporarily net their betta during the most active cleaning phase for extra safety, but with careful siphoning, it’s often not necessary.
Tools to Avoid: The “No” List
Just as important as what to use is what never to use. Absolutely no soap, dish detergent, window cleaner, or any household chemicals. Even a microscopic residue is fatal to fish. Avoid abrasive scrubbers like steel wool or rough sponges that can scratch glass or acrylic. Do not use a brush that has been used for anything else. Your cleaning tools should be single-purpose and aquarium-only.
The Step-by-Step Cleaning Process: A Calm & Safe Routine
Now for the main event. This process is for a weekly partial water change and maintenance, which is the standard and safest routine. We will not be removing all the water or completely stripping the tank. Follow these steps in order.
Visual guide about How to Clean a Betta Fish Tank for Beginners
Image source: wildbettablog.com
Step 1: Preparation & Power Down
Gather all your supplies near the tank. Fill your clean “new water” bucket with tap water to the volume you plan to replace (e.g., 5 gallons for a 10-gallon tank). Add the correct dosage of water conditioner to this bucket immediately and stir. Let it sit while you work; this starts the dechlorination process. Unplug your heater and filter from the wall outlet. You can leave the light on if it helps you see, but power down all equipment for safety.
Step 2: The Gentle Siphon & Gravel Vacuum
This is the core of the cleaning. Submerge the entire gravel vacuum tube into the tank and the other end into your “dirty water” bucket. Prime the siphon by sucking gently on the tube (use the priming bulb if your siphon has one) until water flows. Once flowing, clamp the tube with your thumb or a clip to control the flow.
Hover the vacuum head just above the gravel surface. Move it slowly in a grid pattern over the entire substrate. The suction will pull up fish waste, uneaten food, and debris from between the gravel without sucking up the gravel itself. For sand, you can gently stir the sand with the vacuum tip to lift debris. Continue until you have removed the desired amount of water (25-50%). You will see the water in the bucket getting dirty—that’s the goal! This process cleans the substrate and removes dissolved waste in one step.
Step 3: Algae & Glass Cleaning
With the water level lowered, it’s easier to reach the top of the glass. Use your algae scraper or pad to gently remove any algae from the inside walls. Use long, gentle strokes. For stubborn algae on decorations or the tank bottom, you can use your fingers (washed, with no soap!) or a soft toothbrush dedicated to the aquarium. Avoid disturbing the substrate more than necessary. Wipe the outside of the glass with your dedicated, dry microfiber cloth to remove fingerprints and water spots.
Step 4: Filter Maintenance (The Careful Part)
Your filter media houses the precious beneficial bacteria. Do not replace all of it at once. If your filter has multiple media types (mechanical sponge, ceramic rings, bio-balls), rinse only the mechanical part (usually the sponge or floss) that traps debris. Gently squeeze and rinse it in a small bucket containing old tank water—the water you just siphoned out is perfect for this. This rinses out the gunk without killing the bacteria with chlorinated tap water. If your filter is very dirty, rinse only half the media this week and the other half in 2-3 weeks. Never, ever use tap water on biological filter media. If you have a cartridge that is falling apart, replace it, but try to keep some of the old media in the filter for a month to seed the new one.
Step 5: Decor & Plant Check
While the water is low, take a moment to inspect decorations, rocks, and silk/plastic plants. If they look slimy or heavily soiled, you can gently scrub them with the algae pad or your fingers in the dirty water bucket (not under the tap). For live plants, you can gently rinse their leaves in old tank water to remove detritus. Trim any dead or decaying leaves with clean scissors. This is also a good time to rearrange decor if you wish, which provides mental stimulation for your betta.
Step 6: The Final Top-Off
Double-check that your new, conditioned water in the bucket is at the correct temperature. Use your thermometer to compare it to the remaining tank water. They must match. Now, carefully pour the new, conditioned water back into the tank. Try to pour it against the glass or use a container with a spout to avoid disturbing the substrate and causing a cloudiness storm. Fill the tank to the original water line, being careful not to overfill. Re-submerge your heater fully before plugging it back in. Wait a minute, then plug your filter back in. Ensure it’s flowing properly and there are no leaks.
Step 7: Post-Clean Observation
This is vital. Turn the lights back on and watch your betta for 10-15 minutes. Is it swimming normally? Is its color bright? Is it eating if you offer food? Some mild curiosity is normal. If it’s hiding excessively, gasping at the surface, or has clamped fins, you may have a temperature mismatch or a parameter issue. This is your cue to test the water immediately with a liquid test kit.
Understanding the Nitrogen Cycle & Water Testing
You cannot effectively clean a tank you don’t understand. The nitrogen cycle is the biological process that makes a tank safe for fish. Here’s a simple breakdown:
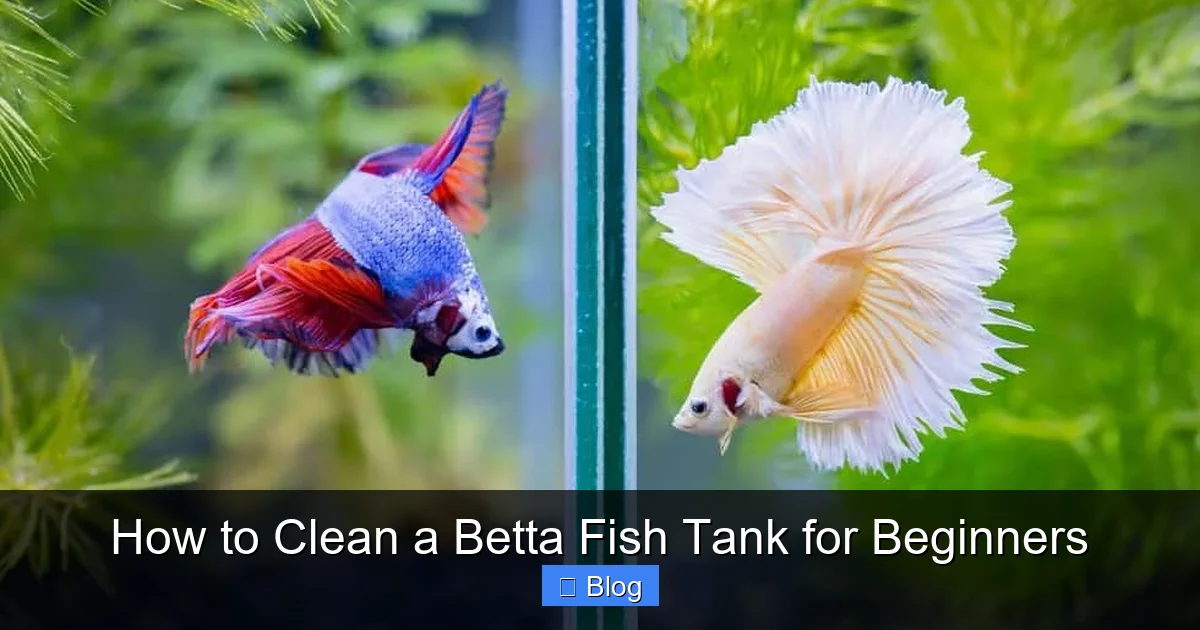
Visual guide about How to Clean a Betta Fish Tank for Beginners
Image source: fishtankmaster.com
- Stage 1: Fish waste and decaying matter produce Ammonia (NH3/NH4+), which is highly toxic.
- Stage 2: Bacteria called Nitrosomonas eat ammonia and convert it to Nitrite (NO2-), which is also highly toxic.
- Stage 3: A second bacteria, Nitrospira, eats nitrite and converts it to Nitrate (NO3-), which is much less toxic but still needs to be managed by water changes.
A “cycled” tank has robust populations of both bacterial types. This cycle takes 4-6 weeks to establish fully. During this time, you must perform smaller, more frequent water changes to keep ammonia and nitrite at zero. The only way to know your cycle is complete and stable is to test the water.
How to Test & What the Numbers Mean
Forget test strips—they are notoriously inaccurate. Invest in a liquid test kit like the API Freshwater Master Test Kit. It’s a one-time cost that will save your fish’s life. Here’s what you’re looking for in a healthy, cycled tank with a betta:
- Ammonia: 0 ppm
- Nitrite: 0 ppm
- Nitrate: < 20 ppm (ideally under 10 ppm before a water change)
- pH: 7.0-7.5 is ideal for bettas, but they can tolerate a stable range of 6.5-7.5.
Test your tap water first to know its baseline. Then test your tank water weekly, before a water change. If ammonia or nitrite reads above 0, you have a problem—likely an overstocked tank, overfeeding, or a disrupted cycle. Perform an immediate 25-50% water change and investigate the cause. Nitrate should be kept below 20 ppm through regular water changes.
Common Beginner Mistakes & How to Avoid Them
Even with the best intentions, it’s easy to make errors. Here are the most frequent pitfalls and their fixes:
Overcleaning / Starting from Scratch
The Mistake: Dumping all the water, scrubbing every surface with soap, and replacing all filter media every week. This destroys the entire bacterial colony, crashing your cycle. The tank will essentially start over as a toxic “new tank,” causing “new tank syndrome” where ammonia and nitrite spike.
The Fix: Stick to partial changes (25-50%). Never use soap. Only rinse filter media in old tank water, and only replace half of it at a time, every few months. Your goal is to remove waste, not sterilize.
Using Untreated Tap Water
The Mistake: Thinking a little chlorine won’t hurt, or adding fish to freshly poured tap water. Chlorine and chloramines are fast-acting cell toxins.
The Fix: Dose your entire bucket of new water with conditioner before it touches the tank. If you forget and add untreated water, immediately dose the entire tank with conditioner (follow bottle instructions for volume) and monitor parameters closely.
Large Temperature Swings
The Mistake: Adding cold tap water from the fridge or hot water from the heater to a warm tank. A sudden change of more than 2°F can shock your betta’s system, suppressing its immune response and inviting disease.
The Fix: Always use a thermometer. The easiest way to get matching temperature is to let the conditioned new water sit in the room until it matches the tank’s temp, or use a small aquarium heater in the bucket (a cheap, small one works). Never mix hot and cold tap water haphazardly.
Overfeeding & Skipping the Vacuum
The Mistake: Dumping a pinch of food that sinks and rots in the gravel. This is the #1 cause of sludge buildup and high nitrates. Then, only doing water changes without vacuuming the gravel, leaving all that waste to decompose.
The Fix: Feed your betta only what it can eat in 2-3 minutes, once or twice a day. Remove any visible pellets after 5 minutes. Always use your gravel vacuum during water changes to physically remove the settled waste from the substrate.
Establishing a Long-Term Maintenance Schedule
Once you’ve mastered the weekly process, create a simple schedule. Consistency is what prevents emergencies.
Weekly Tasks (The Core Routine)
- Test water parameters (ammonia, nitrite, nitrate, pH).
- Perform 25-50% partial water change with gravel vacuuming.
- Scrape algae from glass.
- Wipe down outside of tank.
- Inspect filter flow; rinse mechanical media in old tank water if flow is reduced.
- Check heater and filter for proper function.
Monthly / As-Needed Tasks
- Deep clean filter: replace or rinse half of the biological media.
- Prune live plants (if you have them).
- Clean pump impellers and filter intake tubes if clogged.
- Do a more thorough decor cleaning if needed.
- Inspect equipment cords and connections for safety.
Stick to this schedule, and you’ll have a stable, clean tank. Your betta will reward you with active swimming, beautiful fin displays, and a hearty appetite.
Conclusion: A Clean Tank is a Happy Home
Learning how to clean a betta fish tank properly is the single most important skill you’ll develop as a betta owner. It moves you from simply keeping a fish to providing a thriving, professional-level environment. Remember the golden rules: treat your water, vacuum your gravel, preserve your filter bacteria, and test your parameters. This routine, done gently and consistently, is a profound act of care. It’s not a burdensome chore; it’s a weekly check-in with your pet’s world. You’ll see the difference in your betta’s sparkling colors, energetic personality, and overall vitality. Now, grab your siphon, your conditioner, and your calm demeanor. You’ve got this. Your betta’s beautiful, healthy life in a clean, stable home starts with that first, gentle water change.
Frequently Asked Questions
How often should I completely clean my betta tank?
You should never do a complete, full-strip clean on a cycled, established tank. Instead, perform a partial water change (25-50%) with gravel vacuuming once a week. A full clean disrupts the essential beneficial bacteria and stresses your fish. Only in cases of severe disease treatment (followed by a full re-cycle) or a major contamination would a full cleaning be necessary.
Can I use bottled spring water instead of tap water?
You can, but it’s usually not recommended as a primary source. Spring water lacks minerals and has an unpredictable pH and hardness, which can cause instability. It’s also expensive. Dechlorinated tap water is typically more stable and cost-effective. However, if your tap water is exceptionally poor (high in heavy metals or very hard/soft), a balanced, betta-safe spring water mixed with dechlorinated tap water can be an option, but you must still test parameters regularly.
Do betta fish need a filter? Can I just do water changes?
While bettas can survive in unfiltered bowls with extremely frequent (daily) large water changes, a filter is highly recommended for a 5+ gallon tank. A filter provides mechanical and biological filtration, housing the beneficial bacteria that process toxins. It also creates gentle water movement and surface agitation for gas exchange, which is crucial for oxygen. A filter makes maintenance easier and the tank more stable. A betta in a filtered, cycled tank with weekly changes will be far healthier than one in an unfiltered container.
My tank water gets cloudy after cleaning. Is that bad?
It’s common and usually not harmful if it’s a temporary cloudiness. Disturbing the gravel while vacuuming kicks up fine particles, causing a “dust storm.” This should settle within a few hours. If the cloudiness is white/gray and persists for days, it could be a bacterial bloom from an over-cleaned filter or overfeeding. If it’s green, it’s an algae bloom from too much light or nutrients. Ensure you’re not over-cleaning, reduce feeding, and manage light. Persistent cloudiness warrants a water test.
What temperature should the new water be when I add it?
The new, conditioned water must be within 1-2 degrees Fahrenheit (0.5-1°C) of your tank’s current temperature. Betta are tropical fish and are extremely sensitive to thermal shock, which can lead to stress and disease like ich. Always use a thermometer to check. The easiest method is to let the bucket of new water sit in the room (or next to the tank) for 30-60 minutes to reach room temperature, which should match your heated tank.
My betta is hiding or acting weird after I cleaned the tank. Why?
This is often due to one of three issues: 1) Temperature Shock: The new water was too cold or hot. 2) Chlorine/Chloramine Exposure: You forgot to use conditioner or used too little. 3) pH Shock: The new water’s pH was significantly different from the tank’s. Always match temperature and use conditioner. If you have a stable, cycled tank, minor pH fluctuations from tap water are usually buffered by the tank, but large swings can occur if your tap water is very different. Test your tap and tank water pH to know. Usually, the fish will recover if parameters are corrected quickly. If symptoms persist (clamped fins, gasping, loss of appetite), test the water immediately for ammonia and nitrite.