How to Clean Betta Fish
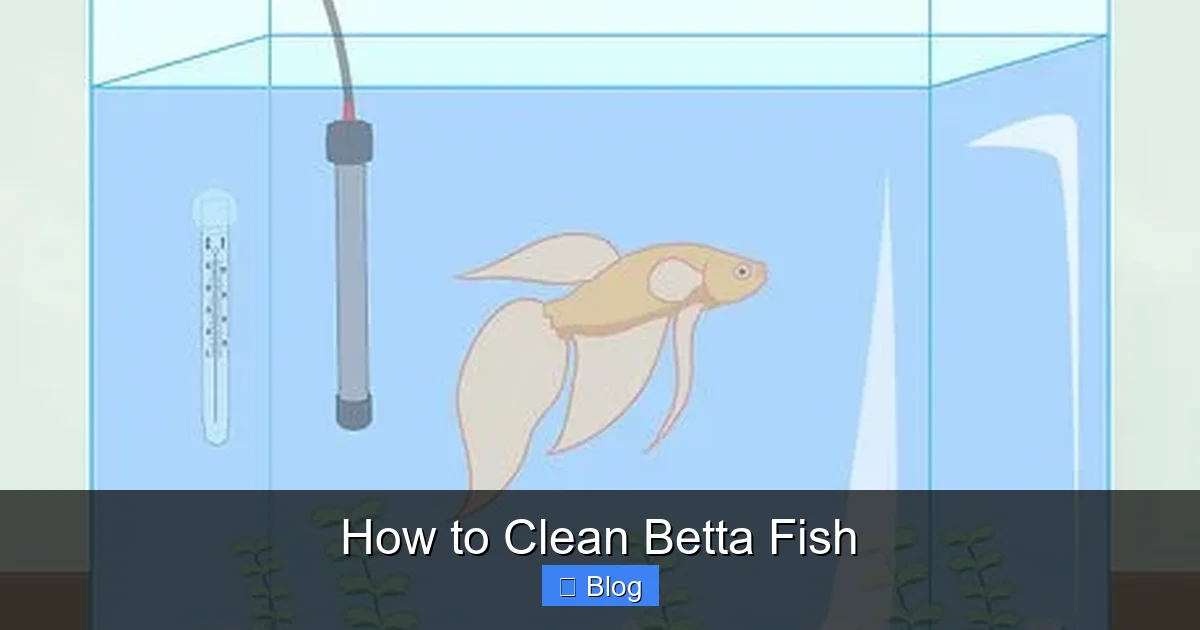
Cleaning your betta fish’s tank is not about cleaning the fish itself, but meticulously maintaining its aquatic home. A clean tank ensures pristine water quality, which is the single most critical factor for your betta’s health, vibrant colors, and long lifespan. This involves regular partial water changes, gentle gravel cleaning, and never using harmful soaps or chemicals. Proper tank maintenance prevents stress, disease, and ammonia poisoning, creating a thriving ecosystem for your aquatic pet.
Key Takeaways
- Focus on Water, Not the Fish: Never soap or scrub your betta. The goal is to clean the tank environment to maintain perfect water conditions.
- Partial Changes are Paramount: Replace 25-50% of the tank water weekly using a gravel vacuum to remove waste from the substrate without disturbing the cycle.
- Use Dechlorinator & Conditioner: Always treat tap water with a water conditioner to neutralize chlorine, chloramines, and heavy metals before adding it to the tank.
- Clean Decor & Glass Gently: Use designated tank-safe algae pads or a clean, dedicated razor blade for glass. Never use soap; scrub decorations with a toothbrush in old tank water.
- Filter Maintenance is Key: Rinse filter media (sponges, cartridges) in a bucket of old tank water once a month to preserve beneficial bacteria—never in tap water.
- Test Your Water: Use a liquid test kit to regularly check ammonia, nitrite, nitrate, and pH levels to ensure your cleaning routine is effective.
- Consistency Prevents Disaster: A strict, weekly maintenance schedule is far easier and safer for your betta than trying to correct a severely dirty, toxic tank.
[FEATURED_IMAGE_PLACEHOLDER]
📑 Table of Contents
- Why Cleaning Your Betta’s Tank is a Non-Negotiable Priority
- Understanding Your Betta’s Specific Needs Before You Start
- The Step-by-Step Guide to a Safe & Effective Tank Cleaning
- Critical “Do Nots”: Common & Dangerous Cleaning Mistakes
- Advanced Water Parameters: Testing is Knowing
- Establishing a Long-Term Maintenance Schedule
- Conclusion: Cleaning as an Act of Care
Why Cleaning Your Betta’s Tank is a Non-Negotiable Priority
Let’s start with the most important concept: you do not clean the betta fish itself. The phrase “how to clean betta fish” is a common misnomer that leads to dangerous practices. Your betta has a protective slime coat, a delicate layer of mucus that acts as its immune system against pathogens. Using soap, chemicals, or even excessive handling to “clean” the fish will strip this coat, causing extreme stress, susceptibility to disease like fin rot, and potentially death.
The true subject is how to clean a betta fish’s tank—its entire environment. A betta fish lives in, drinks, and breathes the water in its tank. That water is its world. If that world is polluted with fish waste, uneaten food, and decaying plant matter, the water becomes toxic. Ammonia from waste burns gills and damages organs. Nitrite prevents blood from carrying oxygen. Nitrate, while less immediately toxic, causes chronic stress and suppresses the immune system. Cleaning the tank is the direct process of managing these toxins and providing a stable, clean, oxygen-rich habitat where your betta can truly thrive, displaying its full personality and brilliant colors.
The Biology of a Betta: Why They’re Sensitive to Poor Water
Betta splendens, the Siamese fighting fish, evolved in the slow-moving, shallow waters of rice paddies and stagnant ponds in Southeast Asia. These environments are warm, have low oxygen content, and are heavily vegetated. This adaptation gives them a specialized labyrinth organ, allowing them to breathe atmospheric air from the surface. However, this evolutionary history does not mean they are tolerant of poor water quality. In fact, their natural habitats, while seemingly “dirty” to us, are complex biological systems with plants that absorb toxins. Your glass tank is a closed system with no such natural filtration capacity.
Without your intervention, waste products accumulate rapidly. A single adult betta produces a surprising amount of ammonia relative to its size. In a small, unfiltered bowl (which should never be used), toxins can reach lethal levels within 24-48 hours. Even in a filtered 5-gallon tank, nitrate builds up, and solid waste settles into the gravel, decomposing and clouding the water. This degradation leads to:
- Physical Stress: Clamped fins, lethargy, loss of appetite, faded colors.
- Increased Disease Susceptibility: Fungal infections, bacterial septicemia, and parasitic outbreaks like velvet or ich are far more likely.
- Respiratory Distress: Gasping at the surface is often a sign of poor water quality, not just low oxygen.
Therefore, “cleaning” is synonymous with “water management.” It’s a routine of dilution and removal of waste products to keep parameters within a safe range.
Understanding Your Betta’s Specific Needs Before You Start
Before you grab a scrub brush, you must understand the parameters of a healthy betta tank. This knowledge informs every cleaning decision you make. The ideal betta environment is:
Visual guide about How to Clean Betta Fish
Image source: fishlab.com
- Tank Size: A minimum of 5 gallons (19 liters) for a single male or female. Larger volumes dilute waste more effectively and provide stable temperatures, making maintenance easier.
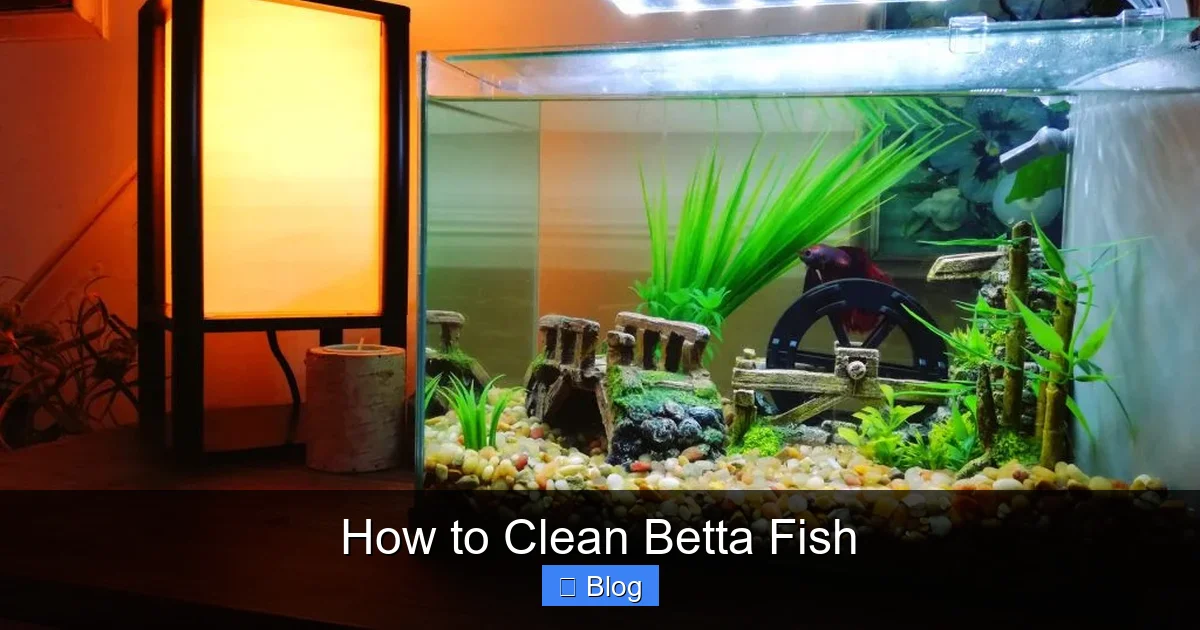
- Temperature: 78-80°F (25.5-26.5°C). Use a reliable aquarium heater and a thermometer. Cold water slows metabolism and immune function.
- Water Parameters: Ammonia: 0 ppm, Nitrite: 0 ppm, Nitrate: < 20 ppm (ideally below 10 ppm). pH: 6.5-7.5.
- Filtration: A gentle sponge filter or a hang-on-back filter with a flow adjuster. Bettas are not strong swimmers and originate from still waters. A strong current causes stress and can damage their long fins. The filter’s job is to house beneficial bacteria and provide mechanical filtration, not create a river.
- Cycling: Your tank must be fully cycled before adding a betta. This 4-6 week process establishes colonies of beneficial bacteria (Nitrosomonas and Nitrospira) that convert toxic ammonia to nitrite and then to much safer nitrate. Cleaning your tank must not disrupt this bacterial colony.
Practical Example: If your nitrate is consistently at 40 ppm after a week, your 25% water change is insufficient, or you are overfeeding. You need to increase the change percentage or frequency. If ammonia or nitrite reads above 0, your cycle has crashed—this is an emergency requiring immediate, large water changes and investigation into the cause (e.g., overfeeding, dead fish, filter power loss).
Debunking the “Bowl” Myth Once and For All
The image of a betta in a small, decorative vase or bowl is pervasive and tragic. These containers:
- Lack filtration and surface area for gas exchange.
- Experience extreme temperature fluctuations.
- Accumulate toxins within days.
- Provide no space for natural behavior or exploration.
Cleaning a bowl means a 100% water change every other day, which is stressful for the fish and unsustainable. A proper, cycled 5+ gallon tank with a filter requires a manageable weekly partial water change and is the only ethical and healthy way to keep a betta. Your cleaning routine is built around this correct setup.
The Step-by-Step Guide to a Safe & Effective Tank Cleaning
This is your core routine. Perform this once per week, without fail. Consistency is the guardian of your betta’s health. Here is the precise order of operations:
Visual guide about How to Clean Betta Fish
Image source: fishsubsidy.org
1. Preparation is Everything
Gather all your tools before touching the tank. This minimizes stress for your fish and prevents you from forgetting a crucial step. You will need:
- Aquarium Gravel Vacuum/Siphon: The most important tool. It removes solid waste from the substrate while siphoning out old water.
- Two Clean Buckets: Designate these for aquarium use only. Never use buckets that have held soap, chemicals, or cleaning supplies.
- Water Conditioner: A high-quality product like Seachem Prime or API Stress Coat.
- Algae Pad/Scraper: A non-scratch pad for glass, or a plastic razor blade for stubborn algae.
- Old, Clean Towel: Dedicated to the aquarium area.
- Water Test Kit: Liquid tests (e.g., API Master Test Kit) are vastly more accurate than strips.
Tip: Fill one bucket with tap water for the fresh water supply. Add the correct dose of water conditioner to this bucket before you start siphoning. This lets it work while you clean. If your tap water is very cold or warm, you may need to adjust its temperature with a separate heater or let it sit to match the tank temperature (within 2-3 degrees).
2. The 25-50% Partial Water Change & Gravel Vacuuming
This is the heart of the cleaning process. The percentage depends on your tank size, bioload, and nitrate levels.
- For a stable 5-gallon cycled tank with one betta: 25% weekly is often sufficient if nitrates are below 10 ppm.
- For smaller tanks, overfed tanks, or if nitrates are 20+ ppm: 30-50% is necessary.
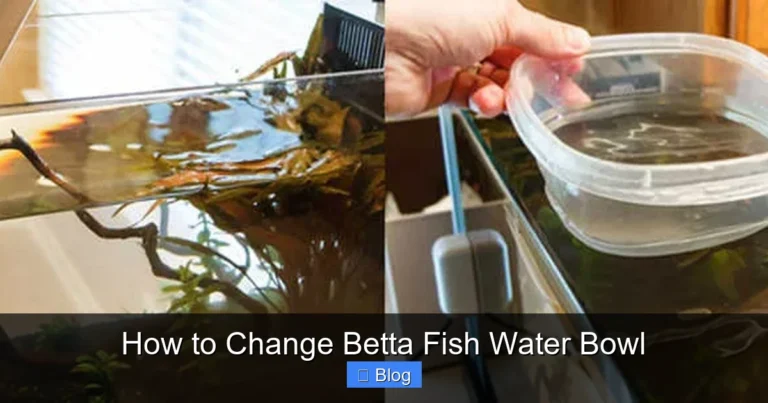
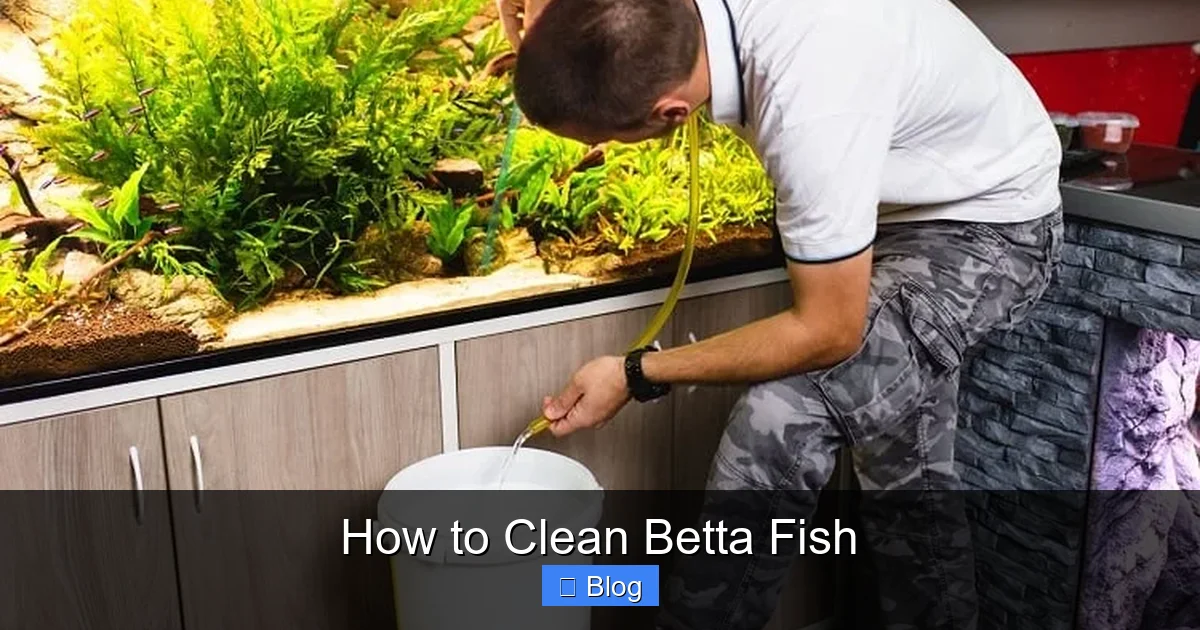
Technique: Insert the gravel vacuum into the substrate. Push it down until it hits the bottom. Start the siphon (by sucking on the tube or using a primer bulb). Move the vacuum in a slow, grid-like pattern across the entire bottom of the tank. You’ll see fish waste, uneaten pellets, and debris get sucked up. Do not vacuum the same spot for more than 2-3 seconds, as you will also suck up the beneficial bacteria living in the gravel. The goal is to remove the *debris*, not sterilize the substrate. As you vacuum, the dirty water flows into your empty bucket. Stop when you’ve removed the desired percentage of water (e.g., for a 5-gallon tank, remove 1.25 gallons for a 25% change).
3. Cleaning the Tank Interior (Glass & Decor)
While the water level is low: This is the perfect time to clean the glass where algae has grown. Use your algae pad. For hard water spots or stubborn algae on the front glass, a plastic razor blade (held at a 45-degree angle) works wonders without scratching.
For decorations (rocks, silk plants, resin castles): Take them out. If they have algae or detritus, scrub them with your algae pad or an old, dedicated toothbrush. The golden rule: use only old tank water from your siphon bucket to rinse them. Tap water contains chlorine that will kill beneficial bacteria living on the decor surfaces. A quick swish in the old tank water is all that’s needed. Do not use soap. Ever.
4. Filter Maintenance – The Gentle Touch
Your filter houses the life-supporting bacteria. Never rinse filter media under the tap. The chlorine will obliterate your bacterial colony, causing a dangerous “new tank syndrome” crash.
Monthly Procedure: Unplug the filter. Disassemble it according to the manufacturer’s instructions. Take out the sponge, ceramic rings, or bio-media. Gently squeeze and swish the sponge in the bucket of old tank water you just siphoned out. The goal is to remove large clumps of solid waste that are blocking water flow, not to make it pristine. For ceramic media or bio-balls, just give them a gentle swirl in the old water. Reassemble and restart the filter. If your filter uses replaceable cartridges, consider switching to reusable sponge media for long-term stability. Replace cartridges only when they are literally disintegrating, and do so a few weeks apart to maintain bacteria.
5. The Refill & Final Checks
Now, fill your clean bucket (which you filled with tap water and conditioned earlier) to the desired level. Slowly pour the new, conditioned water back into the tank. Do not dump it directly on your betta or the substrate, as this can disturb the gravel and stress the fish. Pour it against the glass wall or over a clean decoration to diffuse the flow.
- Check Temperature: Ensure the new water temperature matches the old water within 1-2 degrees. Use your thermometer.
- Observe Your Betta: It should be swimming normally. If it is hiding or breathing heavily, double-check your water parameters and temperature.
- Wipe Down the Outside: Use your dedicated towel and a bit of dechlorinated water (or a vinegar-water solution for hard water stains) to clean the outside glass. Never use paper towels, as they can scratch acrylic.
Final Step: Plug the filter and heater back in. Note the date and percentage of water changed in a logbook or app. This habit is invaluable for tracking your tank’s health over time.
Critical “Do Nots”: Common & Dangerous Cleaning Mistakes
Even with the best intentions, many new betta owners make fatal errors. Here is a list of absolute prohibitions:

Visual guide about How to Clean Betta Fish
Image source: buildyouraquarium.com
Never Use Soap, Detergent, or Household Cleaners
This cannot be stressed enough. Even a single drop of dish soap in a 5-gallon tank creates a toxic film that will destroy your betta’s slime coat and gills. Residue is nearly impossible to rinse completely from porous decorations. If you must deep-clean a decoration that is caked in waste (a last resort), use a 1:10 vinegar-to-water solution, rinse it exhaustively in dechlorinated water, and then soak it in conditioned tank water for an hour before returning it to the display tank. For 99% of cleanings, an old toothbrush and tank water are all you need.
Never Clean Everything at Once
Doing a 100% water change, rinsing all gravel, and sterilizing all decorations and filter media in the same session is a one-way ticket to a crashed cycle. You will remove all the beneficial bacteria, leaving the tank with no biological filtration. Ammonia will spike immediately. The “cycle” is a living colony spread throughout your tank—in the gravel, on the glass, on the decor, and in the filter. You must preserve parts of it at all costs. That’s why we do partial changes and only clean filter media in old tank water.
Never Over-Clean the Gravel
Vacuuming the gravel is about removing *debris*, not turning it white. The top layer of gravel houses beneficial bacteria. If you aggressively vacuum every single inch of substrate every week, you damage the bacterial bed. Use the gentle, grid-like method described above. Let some mulm (the dark, organic sediment) remain in the gravel; it’s part of the ecosystem.
Never Use Untreated Tap Water
Municipal tap water contains chlorine and chloramines to kill pathogens—for humans. For fish, these chemicals are lethal, destroying gill tissue and causing immediate, painful death. Always, always use a water conditioner that neutralizes both. Follow the dosage instructions on the bottle based on the volume of new water you are adding.
Never Ignore the Water Temperature
Pouring cold tap water into a warm betta tank causes thermal shock, a severe stressor that can lead to shock and disease. Similarly, if your conditioned water is too warm, it can cook your betta’s gills. Use a thermometer to ensure the new water is within 1-2°F of the tank’s current temperature.
Advanced Water Parameters: Testing is Knowing
You cannot clean effectively if you don’t know what you’re cleaning. Your senses are unreliable. Clear water can have high ammonia. Smelly water usually indicates a problem, but by then, your fish may already be suffering. You must test.
Essential Testing: The API Master Test Kit
Invest in a liquid drop test kit like the API Freshwater Master Test Kit. It costs more upfront than strips but is vastly more accurate and economical over time. Test your water:
- During the first week of a new tank: Daily, to monitor the cycle.
- After your weekly water change: To confirm your routine is working.
- Any time your betta acts strangely: Lethargy, loss of appetite, flashing (rubbing against objects).
Understanding the Results:
- Ammonia (NH3/NH4+) & Nitrite (NO2-): Should always read 0 ppm. Any detectable amount is toxic and requires immediate action (large water changes, check filter, reduce feeding).
- Nitrate (NO3-): The goal is <20 ppm, ideally <10 ppm. This is the parameter you manage with water changes. If it's consistently high, increase change volume or frequency.
- pH: Bettas are adaptable but prefer slightly acidic to neutral water (6.5-7.5). Avoid swings of more than 0.2 in a day. Do not chase a specific number with chemicals; stability is more important than a perfect number.
Using Your Test Results to Adjust Your Cleaning Routine
Your test kit is your guide. If after a week, your nitrate is at 30 ppm, your 25% change isn’t enough. Try 33% or 40%. If it’s still high at 40 ppm the next week, you may need to go to 50% or consider that your tank is overstocked (remember, for a single betta, 5 gallons is the minimum). If ammonia spikes after cleaning, you likely rinsed filter media in tap water or disturbed the gravel too aggressively. The test results tell you exactly where your maintenance plan is succeeding or failing.
Establishing a Long-Term Maintenance Schedule
Routine is the cornerstone of a healthy betta tank. Here is a sample schedule for a cycled, filtered 5-gallon tank with a single betta. Adjust based on your specific test results.
Weekly Tasks (The Non-Negotiable Core)
- Test Water: Ammonia, Nitrite, Nitrate, pH.
- Perform Partial Water Change: 25-50% using a gravel vacuum.
- Clean Glass: Wipe algae from the front and sides.
- Inspect Equipment: Check that the heater is on and the filter is flowing properly.
- Trim Plants/Wipe Debris: Remove any dead leaves from live plants. Waste any uneaten food immediately after feeding.
Bi-Weekly / Monthly Tasks
- Clean Filter Media: Rinse sponge/media in old tank water. If using replaceable cartridges, stagger their replacement (e.g., replace half one month, the other half two months later).
- Deep Clean Decor: Remove any decorations that have significant algae buildup. Scrub them in old tank water.
- Check & Clean Gravel: During your water change, ensure you are vacuuming all areas of the substrate thoroughly, especially under decorations where debris collects.
- Inspect & Prune: For live plants, trim dead leaves and thin out overgrowth to prevent decay.
Quarterly / As-Needed Tasks
- Deep Filter Clean: Completely disassemble and clean all filter components (impeller, housing) in old tank water to maintain optimal flow.
- Substrate Stir: If you notice compacted gravel in one area, gently stir it with your vacuum during a water change.
- Equipment Check: Inspect heater cords, filter seals, and air tubing (if using) for wear.
Pro-Tip: Keep a simple log. A notebook next to the tank with columns for Date, % Water Changed, Ammonia/Nitrite/Nitrate, and Notes (e.g., “scrubbed algae on left side,” “filter rinsed”) is an invaluable tool. It helps you spot trends and provides a history if problems arise.
Conclusion: Cleaning as an Act of Care
Learning how to properly clean your betta fish’s tank transforms you from an owner into a dedicated aquatic caretaker. It moves beyond the simplistic “change the water” to a nuanced practice of ecosystem management. You are not just removing dirt; you are actively managing the nitrogen cycle, preserving the colony of beneficial bacteria that is your tank’s invisible workforce, and providing the stable, pristine water that allows your betta’s immune system to function optimally. This consistent, knowledgeable maintenance prevents the vast majority of betta health issues. A clean tank is not just an aesthetic goal; it’s the foundation of animal welfare. By following this guide—focusing on water quality, using the right tools, avoiding deadly shortcuts, and establishing a reliable schedule—you create a thriving, low-stress environment where your betta can live its full, vibrant life, often for three to five years or more. The time you spend each week with your siphon and test kit is a direct investment in the health and happiness of your finned companion.
Frequently Asked Questions
How often should I completely clean my betta’s tank?
You should never do a complete, 100% tank clean on a cycled, established betta tank. Instead, perform partial water changes (25-50%) weekly. A full teardown and sterilize should only occur in cases of severe disease outbreaks, and even then, you must preserve some filter media to restart the cycle.
Can I use tap water directly for my betta tank?
No, you must always treat tap water with a reliable water conditioner before adding it to the tank. Conditioners instantly neutralize chlorine, chloramines, and heavy metals that are present in municipal water supplies and are lethal to fish.
How do I clean the filter without killing the good bacteria?
Rinse mechanical filter media (like sponges) in a bucket of the old tank water you just siphoned out during your water change. This water contains the bacteria and lacks chlorine. Gently squeeze the sponge to remove solid waste. Never use tap water, as it will sterilize the media and crash your cycle.
Should I take my betta out of the tank to clean it?
For routine weekly cleanings, no. Removing your betta causes unnecessary stress and risks injury. Perform your water change and cleaning with the fish in the tank, being careful not to bump it with the siphon or decorations. Only remove your betta for a full tank teardown due to a major disease outbreak, and then house it in a separate, cycled hospital tank.
Is it okay to use vinegar or baking soda to clean my betta tank?
For routine cleaning, no. A dedicated algae pad and old tank water are sufficient. For extremely stubborn hard water stains on glass, a diluted vinegar solution (1 part vinegar to 10 parts water) can be used on the outside of the glass only. For the inside, it is risky due to pH swings. Baking soda should be avoided as it can raise pH and alkalinity suddenly. When in doubt, use only water and elbow grease.
What are the signs that my tank needs an immediate, extra cleaning?
Signs include: consistently high nitrate readings (>40 ppm) on your test kit, a strong “fishy” or ammonia odor, visibly cloudy water that doesn’t clear after a few hours, rapid algae overgrowth covering all surfaces, and your betta showing signs of distress like lethargy, gasping, or faded colors. These indicate your weekly maintenance is insufficient and requires an immediate, larger water change and investigation into the cause (overfeeding, filter failure, etc.).