How to Clean a Small Betta Fish Tank
Cleaning a small betta tank is crucial for your fish’s health but must be done correctly to avoid harming him. Never use soap or harsh chemicals, always match the new water temperature, and perform partial water changes instead of full cleans. Focus on removing debris, conditioning new water, and maintaining a stable environment to prevent stress and keep your betta vibrant. Following a regular, gentle routine is far more effective than occasional deep cleans.
So, you’ve got a beautiful betta fish in a small tank—maybe a 2.5-gallon or 5-gallon setup. You love watching him flare at his reflection or lazily drift among the plants. But to keep him healthy and thriving, that little aquatic world needs regular, proper cleaning. Cleaning a small betta fish tank isn’t just about aesthetics; it’s about maintaining a stable, safe environment. The good news? It’s a simple, quick process once you know the right way. Forget the complicated advice you might find. This guide will walk you through everything, from gathering your supplies to the final wipe-down, ensuring your betta lives a long, vibrant life.
Many new betta owners make critical mistakes during tank cleanings—using soap, changing all the water at once, or shocking their fish with cold water. These errors can lead to stressed, sick, or even deceased fish. We’re going to avoid all that. Think of this not as a chore, but as a 15-minute spa day for your betta’s home. By the end of this article, you’ll have the confidence and knowledge to clean your small betta tank safely and effectively, every single time.
Key Takeaways
- Never Use Soap or Cleaners: Even a tiny trace of soap, detergent, or household cleaner is lethal to bettas. Clean decorations with only water or a dedicated aquarium-safe algae pad.
- Partial Water Changes are Key: Change 25-30% of the water weekly. A full 100% water change is a major stressor that disrupts the tank’s beneficial bacteria cycle and can shock your betta.
- Temperature Matching is Non-Negotiable: New water added to the tank must be within 1-2°F (0.5-1°C) of the existing tank water. A sudden temperature drop or spike can cause fatal shock.
- Condition All New Water: Tap water contains chlorine and chloramines that are toxic to fish. Always use a complete water conditioner to neutralize these chemicals before adding water to the tank.
- Gravel Vacuum Properly: Use a gravel vacuum (siphon) to suck out debris from the substrate without removing all the beneficial bacteria living there. Focus on dirty spots, not a full substrate stir.
- Filter Media Should Not Be Rinsed in Tap Water: If your filter has media (sponges, ceramic rings), rinse it gently in the old tank water you just removed during the water change. Tap water kills the essential bacteria colonies.
- Slow and Steady Wins: Perform all cleaning steps calmly and methodically. Rushing causes splashes, temperature fluctuations, and stress for your betta. Work in a organized manner around the tank.
📑 Table of Contents
- Why Consistent, Proper Cleaning is Non-Negotiable for Your Betta
- Gathering Your Supplies: The Essential Toolkit
- The Step-by-Step Cleaning Process: A 7-Step Method
- Critical Mistakes to Avoid at All Costs
- Conquering Algae: Prevention and Gentle Removal
- Establishing a Maintenance Schedule for Lifelong Health
- Conclusion: A Clean Tank is a Happy Betta
Why Consistent, Proper Cleaning is Non-Negotiable for Your Betta
Before we dive into the “how,” let’s talk about the “why.” A betta’s small tank is a closed ecosystem. Unlike a river or lake, there’s no natural flow to remove waste. Everything your betta excretes, along with uneaten food and decaying plant matter, breaks down in the water. This process produces ammonia—a toxic chemical that can burn a fish’s gills and lead to death. In a properly cycled tank, beneficial bacteria convert this ammonia first to nitrite and then to less harmful nitrate. But even with these bacteria, nitrate builds up over time and must be removed through water changes.
In a small tank, these waste products accumulate much faster than in a larger volume of water. A spike in ammonia or nitrite can happen in a matter of days, not weeks. Consistent, partial water changes dilute these toxins and maintain water parameters within a safe range. Furthermore, clean water holds more oxygen, which bettas need to breathe (they use a labyrinth organ, but they still rely on oxygenated water). A dirty tank with sludge and algae consumes oxygen and creates a hostile environment. Finally, a clean, clear tank is simply more enjoyable for you to observe your stunning betta in. It’s the foundation of preventative healthcare.
The Danger of a “Dirty” Tank vs. a “Cycled” Tank
It’s important to distinguish between a tank that is dirty (high visible waste, cloudy water, slime coat on surfaces) and a tank that is cycled (has an established population of beneficial bacteria). A cycled tank is a healthy tank. The bacteria live primarily in the filter media and on solid surfaces like gravel and decorations. When you clean, your goal is to remove the physical waste (uneaten food, feces) and some of the nitrate, not to sterilize the tank or remove all the bacteria. Over-cleaning by scrubbing everything with tap water or using soap destroys this essential bacterial colony, forcing you to start the cycling process over—a stressful ordeal for your betta.
Gathering Your Supplies: The Essential Toolkit
Having everything ready before you start makes the process smooth and fast. You don’t need fancy equipment, just the right tools. Scrambling for a bucket mid-clean is a recipe for temperature mistakes and spills.
Visual guide about How to Clean a Small Betta Fish Tank
Image source: vetranch.org
- Two Dedicated Buckets or Containers: This is critical. One bucket is for removing the old tank water. The second bucket is for preparing the new, conditioned water. These buckets should be used only for aquarium purposes. Never use a bucket that has held soap, bleach, or other household chemicals, as residues can be fatal.
- A Gravel Vacuum/Siphon: This is your most important tool. It’s a plastic tube with a wide end that you squeeze to start a siphon. It allows you to remove debris from the gravel while simultaneously taking out water. For a small betta tank, a 6-12 inch siphon is perfect. Look for one with a hand pump or squeeze bulb for easier starting.
- Water Conditioner: A non-negotiable. This product (like Seachem Prime, API Stress Coat+, or any reputable brand) instantly detoxifies chlorine, chloramines, and heavy metals in tap water. It also may contain additives to promote a healthy slime coat. Have it on hand and use it exactly as directed on the bottle.
- Algae Scraper or Pad: For glass or acrylic tanks. Use a non-scratch pad designed for aquariums. A simple plastic scraper or a pad that attaches to your siphon hose works well. Avoid anything abrasive like household scrub pads.
- Clean Cloth or Paper Towels: For wiping the outside of the glass and any spills. Keep these separate from your kitchen towels.
- Thermometer: To verify the temperature of your new water matches the tank water. Many heaters have built-in thermostats, but it’s wise to double-check with a separate, inexpensive stick-on or floating thermometer.
- Optional but Helpful: A dedicated turkey baster for sucking out stubborn debris from tight spots, long tweezers for planting or moving decorations, and a magnetic algae cleaner if you have an acrylic tank.
Set up your station near the tank, with the two buckets, your siphon, and conditioner within arm’s reach. If you plan to clean decorations, have a separate container (like a small bowl) with conditioned water ready for soaking.
The Step-by-Step Cleaning Process: A 7-Step Method
Now, let’s get to the core procedure. This method is designed for a weekly or bi-weekly maintenance routine for a small (under 5 gallons) betta tank. It takes about 15-20 minutes. The golden rule: we are doing a partial water change, not a full tank overhaul.
Visual guide about How to Clean a Small Betta Fish Tank
Image source: images-na.ssl-images-amazon.com
Step 1: Preparation and Power Down
First, unplug the filter and heater from the wall outlet. For the heater, wait at least 15 minutes before removing it from the water to allow it to cool down slightly (to prevent cracking if exposed to air while hot). This is a safety step. If your filter is an internal power filter or sponge filter, you can leave it in the tank for now, but be prepared to rinse it later. If it’s a hang-on-back (HOB) filter, you may want to remove it for easier access to the tank’s edges, but it’s not strictly necessary.
Step 2: Condition the New Water First
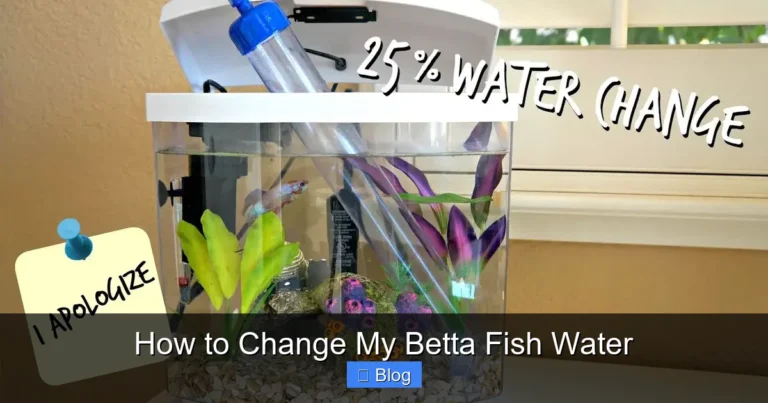
This is a pro tip that prevents mistakes. Before you remove any old water, fill your second, clean bucket with fresh tap water. Add the correct dosage of water conditioner to this bucket immediately and stir it in. This gives the conditioner time to work while you perform the rest of the cleaning. The amount of water you’ll need is roughly 25-30% of your tank’s volume. For a 3-gallon tank, that’s about 0.75 to 1 gallon. It’s better to have a little extra conditioned water ready.
Let this bucket of treated water sit for a few minutes. If your tap water is very cold, you may need to use a little warm tap water to bring the temperature up to room temperature, which should be close to your tank’s temperature (bettas prefer 78-80°F/25-27°C). Use your thermometer to check. The goal is to have this new water within 1-2 degrees of the tank water before you add it.
Step 3: The Gravel Vacuum – Removing Solid Waste
Now, take your gravel vacuum and your first (empty) bucket. Place the wide end of the siphon into the gravel, pressing down slightly. Put the other end into the bucket and squeeze the bulb or pump vigorously to start the siphon. Once water is flowing, move the vacuum tube slowly through the gravel in a systematic pattern—say, rows or circles. As you move it, the suction will pull out debris (fish waste, old food) that has settled between the gravel pieces. The gravel itself will not be sucked up if you don’t plunge the tube too deep. Focus on areas where you see visible waste, especially near the feeding spot. Continue until you have removed the desired amount of water (25-30% of the tank’s volume) into the first bucket.
Tip: If your tank has sand substrate, be extra gentle. Hold the vacuum tube just above the sand surface to avoid sucking up too much sand. You can also use a turkey baster to spot-clean waste from sand.
Step 4: Clean the Decorations (If Needed)
While the siphon is still running, you can quickly address decorations. Do not remove everything at once, as this disturbs the tank and removes beneficial bacteria. Identify any decorations with visible algae or gunk. Remove them one by one. If they have a significant algae growth, you can gently wipe it off with your fingers or an algae pad under a stream of the old tank water you just siphoned into the first bucket. Never use tap water to rinse decorations, as the chlorine will kill bacteria on their surfaces. For stubborn algae on artificial plants or rocks, a 10-minute soak in a bucket of the old tank water can help loosen it. Place the cleaned decoration on a clean towel.
Step 5: Clean the Glass (Inside and Out)
Use your algae scraper or non-scratch pad to gently scrape the inside glass walls. Start from the top and work your way down. Algae often grows more at the water line. Use the siphon’s flow to suck up the loosened algae particles as you work, or wipe the pad on the gravel vacuum’s intake to clean it. For the outside of the glass, use your clean, dry cloth or a paper towel with a bit of vinegar-water solution (1 part vinegar to 4 parts water) for a streak-free shine. Never put any cleaning solution inside the tank.
Step 6: Rinse the Filter Media (The Gentle Approach)
Your filter is the heart of the biological filtration. This step is done with extreme care. Take the filter cartridge or media out. Place it in the bucket of old tank water (the first bucket). Gently swish it around and squeeze it (if it’s a sponge) to remove the solid debris. You want to loosen the gunk but not sterilize it. The water will turn brown—that’s fine. You are removing the physical clogging material, not all the bacteria. Do not use tap water, soap, or scrub it hard. Once the water runs clearer, you can place the media back into the filter. If your filter has multiple media types (e.g., a sponge and ceramic rings), only rinse the mechanical media (the sponge) during a weekly clean. The biological media (ceramic rings, bio-balls) should only be rinsed very occasionally, and only in old tank water.
Step 7: The Finale – Adding New Water and Restarting
Now, ensure all your decorations are back in the tank. Double-check that the temperature of your conditioned, new water in the second bucket matches the tank water (use your thermometer). If it’s a degree or two off, you can let it sit longer or gently add a small amount of warm or cold tap water (conditioned!) to adjust it. Once matched, slowly pour the new, conditioned water into the tank. Try to pour it against the glass or over a decoration to minimize disturbance to the substrate and your betta. Do not dump it directly onto your fish.
Once the tank is filled to the desired level, wipe away any water spots on the outside glass. Re-submerge and plug in the heater (if you removed it) and the filter. Check that the filter is flowing properly and the heater is working. Once the water is clear from the initial disturbance, observe your betta for a few minutes. He should be swimming normally. Then, dispose of the old tank water from the first bucket. You can use it to water houseplants—it’s great fertilizer! Clean your buckets and siphon with fresh water (no soap) and let them air dry. You’re done!
Critical Mistakes to Avoid at All Costs
Even with the best intentions, it’s easy to slip up. Here are the most common—and dangerous—errors that betta owners make during tank cleanings.

Visual guide about How to Clean a Small Betta Fish Tank
Image source: custom-display.com
1. The Soap Catastrophe
This cannot be stressed enough. Never, under any circumstances, use dish soap, detergent, bleach, or any household cleaner on anything that will go into the tank. Even a microscopic residue is a death sentence for your betta. The surfactants in soap destroy fish gills. If you accidentally use soap on a decoration, you must rinse it an exhaustive number of times under running tap water and then soak it in conditioned water for hours before considering it safe. It’s better to just never introduce soap to the process. Use dedicated aquarium tools and rinse them with water only.
2. The 100% Water Change Trauma
Changing all the water at once is incredibly stressful. It removes all the beneficial bacteria, drastically alters the water chemistry (pH, hardness, temperature), and removes any beneficial bacteria biofilm from decorations. Your betta is left in a sterile, unfamiliar environment with no biological filter. This often leads to “new tank syndrome” where ammonia spikes uncontrollably. Stick to 25-30% changes. Only consider a full change in a true emergency, like a severe contamination, and even then, you must take steps to re-cycle the tank immediately for the fish’s safety.
3. Temperature Shock: The Silent Killer
Bettas are tropical fish. A rapid change of more than 2 degrees Fahrenheit can send them into thermal shock, weakening their immune system and making them susceptible to disease like Ich or velvet. Always match the water temperature. The easiest way is to prepare the new water in the same room as the tank so it acclimates to room temperature. Using a thermometer is the only surefire way to know. Never add cold tap water directly from the faucet.
4. Forgetting to Condition the Water
It seems obvious, but in a rush, it’s easy to forget. Tap water is a chemical cocktail for fish. Chlorine and chloramines are added to municipal water to kill pathogens—they do the same to your fish’s cells. Always, always use a water conditioner. Dose it based on the amount of water you are adding, not the whole tank volume. Read your conditioner’s label; some work instantly, others take a few minutes.
5. Over-cleaning the Filter and Gravel
You are not scrubbing a bathtub. When you vacuum the gravel, you’re removing the *debris* on top of and between the gravel, not the gravel itself. You do not need to deep-clean the entire substrate every week. Similarly, when you rinse filter media, you are gently removing the clogging gunk, not making it look brand new. If the media is so clean it looks white or new, you’ve gone too far. You’ve washed away the bacteria colony. A little brown sludge is good and necessary.
Conquering Algae: Prevention and Gentle Removal
Algae is a natural part of the aquarium ecosystem, but in a small betta tank, it can become an eyesore quickly. The key is to manage it, not wage a chemical war. Algae thrives on three things: light, nutrients (nitrates/phosphates), and carbon dioxide. Controlling these keeps it in check.
Common Types in Small Tanks
- Green Spot Algae: Small, hard, circular spots on glass. Very common. Can be scraped off easily with a razor blade (plastic for acrylic) or algae pad.
- Hair/Thread Algae: Long, stringy strands. Often indicates too much light or fluctuating nutrients.
- Blue-Green Algae (Cyanobacteria): A slimy, smelly film that coats surfaces. It’s technically a bacteria, not true algae, and is a sign of poor water circulation or excessive organics.
- Brown Diatom Algae: A dusty, brown coating common in new tanks. Usually fades as the tank matures.
Safe Removal Strategies
During your weekly clean, physically remove as much as possible with your algae scraper. For decorations, remove them and wipe them down in a bucket of old tank water. For persistent spots on glass, a dedicated magnetic cleaner can help reach the inside without getting your arm wet. For hair algae, you can manually pull it out with your fingers or tweezers. Be thorough, as even small fragments can regrow.
Prevention is Best: Ensure your tank is not in direct, harsh sunlight, which accelerates algae growth. Keep your light on a consistent schedule (8-10 hours max per day). A small timer for your LED hood is a great investment. Perform those regular water changes to remove nitrates—the primary food for algae. If you have live plants, they will compete with algae for nutrients. Even a single marimo moss ball or a few fast-growing stem plants like Anacharis can help. Never use algae-killing chemicals in a betta tank; they are often harmful to fish and only a temporary fix.
Establishing a Maintenance Schedule for Lifelong Health
Consistency is the single most important factor in successful betta keeping. A small tank requires more frequent attention than a large, stable system. Here is a simple, effective schedule to follow.
- Daily (1 minute): Observe your betta. Is he active? Are his fins intact? Is he eating? Check the water temperature. Look for any obvious debris or uneaten food and remove it with a turkey baster or pipette.
- Weekly (15-20 minutes): Perform the full partial water change and cleaning process described in the 7-step method. This includes: gravel vacuum (25-30% water change), wipe glass, clean decorations as needed, rinse filter media in old tank water, condition new water, and add it back.
- Monthly/Every Other Month (30 minutes): Perform a more thorough inspection. Test your water parameters (ammonia, nitrite, nitrate, pH) using a liquid test kit. This is crucial to ensure your cycle is stable. Deep-clean your filter media more thoroughly—rinse all media (biological media only very gently, maybe in a separate bucket of old water). Check all equipment (heater, filter, cords) for wear. Prune any live plants and consider replacing filter media if it’s falling apart (but do it in stages, not all at once).
Remember, this schedule is a guideline. If your tank gets dirty faster (e.g., you overfeed), you may need to clean slightly more often. If it’s pristine, you might stretch to every 10-14 days, but never go longer than two weeks without a partial water change in a small betta tank. The goal is to maintain stable, clean water conditions consistently. Your betta will reward you with vibrant colors, active behavior, and a long, healthy life.
Conclusion: A Clean Tank is a Happy Betta
Cleaning your small betta fish tank doesn’t have to be a daunting task. By arming yourself with the right supplies, following a gentle, methodical process that prioritizes water chemistry and temperature stability, and avoiding the common pitfalls of soap and full water changes, you create a sanctuary for your fish. You are not just wiping glass; you are maintaining a delicate balance of life. This regular care is the ultimate expression of responsible pet ownership. It prevents disease, reduces stress, and allows you to fully enjoy the unique personality and stunning beauty of your betta. Make it a calm, weekly ritual. Put on some music, roll up your sleeves, and give your aquatic friend the clean home he deserves. The health and happiness you see in his graceful movements will be your best reward.
Frequently Asked Questions
Can I use vinegar to clean my betta tank?
Yes, but with extreme caution. White vinegar can be used to remove hard water stains on the outside of the glass. Dilute it heavily (1 part vinegar to 4 parts water) and rinse the outside thoroughly with a damp cloth afterward. Never, ever use vinegar inside the tank where it will contact the water, as it will alter the pH and harm your fish and beneficial bacteria.
How often should I completely empty and clean the entire tank?
Aim to never do a full empty-and-scrub unless it’s a dire emergency (e.g., a toxic spill). A properly maintained small betta tank with weekly 25-30% water changes should never require a full teardown. Full cleans destroy the beneficial bacterial cycle and cause immense stress. Stick to partial changes and spot cleaning for the life of the tank.
My betta is stressed after a water change. What did I do wrong?
The most likely culprits are a temperature mismatch (water was too cold or too hot) or a change in water chemistry (forgot conditioner, or changed too much water at once). Always match temperatures within 1-2°F and use a proper conditioner. Perform changes slowly and calmly. Ensure the filter and heater are running properly afterward to restore stability.
Do I need to take my betta out of the tank to clean it?
For a standard weekly partial water change and cleaning, no, you do not need to remove your betta. The process is designed to be done with the fish in the tank. Removing him is more stressful and risky (you could drop him or damage his delicate fins). Only remove him if you are performing a full tank breakdown for an emergency, and then transfer him to a clean, conditioned, temperature-matched hospital tank.
What’s the best way to clean algae off the plastic plants and decorations?
Remove the item from the tank. Place it in a bucket or bowl. Use your fingers or a soft algae pad to gently rub off the algae under a stream of the old tank water you just siphoned out. For stubborn algae, let it soak in the old water for 10-15 minutes first. Rinse it well with more old tank water before placing it back. Never use a scrub brush or tap water.
Is it okay to use a toothbrush to scrub my tank?
Only if the toothbrush is brand new and has never had toothpaste on it, and you will never use it for anything else again. Even then, it’s better to use a dedicated algae scraper or non-scratch pad designed for aquariums. A used toothbrush, even if rinsed, can harbor toothpaste residues which are toxic to fish. It’s not worth the risk. Invest in a $3 aquarium algae pad.