How to Do a Water Change for Betta Fish
Performing regular water changes is the single most important task for maintaining a healthy betta fish environment. This guide provides a simple, step-by-step process to safely replace old tank water with fresh, dechlorinated water, preventing toxic buildup and mimicking your betta’s natural habitat. Following these best practices will drastically reduce stress, prevent disease, and ensure your vibrant companion lives a long, happy life.
Key Takeaways
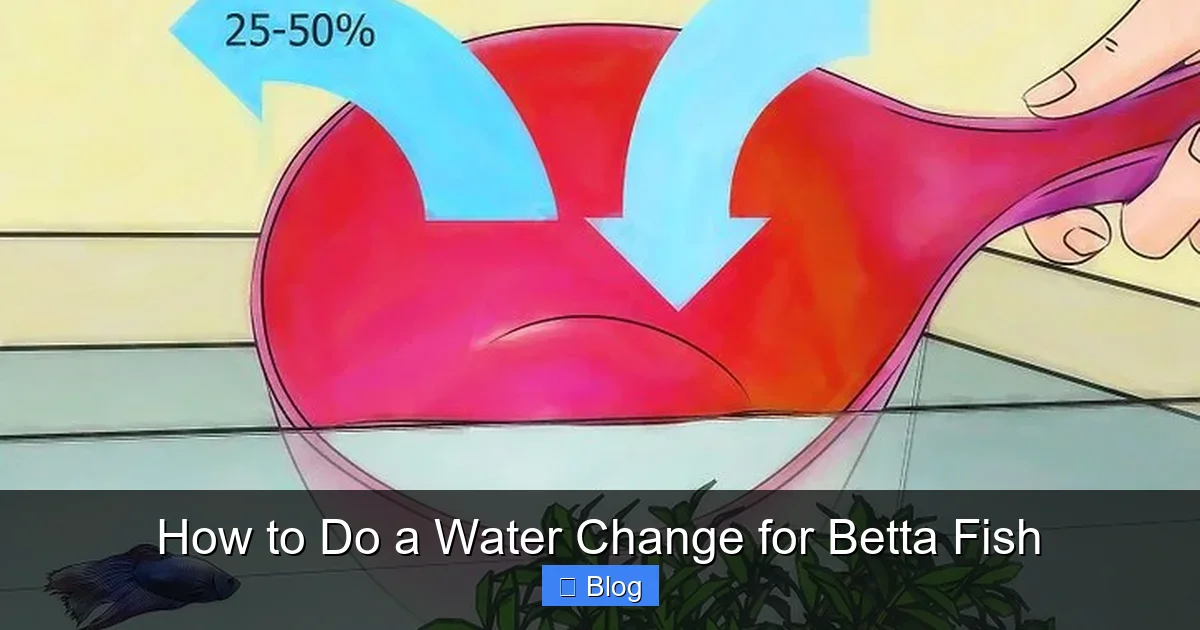
- Consistency is critical: A regular schedule of partial water changes (25-50% weekly) is non-negotiable for betta health, preventing ammonia and nitrite spikes.
- Temperature matching is essential: The new water must be within 1-2°F (0.5-1°C) of the tank’s current temperature to prevent dangerous thermal shock.
- Always dechlorinate: Tap water contains chlorine and chloramines that are lethal to fish; a reliable water conditioner must be used every single time.
- Gentle execution reduces stress: Use a gentle siphon, avoid direct water flow on the fish, and maintain a calm environment during the process.
- Don’t overclean: Never scrub all decorations or replace all filter media at once, as this destroys beneficial bacteria that process waste.
📑 Table of Contents
- Why a Proper Water Change for Betta Fish is Non-Negotiable
- Gathering Your Supplies: The Essential Toolkit
- Step-by-Step Guide: Performing the Water Change
- Common Mistakes & How to Avoid Them
- Troubleshooting: What To Do When Things Go Wrong
- Creating a Sustainable Maintenance Schedule
- Conclusion: The Rewarding Rhythm of Care
Why a Proper Water Change for Betta Fish is Non-Negotiable
Let’s be honest, your betta fish’s small, beautiful tank is a sealed ecosystem. Unlike a river or pond, there’s no natural flow to carry away waste. Everything your betta excretes, along with uneaten food and decaying plant matter, breaks down into toxic compounds. The most dangerous of these are ammonia and nitrite. Even tiny amounts can burn your betta’s gills, suppress its immune system, and lead to fatal diseases like fin rot or dropsy. A proper water change isn’t just a cleaning chore; it’s a vital medical procedure for your fish’s home. It dilutes these toxins, replenishes essential minerals, and mimics the soft, slightly acidic water changes found in their native Southeast Asian rice paddies. Skipping or doing it incorrectly is one of the fastest routes to a sick or deceased betta.
Understanding the Invisible Threats: The Nitrogen Cycle
You don’t need a chemistry degree, but a basic grasp of the nitrogen cycle will revolutionize your understanding of tank maintenance. It’s a simple, three-step process happening constantly in your aquarium:
- Ammonia (NH3/NH4+): The most immediately toxic waste product, produced directly from fish waste and decomposing matter. It burns gills and skin.
- Nitrite (NO2-): Bacteria convert ammonia into nitrite, which is still highly toxic, interfering with a fish’s ability to carry oxygen in its blood.
- Nitrate (NO3-): A second type of bacteria converts nitrite into nitrate, which is far less toxic (though still harmful in high concentrations). This is what we remove with water changes.
In a new, uncycled tank, ammonia and nitrite can spike to lethal levels within days. In an established tank, the beneficial bacteria colony keeps ammonia and nitrite at zero, but nitrate steadily climbs. A water change for betta fish is your primary tool to lower that nitrate, completing the cycle and keeping the entire system safe.
Why Betta Fish Have Unique Needs
Betta splendens are anabantoids, meaning they possess a labyrinth organ that allows them to breathe atmospheric air. While this makes them hardy in low-oxygen water, it doesn’t make them tolerant of poor water quality. In fact, their slow-moving, ornate fins make them more susceptible to fin rot from elevated nitrates and their long, flowing tails are easily torn by strong filter currents—often a side effect of trying to compensate for poor water with excessive filtration. Their natural habitat is shallow, warm, slow-moving water with heavy vegetation. This means they are adapted to stable, warm parameters and are extremely sensitive to sudden changes. A water change done wrong—with cold water or a shocking temperature swing—can be more stressful than the toxins themselves. This is why the “how” of a water change for betta fish is just as important as the “why.”
Gathering Your Supplies: The Essential Toolkit
Walking into the process unprepared is a recipe for disaster. Having everything within arm’s reach before you start ensures a swift, calm, and efficient water change. It minimizes the time your tank’s lid is off and reduces stress for your betta.
Visual guide about How to Do a Water Change for Betta Fish
Image source: wikihow.com
The Core Four: Must-Have Items
- Gravel Vacuum/Siphon: This is your #1 tool. A simple plastic siphon with a wide bell end (like the Python or Aqueon brands) allows you to remove debris from the substrate while siphoning water. For a 5-gallon betta tank, a 12-inch siphon is perfect. Pro Tip: Prime the siphon by sucking on the tubing (keep it clean!) or using a pump attachment to start the flow without putting your mouth near tank water.
- Water Conditioner: Never, ever use untreated tap water. A quality dechlorinator like Seachem Prime or API Stress Coat+ neutralizes chlorine, chloramines, and heavy metals instantly. Prime has the added benefit of temporarily binding ammonia and nitrite, offering a safety net during the change.
- Clean Buckets: You need at least two dedicated, clean buckets. One for the dirty water you remove (the “siphon bucket”), and one for the fresh, conditioned water (the “fill bucket”). Never use buckets that have held soap, chemicals, or have been used for other household purposes. Label them “FISH ONLY” to avoid accidents.
- Thermometer: Don’t guess! A cheap, floating or stick-on aquarium thermometer is crucial for ensuring the new water matches the tank temperature exactly. Your betta’s health depends on it.
Helpful Extras for a Flawless Process
- Algae Pad or Mag-Float: A dedicated, non-abrasive pad for gently scrubbing the inside glass before you start the water change. A magnetic cleaner is great for larger tanks as it keeps your hands dry.
- Soft Cloths or Paper Towels: For wiping down the outside of the tank and any spills. Keep the area tidy.
- Timer: If you’re new to this, a kitchen timer helps you track how long the siphon runs to ensure you’re removing the correct volume of water.
With these tools assembled on a towel near the tank, you’re ready to begin the actual water change for betta fish with confidence.
Step-by-Step Guide: Performing the Water Change
Now, let’s get into the exact procedure. Think of this as a calm, methodical routine. Rushing leads to mistakes. Aim to complete the entire process in 15-20 minutes for a standard 5-gallon tank.

Visual guide about How to Do a Water Change for Betta Fish
Image source: wikihow.com
Step 1: Preparation is 90% of the Success
Before touching the tank, fill your “fill bucket” with the amount of fresh water you’ll need (e.g., 2.5 gallons for a 50% change in a 5-gallon tank). Add the correct dose of water conditioner to this bucket now, as per the product instructions. Stir gently. Let this bucket sit while you work on the tank. This serves two purposes: it ensures the conditioner has time to work, and it allows the water to come to room temperature, which is usually close to your tank’s temperature. You will fine-tune the temperature in the next step.
Step 2: The Gentle Siphon & Substrate Cleaning
Insert the wide end of your gravel vacuum into the substrate. Angle it slightly and gently stir the top 1-2 inches of gravel in a small circle. Debris (fish waste, old food) will lift and be sucked into the siphon. Move the vacuum to a new spot and repeat. Your goal is to clean about 1/3 to 1/2 of the tank’s bottom during each water change, rotating areas each week. Key: Do not dig too deep or disturb the gravel too aggressively, as this can release trapped gases and cloud the water excessively. Keep the siphon flow moderate—you’re cleaning, not draining a flood. Continue siphoning until you’ve removed the target volume of water (e.g., 2.5 gallons) into your “siphon bucket.”
Step 3: The All-Important Temperature Check & Adjustment
Now, check the temperature of the fresh, conditioned water in your fill bucket using your thermometer. Compare it to the tank’s current temperature (read from your in-tank thermometer). The goal is a match within 1°F (0.5°C). If the new water is too cold, add a small amount of warm (not hot!) tap water from your faucet, a cup at a time, stirring and checking after each addition. If it’s too warm, you can add a little cold tap water. This step is critical. A 5-degree temperature drop can shock your betta’s system, leading to lethargy, loss of appetite, and susceptibility to illness like ich. Patience here pays off.
Step 4: The Art of the Refill
This is where many people go wrong. Do not dump the new water in! Place the end of your clean siphon tubing (or a clean cup) into the tank. Gently pour the fresh water from your fill bucket over the overflow of the siphon tube or directly onto a decorative rock or the tank glass. The goal is to disperse the flow and prevent it from blasting your betta directly. A strong, direct current will stress your fish and can damage its delicate fins. If your tank has a filter, you can also pour the new water *into* the filter’s overflow or intake area (if it’s designed for that), which will dissipate the force. Continue until the water level is back to its normal line, accounting for evaporation.
Step 5: The Final Touches & Observation
Wipe down the outside of the tank with your cloth. Replace the lid securely. Turn your filter and heater back on if you turned them off (many betta keepers turn heaters off during the change to prevent dry-fire, but check your model’s manual). Now, the most important part: observe your betta for 10-15 minutes. Is it swimming normally? Is its color bright? Is it eating if you offer food? Some mild initial hiding is normal, but frantic swimming, gasping at the surface, or lethargy could indicate a problem with temperature or water chemistry. If you used a conditioner like Prime, it has a slight sulfur smell—that’s normal and harmless.
Common Mistakes & How to Avoid Them
Even with the best intentions, it’s easy to make errors that undermine your hard work. Knowing these pitfalls beforehand helps you steer clear of them.
Visual guide about How to Do a Water Change for Betta Fish
Image source: fishyfishpet.com
Mistake #1: Changing Too Much Water, Too Often
The classic rookie error is thinking a 100% water change is “more thorough.” It’s not; it’s devastating. A full change completely resets your tank’s parameters, destroys the beneficial bacterial colony (which lives in the filter and substrate), and causes extreme pH and temperature shock. The Rule: Never change more than 50% of the water in a single session, and for a betta, 25% is often ideal, especially in a well-cycled, filtered tank. Consistency with smaller changes is infinitely better than occasional massive overhauls.
Mistake #2: Forgetting to Dechlorinate or Using the Wrong Dose
This is a fatal, non-negotiable error. Chlorine and chloramines in tap water will kill your betta’s gill tissue within minutes. Always, always use a conditioner. Second, always dose correctly. Under-dosing is ineffective; over-dosing (within reason for most conditioners) is usually safe but wasteful. Follow the bottle’s instructions for your specific water volume. If you have very hard water or high chlorine levels, consider a slightly higher dose.
Mistake #3: Ignoring the Temperature Differential
As emphasized, this is a major stressor. Your betta’s body is used to a stable tropical environment (typically 78-80°F or 25.5-26.5°C). Introducing water that’s even a few degrees colder can cause a shock to its system, slowing its metabolism and immune response. Always, always use the thermometer. Don’t rely on the feel of the water with your hand—it’s inaccurate.
Mistake #4: Overcleaning the Tank
When you do a water change, you should only clean what’s necessary. Gently rinse the siphon tube in the old tank water you’re removing (not under the tap!) to clear debris. Do not scrub every decoration, wash the gravel until it’s bone white, or change all your filter media. This “sterilizes” the tank and wipes out the good bacteria that are essential for processing waste. A slight algae film on the glass or a bit of mulm in the filter is healthy. Your goal is to *remove* excess waste, not to create a sterile laboratory.
Troubleshooting: What To Do When Things Go Wrong
Even with careful planning, you might encounter issues. Here’s how to diagnose and fix common post-water-change problems.
Problem: My Betta Is Lethargic or Hiding Excessively After the Change
Diagnosis: This is most likely a temperature shock or a significant parameter swing (pH, hardness). Solution: First, immediately verify the tank temperature with your thermometer. If it’s off, adjust the heater setting gently. Do not add hot water directly to the tank. Second, test your water parameters (ammonia, nitrite, nitrate, pH) with a liquid test kit. If ammonia or nitrite is present, perform another small (10-15%) water change with perfectly conditioned, temperature-matched water. Ensure your conditioner dose was adequate for the new water volume. Provide plenty of hiding spots and dim lighting to help your betta recover.
Problem: The Water Is Cloudy After the Change
Diagnosis: This is usually caused by disturbing the substrate too violently during siphoning, kicking up fine particles (silt). It can also be a bacterial bloom if you over-cleaned, but that’s less common with a simple water change. Solution: If it’s just silt, it will settle within a few hours. Ensure your filter is running properly to help clarify it. Avoid the temptation to do another water change to fix it—that often makes it worse. If it’s a persistent white/green cloudiness that doesn’t settle, it could be an algae bloom from excess nutrients or light; adjust feeding and lighting schedule.
Problem: My Betta Is Flashing (Rubbing Against Objects)
Diagnosis: Flashing is a sign of irritation, most commonly from poor water quality (elevated ammonia/nitrate) or a parasitic infection like ich. Solution: Test water parameters immediately. If anything is off (ammonia or nitrite >0), perform an emergency 25% water change with perfectly conditioned water. If parameters are good but flashing continues, observe for white spots (ich) or other symptoms. Quarantine the fish if possible and consult a vet or experienced aquarist for treatment. Often, a clean water change resolves minor irritation.
Creating a Sustainable Maintenance Schedule
The key to success is turning a chore into a predictable, easy routine. Your schedule depends on your tank’s specifics, but here is a reliable starting point for a betta in a filtered 5-gallon tank.
The Weekly Foundation: The 25% Water Change
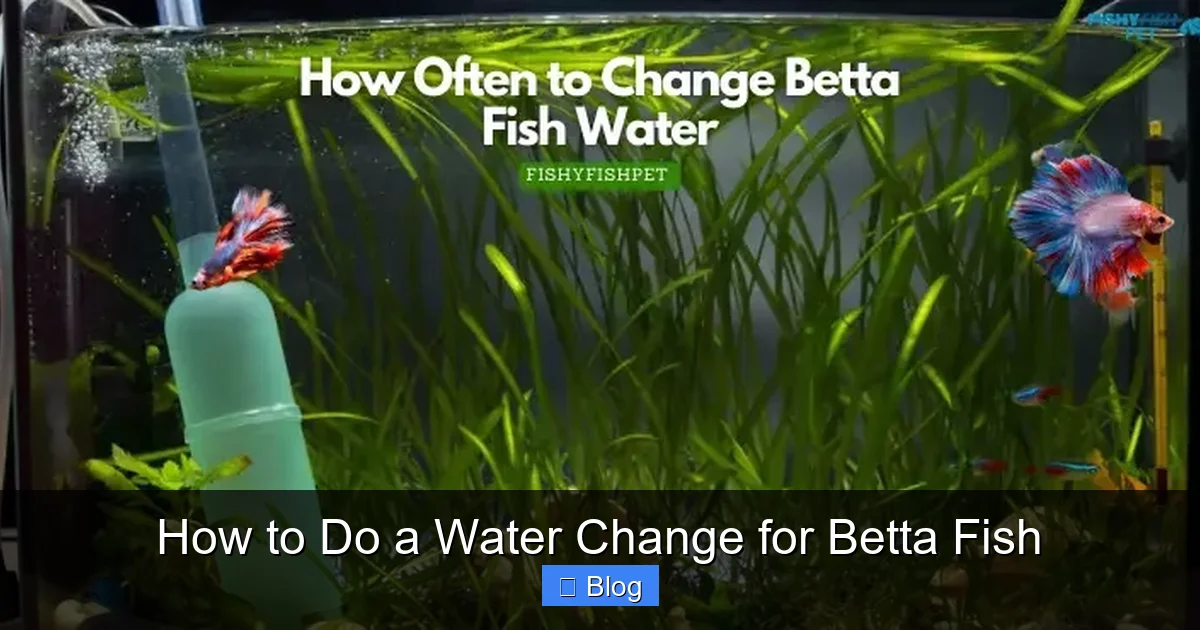
This is your baseline. Once a week, without fail, perform a 25% water change using the method described above. This consistently dilutes nitrates and removes solid waste before it fully decomposes. For a 5-gallon tank, this means removing and replacing about 1.25 gallons. Set a specific day and time (e.g., Sunday morning) and stick to it. This predictability helps both you and your betta.
Adjusting Your Schedule: Tank Size & Filtration Matter
The larger the tank, the more stable the water parameters. A 10-gallon filtered betta tank might only need a 25% change every 10-14 days. Conversely, a tiny, unfiltered 2-gallon “bowl” (which is not recommended) may need 50% changes every 2-3 days to stay safe. Your filter’s capacity also plays a role. A robust filter rated for a larger tank can go longer between changes, but never skip them. Always use a liquid test kit to monitor nitrate levels. Your goal is to keep nitrate below 20 ppm. If it’s hitting 40 ppm between changes, increase the frequency or volume slightly.
The Monthly Deep-Clean (With Extreme Caution)
Once a month, you can incorporate a slightly more thorough cleaning, but with strict rules. During your regular weekly change, you can:
- Gently scrub the inside glass more thoroughly.
- Rinse filter media *only* in the bucket of old tank water you just removed (never tap water). Squeeze sponges gently to clear debris, but don’t wring them out completely—you want to preserve the bacterial colony.
- Prune any dead plant leaves.
Never use soap, chemicals, or replace all filter media at once. The goal is maintenance, not sterilization. If your tank is well-balanced, you may find you barely need to touch the filter media for months.
Conclusion: The Rewarding Rhythm of Care
Mastering the water change for betta fish transforms you from a casual pet owner into a dedicated aquatic caregiver. It’s a simple, 20-minute weekly ritual that forms the bedrock of your betta’s health and vibrancy. By understanding the “why” behind the toxins, gathering the right tools, executing the steps with care for temperature and flow, and avoiding the common pitfalls, you create a stable, pristine environment. You’ll see the rewards in your betta’s brilliant colors, active exploration, and curious bubble-nesting behaviors. Remember, in the miniature world of the aquarium, you are the river, the rain, and the filter. What you put into that weekly maintenance is exactly what you’ll get back in the form of a thriving, joyful companion. Start your schedule today, and enjoy the peace of mind that comes with knowing you’ve mastered the most critical aspect of betta fishkeeping.
Frequently Asked Questions
How often should I do a water change for my betta fish?
For a typical filtered 5-gallon betta tank, a 25% water change once a week is the gold standard. Smaller or unfiltered tanks require more frequent changes (e.g., 50% every 2-3 days). Always use a water test kit; your goal is to keep nitrate below 20 ppm.
Do I need to take my betta out of the tank during the water change?
No, and you should avoid it if possible. Removing your betta causes immense stress and risks injury or escape. The entire process can be done with the fish in the tank by using a gentle siphon and careful pouring to avoid strong currents.
Can I use bottled spring water instead of tap water?
It’s not recommended. Spring water lacks essential minerals bettas need and has unpredictable pH and hardness. It’s also expensive and environmentally taxing. Properly conditioned tap water is the best, most consistent, and healthiest choice for your betta.
What happens if I forget to add water conditioner?
Chlorine and chloramines in untreated tap water will rapidly damage your betta’s gills, leading to respiratory distress, organ failure, and death within hours. Always add conditioner to the new water before it touches your fish or the tank’s biological filter.
Should I clean the filter during a water change?
Only if it’s visibly clogged, and even then, do it sparingly. Once a month, rinse filter media in the bucket of old tank water you just removed. Never replace all media at once or rinse it under tap water, as this kills the beneficial bacteria that are crucial for a healthy aquarium.
My betta hides a lot after a water change—is that normal?
Mild hiding for 30-60 minutes is normal as the fish re-acclimates to the subtle changes. However, prolonged hiding (several hours), lethargy, or loss of appetite indicates a problem, most likely a temperature shock or water parameter issue. Test your water and verify the temperature immediately.