How to Draw a Betta Fish Easy
Drawing a betta fish is easier than you think! By breaking down its complex, flowing fins into simple shapes and lines, anyone can create a stunning, realistic betta fish drawing. This guide walks you through the entire process, from basic sketch to vibrant color, with clear steps and pro tips to ensure your success.
Key Takeaways
- Start with simple shapes: A betta’s body is essentially an oval or almond shape, while its famous fins are built from curved lines and triangles, not complex anatomy.
- Embrace fluid, wavy lines: The key to a believable betta is capturing the gentle, constant movement of its fins. Avoid straight, rigid lines for the fin edges.
- Layer your fins: Betta fish have multiple fin types (dorsal, caudal, anal, pelvic). Draw them in layers from back to front to create proper depth and overlap.
- Use a light touch: Sketch everything with a soft pencil (like an HB or 2H) first. This lets you easily erase guidelines and adjust proportions before committing to dark lines.
- Reference is your best friend: Keep a clear photo of a betta fish beside you. Study how the fins attach to the body and how they billow in the water.
- Color brings it to life: Once your pencil sketch is solid, use layered coloring (starting light and building darkness) to achieve the betta’s signature iridescent, shimmering scales.
📑 Table of Contents
- Why the Betta Fish is the Perfect Subject for Beginner Artists
- Gathering Your Simple Supplies: Less is More
- Step 1: The Foundation – Sketching the Betta’s Body with Basic Shapes
- Step 2: Building the Majesty – Drawing the Flowing Fins
- Step 3: Adding Details and Defining the Form
- Step 4: Bringing Your Betta to Life with Color
- Common Mistakes to Avoid and Pro Tips for Success
- Conclusion: Your Journey as an Artist Begins with a Single Betta
Why the Betta Fish is the Perfect Subject for Beginner Artists
So, you want to learn how to draw a betta fish easy. That’s a fantastic goal! The betta fish, with its spectacular, flowing fins and vibrant colors, might look intimidating at first glance. You might think, “How can I possibly draw all those delicate, wavy fins without making a mess?” But here’s the wonderful secret: the betta is one of the easiest and most rewarding fish to draw for beginners. Its beauty comes from elegant, simple curves, not intricate scales or complex bone structure. Unlike drawing a shark or a goldfish with detailed fin rays, a betta’s fins are more like beautiful, flowing fabric or silk. This means you can capture their essence with confident, graceful lines. This guide will dismantle the betta’s complicated appearance into a series of foolproof, easy-to-follow steps. We’re not aiming for a scientific illustration; we’re going for a beautiful, artistic representation that you can be proud of. Get ready to unlock your artistic potential and create a stunning betta fish drawing, even if you’re picking up a pencil for the first time.
Gathering Your Simple Supplies: Less is More
Before we dive into the drawing, let’s talk tools. The beauty of learning how to draw a betta fish easy is that you don’t need a fancy art studio. In fact, starting simple is key to avoiding overwhelm. Here’s your minimalist toolkit:

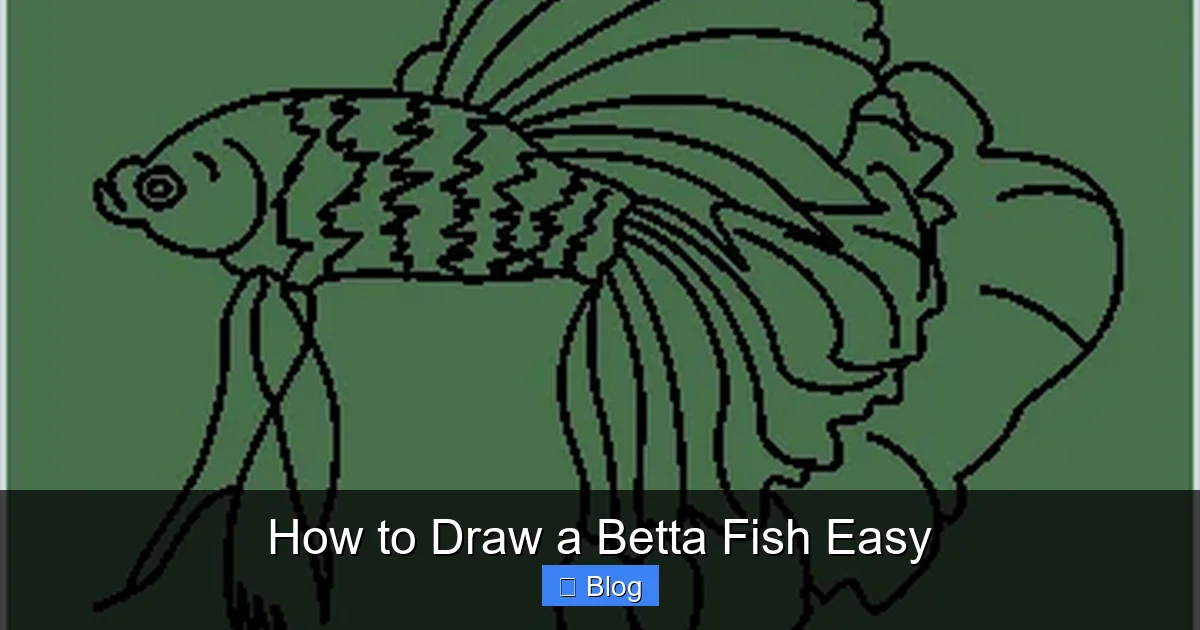
Visual guide about How to Draw a Betta Fish Easy
Image source: easydrawingguides.com
The Essential Pencil Kit
- A Standard HB Pencil: This is your workhorse. It’s medium-hardness, perfect for initial sketches that are dark enough to see but light enough to erase.
- A Softer Pencil (2B or 4B): You’ll use this for final, darker outlines and to add deeper shading. A softer pencil gives a richer, smoother line.
- A Good Eraser: A kneaded eraser is ideal because you can shape it to erase small areas without damaging your paper. A classic pink eraser works fine too.
Paper and Optional Extras
Any plain white printer paper or sketchbook will work. For the coloring stage, you have options! Colored pencils are the most beginner-friendly, offering great control. Markers (like alcohol-based Copic or Prismacolor) are fantastic for blending vibrant colors but require a slightly heavier paper to prevent bleed-through. Watercolors can create a dreamy effect but need practice. For this guide, we’ll focus on the pencil sketch, which is the foundation for any medium. Finally, have a reference photo open on your phone or printed beside you. This is non-negotiable and your most important tool.
Step 1: The Foundation – Sketching the Betta’s Body with Basic Shapes
Forget everything you know about complicated fish anatomy. We’re building our betta from the ground up using two simple shapes. This is the most critical step in mastering how to draw a betta fish easy. A strong foundation means everything else falls into place.
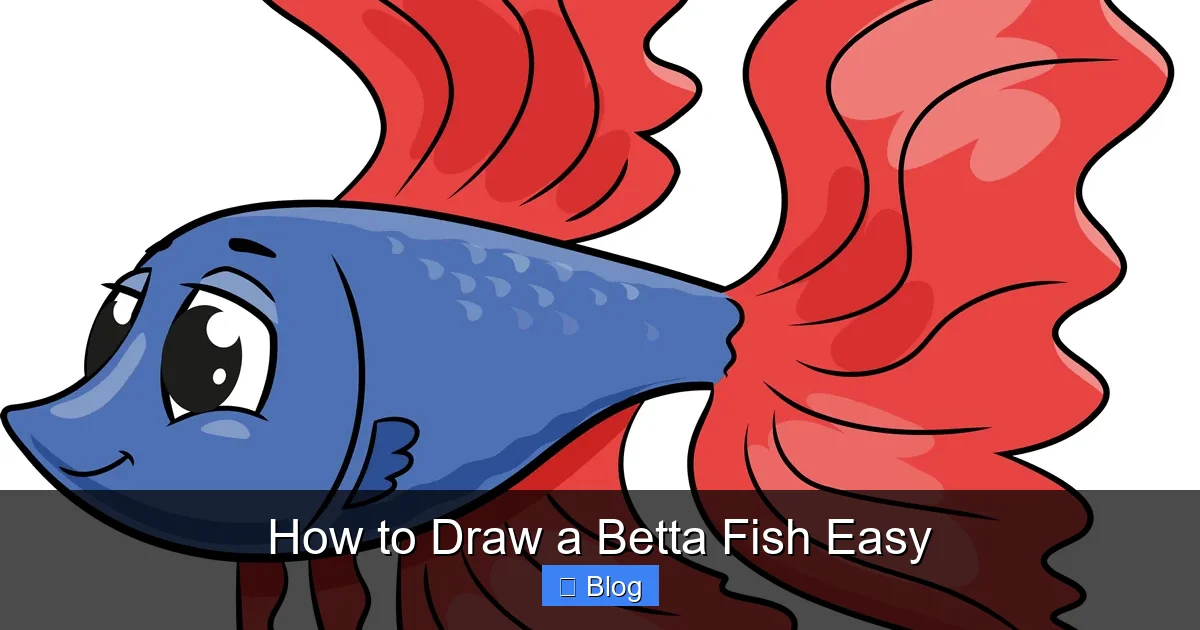
Visual guide about How to Draw a Betta Fish Easy
Image source: easydrawingguides.com
Drawing the Main Body Oval
Lightly, with your HB pencil, draw a slightly tilted oval on your page. This oval is the betta’s main body, from its snout to the base of its tail. Think of it as a flattened egg. The top of the oval should be a bit flatter, representing the betta’s back. The oval should take up about one-third of your page’s height. Don’t press hard—this is a guide that we will eventually erase parts of.
Adding the Simple Head Triangle
Now, at the left end of your oval (if the oval is tilted with the narrow end to the left), draw a small, rounded triangle. This triangle forms the betta’s head and mouth. The base of the triangle connects seamlessly to the oval. The point of the triangle is the snout. This simple combination of an oval and a triangle already looks like a fish! See? We’re making progress already.
Placing the Eye and Gill
Inside the head triangle, about one-third of the way from the snout tip, draw a small circle for the eye. Betta eyes are relatively large and expressive. Add a tiny white dot (a highlight) inside the eye to make it look alive. Just behind the eye, on the side of the head, sketch a faint, curved line—this suggests the gill cover. It’s a subtle detail but adds realism.
Step 2: Building the Majesty – Drawing the Flowing Fins
This is where the magic happens, and where the “easy” part really shines. Those magnificent fins are not separate, complicated objects. They are extensions of the body, built from graceful curves. We’ll draw them in the correct order: from the back fins forward, to create a sense of depth.
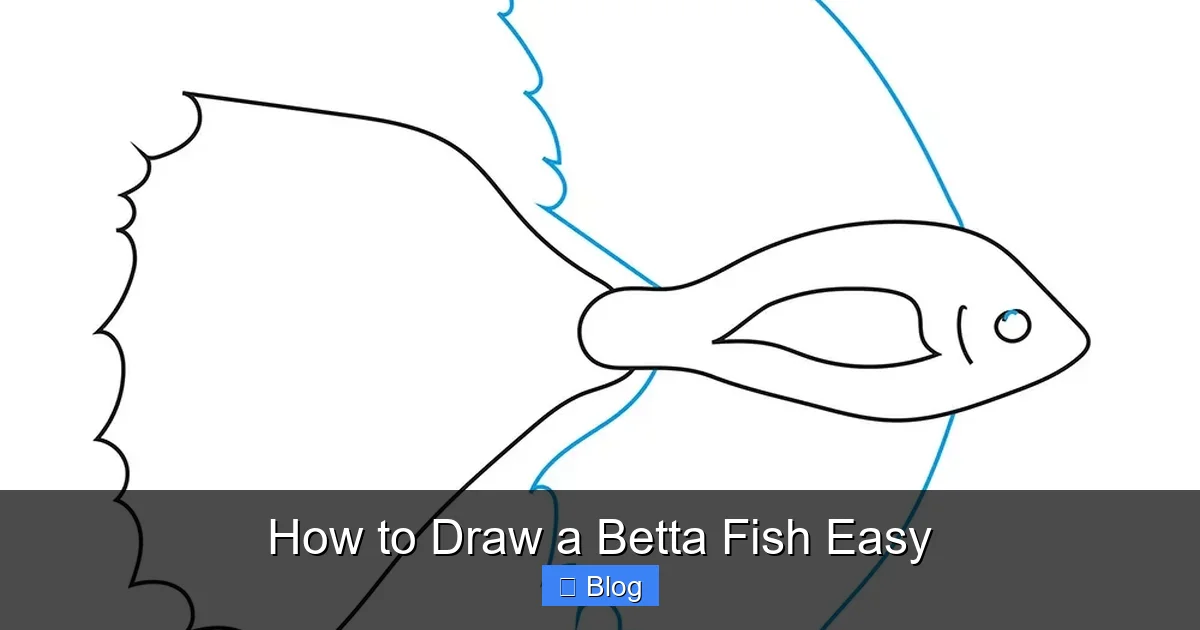
Visual guide about How to Draw a Betta Fish Easy
Image source: howtodraweasy.net
The Dorsal Fin (The Fin on Top)
Start at the top-center of the body oval. Draw a soft, curved line that arches upward and then gently tapers to a point. This is the leading edge of the dorsal fin. Now, from the point where this line meets the body, draw a second, parallel curved line that flows down and back toward the body, connecting to the oval a bit behind your starting point. You’ve just created a simple, elegant fin shape. The edge of this fin should be wavy, not straight—add 2-3 gentle “M” shapes along the top curve.
The Caudal Fin (The Grand Tail)
The caudal fin is the showstopper. To keep it easy, we’ll divide it in half vertically. From the very end of the body oval, draw two long, sweeping curves that flare outwards like a majestic, semi-circular fan. The top curve should be a bit longer and more dramatic. The bottom curve should mirror it but can be slightly shorter. Now, connect the two curves at the tips with a wavy line. The edge of the tail fin should have deep, elegant curves—think of the shape of a fancy dress train or a leaf. Draw 3-4 large, graceful dips along this edge.
The Anal and Pelvic Fins (The Bottom Pair)
Under the body, the anal fin runs along the belly. Start just behind the pelvic fins (which we’ll do next) and draw a long, curved line that flows backward, parallel to the body, ending in a soft point. Its edge should also be wavy. The pelvic fins are the two fins under the head, often long and flowing. Draw two thin, blade-like shapes starting just below the head. They should curve gently forward and then trail backward, tapering to points. Think of them as two elegant ribbons.
Finalizing the Fin Shapes
Step back. Do the fins look balanced? The caudal (tail) fin should be the largest and most dominant. The dorsal fin adds height, and the pelvic/anal fins add lower balance. If something looks off, gently adjust the curves. Remember, in nature, no two fins are perfectly symmetrical—a little asymmetry adds character.
Step 3: Adding Details and Defining the Form
Your basic fish shape is there, but it’s time to refine it and add the details that make it look like a betta specifically, not just any fish.
Refining the Body Contour
Go over your initial oval. The betta’s body is more streamlined. Gently curve the top line of the oval to create a subtle hump before the dorsal fin, and curve the bottom line to create a slight taper toward the tail. Erase the parts of the original oval that are now inside the fin shapes. The body should look sleek and muscular where it’s not covered by fins.
Fin Texture and Separation
Real betta fins aren’t solid sheets; they have a slight texture and separation. With your softer (2B) pencil, draw very light, curved lines within the fin shapes. These lines should radiate from the point where the fin attaches to the body and flow toward the fin edges. They suggest the fin’s supportive rays and the way light passes through them. Don’t draw too many—just 3-5 per fin section is enough. Also, where fins overlap (like the pelvic fins over the anal fin), darken the line where one fin goes behind the other to establish clear layering.
The Final Face: Scales and Mouth
Betta scales are tiny and often not individually drawn in simple art, but you can suggest them. On the cheek and top of the head, draw a pattern of tiny, curved lines that follow the form of the head—like a mosaic. For the mouth, bettas have a small, upward-turned mouth (a “superior mouth”). Draw a tiny curved line at the tip of the snout triangle to indicate this, and maybe a very small dot for the mouth opening.
Step 4: Bringing Your Betta to Life with Color
Now for the fun part! A betta’s color is its personality. While wild bettas are usually dull, domestic ones are living rainbows. We’ll use a simple layering technique for colored pencils that works for any medium.
Choosing Your Color Palette
Look at your reference photo. Popular betta colors include deep blues, fiery reds, vibrant purples, and turquoise greens. Many have multiple colors that blend. For this easy method, choose a base color (the main color, like blue), a lighter shade for highlights (like a light turquoise), and a darker shade for shadows and depth (like a navy or violet). You can also add a touch of a contrasting color, like orange or red, on the fin tips for a “butterfly” or “half-moon” pattern.
The Layering Technique: Light to Dark
Step 1: Using your lightest color, apply a smooth, even layer over the entire fish, avoiding the white of the paper. This is your foundation. Step 2: Using your medium (base) color, start adding color to the main body and the majority of the fins. Use soft, circular motions. Don’t press too hard. Step 3: Now, add your darkest color. This is crucial for depth. Apply it in the shadowed areas: under the fins where they attach to the body, in the creases of the tail fin, and on the underside of the fish. This makes the fins look like they’re floating and billowing. Step 4: Go back to your lightest color and gently burnish (press firmly) over the areas that would catch the most light—the very tops of the dorsal fin, the upper edges of the tail, and the rounded parts of the body. This creates a beautiful, shimmering highlight.
Final Touches with a White Pencil or Gel Pen
For that true betta iridescence, use a white colored pencil or a white gel pen sparingly. Add tiny, sharp highlights on the very tips of the fins and a few scattered, tiny spots on the body where light would reflect off a scale. This little trick makes your drawing look wet and alive instantly.
Common Mistakes to Avoid and Pro Tips for Success
Even with an easy method, a few pitfalls can trip up beginners. Knowing these will save you frustration.
Mistake 1: Drawing Fins as Flat, Stiff Shapes
The Fix: Always think “water flow.” Imagine the fish is suspended in water, and its fins are gently moving. Draw the fin edges with S-curves and C-curves, not straight lines or sharp points. Look at your reference and mimic the natural wave.
Mistake 2: Forgetting Overlap and Layering
The Fix: Fish fins are not like pages in a book; they overlap. When you sketch, draw the caudal (tail) fin first, then the dorsal fin on top of it, then the pelvic fins in front. This simple ordering automatically creates a 3D effect. Darken the lines where one fin passes behind another.
Mistake 3: Making the Body Too Thick or Too Thin
The Fix: Betta bodies are slender and torpedo-shaped. Your starting oval should be narrow, not round. A good trick: the body’s width should be about one-third of its length from snout to tail base.
Pro Tip: Use a Grid for Perfect Proportion (The Easy Way)
If you’re struggling with getting the fins the right size relative to the body, lightly draw a 1×1 inch grid over your reference photo (you can do this digitally). Then, draw a matching, light grid on your paper. Copy the shapes square by square. This isn’t cheating—it’s a classic artist’s tool for accuracy, and you can erase the grid later.
Conclusion: Your Journey as an Artist Begins with a Single Betta
Congratulations! You now know how to draw a betta fish easy, from a simple oval to a vibrant, flowing masterpiece. Remember, the goal wasn’t perfection on the first try; it was understanding the process. The betta fish is a forgiving and beautiful subject because its elegance comes from simple, graceful curves. Every line you drew, from the body oval to the final highlight, was a step in learning to see shapes and translate them onto paper.
Now, take this foundation and run with it. Try drawing your betta from a different angle—a side view, a top view showing its flared gills. Experiment with different color patterns: a solid royal blue, a marbled koi pattern, or a delicate pink and white. Use your new skill to create greeting cards, decorate your room, or simply enjoy the meditative act of drawing. The most important takeaway is this: you did it. You broke down a complex, beautiful creature into manageable steps and brought it to life. That’s a skill that will serve you in every artistic endeavor. So, grab your pencil, find a new reference photo, and draw another betta. With each one, your confidence and your art will flow more beautifully. Happy drawing!
Frequently Asked Questions
What is the easiest part of the betta fish to draw first?
Always start with the body. Sketch a simple, slightly tilted oval for the main torso and a small rounded triangle for the head. Getting this basic shape correct and proportionate is the single most important step for the entire drawing to look right.
How do I make the betta’s fins look flowy and not stiff?
The secret is to use curved, wavy lines for all fin edges. Avoid straight lines entirely. Imagine the fins are made of silk or fabric floating in water. Draw gentle “S” curves and soft dips along the top and bottom of each fin, especially the large caudal (tail) fin.
I keep messing up the tail fin. Any simple tricks?
Yes! Think of the tail fin as a half-circle or a fan. Start by drawing two long, curved lines that flare out from the body’s end. Then, connect the tips with a wavy line. Break that wavy edge into 3-4 large, graceful curves instead of small zigzags.
Do I need to draw every single scale on the betta?
Absolutely not! For an easy and artistic betta drawing, you do not need individual scales. Instead, suggest scales by adding a few tiny, curved lines following the body’s contour on the head and shoulders, or simply use smooth color blending to imply the shiny, scaly texture.
What if my betta looks like a plain fish and not a betta?
Check your fin proportions and flow. Bettas have extremely long, flowing fins, especially the caudal (tail), anal (bottom), and pelvic (front bottom) fins. Make these fins significantly longer and more dramatic than a regular fish. Also, ensure the fins are drawn in layers with clear overlap.
Can I draw a betta fish without a reference photo?
While possible, it’s much harder. A reference photo is your best friend. It shows you exactly how the fins attach, how they billow, and the fish’s proportions. For the easiest and most successful result, especially when learning, always draw from a clear, high-quality photo of a betta fish.