How to Clean Betta Fish Tank Water
Cleaning your betta’s tank water correctly is crucial for its health and longevity. It’s not just about changing water; it’s about maintaining a balanced ecosystem. This guide breaks down exactly how to do it safely, from gathering the right tools to performing a partial water change that minimizes stress. Follow these steps to ensure crystal-clear, toxin-free water where your betta can truly thrive.
You’ve got your beautiful betta, with its flowing fins and vibrant colors, settled in its tank. It’s swimming happily, and everything seems perfect. Then you notice the water looking a little… off. Maybe it’s slightly cloudy, or you see some debris floating near the bottom. Your first instinct might be to give the whole tank a good scrub and fill it with fresh water. Stop right there. This well-meaning impulse is actually one of the most common and dangerous mistakes new betta owners make. Cleaning a betta tank is a delicate science, not a household chore. The goal isn’t to create sterile, brand-new conditions, but to maintain a stable, balanced aquatic environment. This guide will walk you through exactly how to clean your betta fish tank water the right way, ensuring your finned friend lives a long, healthy life.
Key Takeaways
- Partial water changes (25-50%) are the gold standard: Never perform a 100% water change unless in an emergency, as it removes beneficial bacteria and shocks your betta with drastic parameter shifts.
- Always treat tap water with a dechlorinator: Chlorine and chloramines in tap water are lethal to fish and will destroy your tank’s beneficial bacterial colony.
- Temperature matching is non-negotiable: The new water you add must be within 1-2°F (0.5-1°C) of the existing tank water to prevent thermal shock.
- Siphon gravel to remove solid waste: Fish waste and uneaten food decays in the substrate, producing harmful ammonia; siphoning during water changes is your primary defense.
- Never use soap or household cleaners: Even a trace residue is toxic. Use only water or tank-safe vinegar for cleaning decorations and glass.
- Test your water regularly: Use a liquid test kit (not strips) to monitor ammonia, nitrite, nitrate, and pH. This tells you if your cleaning routine is effective.
- Consistency is more important than perfection: A regular, smaller water change schedule (e.g., 25% weekly) is far better than infrequent, large changes.
📑 Table of Contents
- Why Proper Water Cleaning Isn’t Just “Changing the Water”
- Essential Tools: Your Betta Tank Cleaning Kit
- Step-by-Step: The 25-50% Partial Water Change Process
- What About the Filter? A Delicate Balance
- Deep Cleaning: When and How (Sparingly!)
- Troubleshooting & Common Mistakes
- Conclusion: A Routine for a Thriving Betta
Why Proper Water Cleaning Isn’t Just “Changing the Water”
Before we dive into the “how,” we must understand the “why.” Your betta’s tank is not just a bowl of water; it’s a complex, living ecosystem. This ecosystem relies on something called the nitrogen cycle, a process driven by beneficial bacteria. These bacteria live primarily in the filter media and on surfaces in the tank. They perform the vital job of converting toxic fish waste (ammonia) into less harmful nitrite, and then into nitrate, which is removed through water changes and plants.
The Nitrogen Cycle: Your Tank’s Invisible Support System
When your betta excretes waste or uneaten food decays, it releases ammonia (NH3/NH4+). Ammonia is incredibly toxic, even at low levels. The first type of beneficial bacteria (Nitrosomonas) eats this ammonia and converts it into nitrite (NO2-). Nitrite is also highly toxic. A second type of bacteria (Nitrospira) then converts the nitrite into nitrate (NO3-). Nitrate is much less toxic and is primarily removed by diluting it with fresh water during water changes and, to a lesser extent, by live plants. Disrupting this bacterial colony is the single biggest risk of improper cleaning.
What’s Actually in Your Tap Water?
Municipal tap water is treated with chemicals to make it safe for human consumption. Chlorine and chloramines are added to kill pathogens. While great for us, these chemicals are lethal to fish and will also massacre the beneficial bacteria in your filter. This is why you must always use a water conditioner/dechlorinator. It neutralizes these chemicals instantly, making the water safe for your betta and your biofilter.
Essential Tools: Your Betta Tank Cleaning Kit
Having the right tools on hand makes the entire process smooth, quick, and less stressful for both you and your betta. Scrambling for supplies mid-clean is a recipe for mistakes.
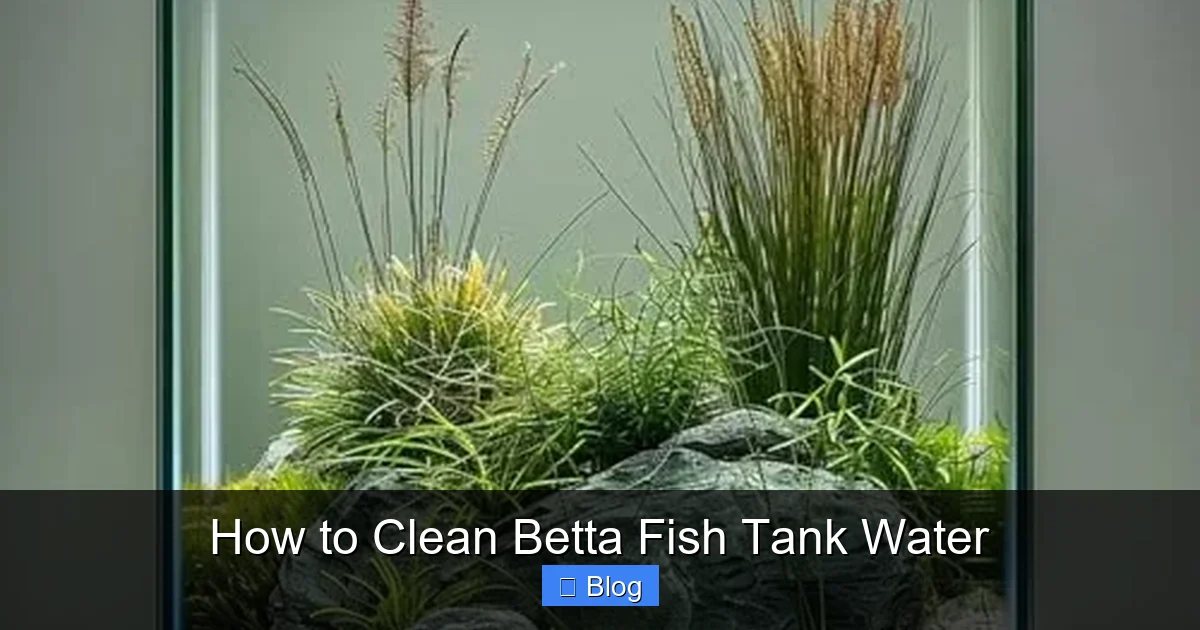
Visual guide about How to Clean Betta Fish Tank Water
Image source: m.media-amazon.com
- Gravel Vacuum/Siphon: This is your most important tool. It’s a flexible tube with a wider end that you squeeze to start the siphon, allowing you to suck up debris from the substrate while removing old water. Look for a battery-operated or manual squeeze bulb model for easier use.
- Water Conditioner: A high-quality dechlorinator that also detoxifies ammonia (like Seachem Prime) is a lifesaver. It’s your insurance policy against tap water toxins.
- Clean Buckets (2):strong> Designate two clean buckets exclusively for aquarium use. One will hold the dirty water you remove, the other will hold the fresh, treated water you’ll add back. Never use buckets that have had soap or chemicals in them.
- Algae Scraper/Pad: For glass tanks, a magnetic algae scraper is fantastic as it lets you clean the inside without sticking your arm in. For acrylic tanks, use a specifically labeled acrylic-safe pad to avoid scratches.
- Old, Clean Towels: Dedicated to aquarium use. You’ll use these to wipe up spills and dry your hands. Do not use fabric softener when washing them.
- Thermometer: A simple stick-on or digital thermometer to ensure the new water temperature matches the tank perfectly.
- Filter Media (Optional):strong> If you rinse your filter media, you’ll need a small bucket of the old tank water (never tap water) to gently swish it in.
Step-by-Step: The 25-50% Partial Water Change Process
This is the core routine. Performing a partial water change (PWC) weekly or bi-weekly is the cornerstone of betta tank maintenance. The exact percentage depends on your tank size and bioload. For a 5-gallon tank with one betta, 25% weekly is often sufficient. For a 2.5-gallon, you might need 30-40% weekly. Let’s get started.
Preparation: Set the Stage for Success
Before you touch anything, gather all your tools. Fill your designated “clean” bucket with the amount of fresh tap water you’ll need (e.g., for a 25% change in a 5-gallon tank, you need ~1.25 gallons). Add the correct dosage of water conditioner to this new water now. Let it sit. If your tap is very cold, you may need to use a small aquarium heater in this bucket to bring it to the correct temperature (78-80°F / 25.5-26.5°C). Place the thermometer in the bucket to monitor.
The Siphon & Scrape: Removing the Old
Now, approach the tank calmly. Rapid movements stress fish. Gently insert the wide end of your gravel vacuum into the substrate. Start the siphon by squeezing the bulb or sucking gently on the tube (be careful not to ingest water!). As water flows out into your “dirty” bucket, move the vacuum through the gravel in a slow, deliberate pattern. You’ll see debris being sucked up. Focus on areas where waste accumulates, like under the filter outflow or where your betta usually rests. Do not dig too deep and disturb the bottom layers of gravel where beneficial bacteria may reside. Continue until you’ve removed the desired amount of water. While the water level is low, use your algae scraper to clean the glass walls. Any debris knocked loose will be removed when you refill.
The Refill: The Critical Final Step
Double-check the temperature of your new, conditioned water. It must match the tank’s current temperature exactly. You can pour the new water into a clean cup and hold it in the tank for a minute to equalize, or use your thermometer. Once matched, slowly pour the new water back into the tank. Pour it against the glass or use a cup with a spout to avoid creating a strong current that could stress your betta. Do not pour directly onto your betta. Fill to the desired level, leaving a small gap to prevent overflow from future splashes. That’s it! Your PWC is complete.
What About the Filter? A Delicate Balance
Your filter is home to a massive colony of the beneficial bacteria we discussed. Cleaning it incorrectly is a surefire way to cause a “cycle crash,” leading to dangerous ammonia and nitrite spikes.
When and How to Rinse Filter Media
Rinse your filter media only when water flow is significantly reduced, typically every 4-6 weeks, not on a weekly schedule. When you do rinse it, never use tap water. The chlorine will kill the bacteria. Instead, take a small amount of the old tank water you just siphoned out (from your dirty bucket) and gently swish and squeeze the sponge or ceramic rings in it. Your goal is to remove the large chunks of solid debris that are blocking flow, not to make it pristine and white. A slight brown tint is perfectly fine and indicates a healthy bacterial colony. After rinsing, simply place it back in the filter.
Never Replace All Media at Once
If you need to replace filter media (e.g., a carbon cartridge), only replace half of it at a time, spaced a month apart. This preserves at least some of the bacterial colony. Never replace all mechanical, biological, and chemical media in a single service.
Deep Cleaning: When and How (Sparingly!)
Sometimes, a tank gets genuinely dirty—persistent algae on decorations, a film on the glass, or a major accident. This calls for a more thorough approach, but it must be done with extreme care.
The “Staged” Deep Clean Approach
Do not do everything at once. Spread the deep-cleaning tasks over 2-3 separate weeks.
- Week 1: Perform your normal 25% PWC. Remove all decorations and scrub them thoroughly with a dedicated algae pad or soft brush in the old tank water (from your dirty bucket). Do not use soap. Rinse well. Clean the glass inside and out.
- Week 2: Perform your normal PWC. This week, focus on the substrate. You can gently vacuum more thoroughly, or if using sand, lightly stir the top layer to release trapped gas and siphon the debris that floats up. Do not completely strip the gravel.
- Week 3: Perform your normal PWC. If your filter media is very clogged, this is the week to gently rinse it in old tank water as described above.
This staged method prevents shocking the system by changing too many parameters at once. Your betta will also be less stressed by gradual changes.
Troubleshooting & Common Mistakes
Even with the best intentions, problems can arise. Here’s how to identify and fix the most common issues.
Cloudy Water After a Change
If your water turns cloudy white or milky shortly after a change, it’s likely a bacterial bloom. This happens when you’ve disturbed the substrate too much, releasing a surge of nutrients that bacteria feed on. It’s usually harmless and will clear on its own within a few days as the bacteria population stabilizes. Ensure you’re not over-vacuuming. A slight cloudiness is normal; a thick, persistent cloudiness indicates overfeeding or an under-filtered tank.
Algae Explosions
Algae is a sign of an imbalance, usually too much light and/or nutrients (nitrate/phosphate). To combat it: 1) Reduce lighting to 8 hours max per day using a timer. 2) Ensure you’re not overfeeding (your betta’s stomach is the size of its eye). 3) Perform consistent water changes to lower nitrates. 4) Introduce live plants to out-compete algae for nutrients. 5) For stubborn algae on glass, use a scraper. For hair algae on decorations, remove them and scrub.
My Betta Is Stressed After Cleaning!
Signs of stress include lethargy, loss of color, clamped fins, and rapid breathing. First, check your water parameters immediately with a test kit. The most likely culprits are temperature shock or chlorine exposure. If the temperature was off, let it stabilize. If chlorine is present, add more conditioner. Turn off lights and provide plenty of hiding places (plants, caves) to help your betta recover. Prevention is key: always match temperatures and always use conditioner.
Conclusion: A Routine for a Thriving Betta
Cleaning your betta fish tank water doesn’t have to be a daunting task. By understanding the delicate ecosystem you’re maintaining and following a consistent, gentle routine of partial water changes, you are providing the single most important factor for your betta’s health: clean, stable water. Remember the golden rules: treat all tap water, match the temperature, vacuum the gravel, and never over-clean. Think of yourself as a caretaker of a miniature, living planet. Your diligence is rewarded with the vibrant, active, and long-lived companion you wanted when you first brought your betta home. A clean tank is a happy tank, and a happy tank means a happy, healthy betta.
Frequently Asked Questions
Can I use bottled spring water instead of tap water for my betta tank?
While spring water is free of chlorine, its mineral content (pH, GH, KH) is unknown and often unsuitable for stable betta parameters. It’s also expensive and unsustainable for regular water changes. Tap water treated with a conditioner is the most reliable and cost-effective option when used correctly.
How often should I clean my betta tank?
For a filtered tank of 5 gallons or more, perform a 25% water change weekly. For unfiltered or smaller tanks (2.5-3 gallons), a 30-50% water change is needed 2-3 times per week. Always test your water (especially nitrate) to adjust this schedule for your specific setup.
Do bettas need a filter? Can I skip it and just do water changes?
While bettas can survive in unfiltered bowls, a small, gentle filter is highly recommended. It provides crucial biological filtration (the nitrogen cycle) and water movement/aeration, making tank maintenance easier and water quality more stable. Water changes alone in an unfiltered tank require much more frequent effort.
Is it okay to clean the tank glass with vinegar?
Yes, a very dilute solution of white vinegar (1 part vinegar to 10 parts water) is excellent for removing hard water stains from the glass. Apply it with a cloth or paper towel, scrub, and then rinse the area thoroughly with clean water before refilling the tank. Never add vinegar directly to the tank water.
My betta is in a small bowl. Can I still do a partial water change?
Yes, but it’s more challenging. Use a very small cup or turkey baster to carefully remove 30-50% of the water, trying to catch any debris. Replace it with an equal amount of conditioned, temperature-matched water poured very slowly. For a betta’s long-term health, upgrading to a filtered 5-gallon tank is the single best improvement you can make.
Should I clean the tank when my betta is in it or take it out?
Always leave your betta in the tank during a standard partial water change. The process is less stressful than netting and moving him. Only remove your betta for a deep clean if you must completely empty the tank, which should be a rare event. In that case, house him in a clean, conditioned, temperature-matched hospital tank during the process.