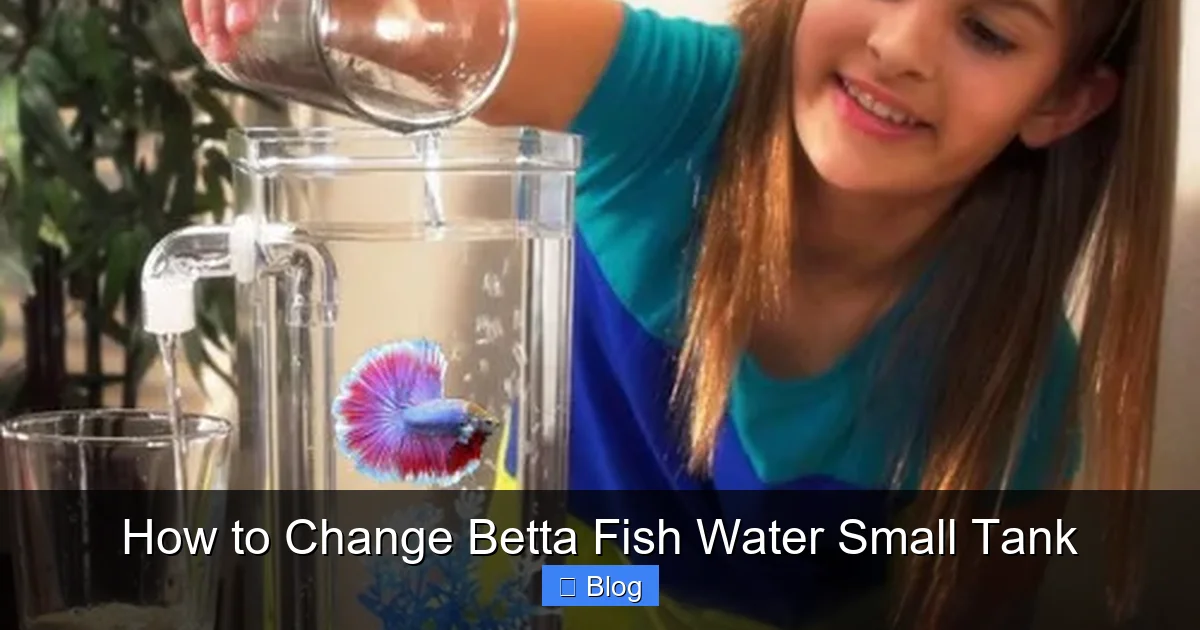
How to Change Betta Fish Water Small Tank
Changing water in a small betta tank is non-negotiable for your fish’s health. Unlike large aquariums, tiny volumes (under 5 gallons) accumulate toxins like ammonia and nitrates incredibly fast, stressing your betta. The process requires precise temperature matching, thorough dechlorination, and gentle cleaning of decorations without over-cleaning the filter. Using a gravel vacuum, replacing only 30-50% of the water weekly, and never using soap are the golden rules. Consistency is far more important than occasional deep cleans, as stable water parameters are the key to a vibrant, long-lived betta.
Ah, the betta fish. With its flowing fins and vibrant personality, it’s easy to see why this little warrior is a pet store staple. You bring home your beautiful betta, perhaps in a charming small vase or a compact 2.5-gallon tank, and everything seems perfect. That is, until you wonder: “How often do I really need to change the water in this tiny setup?” If you’re asking that question, you’re already on the right path. Proper water changes are the single most important factor in your betta’s health, especially in a small tank. Think of it this way: your betta lives, eats, and breathes in its entire world. In a small volume, every bit of waste, every uneaten food pellet, and every bit of decaying plant matter has a much larger impact on water quality than in a massive aquarium. This guide is your definitive, step-by-step manual to mastering the art of the water change for your small betta tank. We’ll move beyond vague advice and dive into the precise tools, techniques, and troubleshooting you need to ensure your Siamese fighting fish thrives, not just survives.
Key Takeaways
- Small tanks require frequent, partial water changes: Due to the tiny water volume, toxins build up rapidly. A 30-50% weekly change is essential for tanks under 5 gallons.
- Temperature matching is critical: The new water must be within 1-2°F (0.5-1°C) of the tank water to prevent dangerous thermal shock.
- Always use a water conditioner/dechlorinator: Tap water contains chlorine, chloramines, and heavy metals that are lethal to fish. conditioner must be added to the new water before it touches your betta.
- Clean the gravel and décor, but not the filter: Use a gravel vacuum to remove waste from the substrate. Never wash filter media in tap water, as it destroys beneficial bacteria.
- Never remove all the water at once: A 100% water change eliminates the established nitrogen cycle and beneficial bacteria, crashing the tank’s ecosystem and severely stressing your betta.
- Acclimate your betta during the process: Keep your fish in a separate, clean container with some old tank water while you clean. Slowly acclimate them back to the refreshed tank.
- Consistency beats occasional deep cleans: A regular, moderate weekly change is infinitely better for water stability than an irregular, large change.
📑 Table of Contents
- Why Small Tanks Are a Different Beast: The Nitrogen Cycle on Fast-Forward
- Your Betta Water Change Toolkit: What You Actually Need
- The Step-by-Step Water Change Process: From Prep to Rehoming
- Common Water Change Mistakes (And How to Avoid Them)
- Establishing a Foolproof Maintenance Schedule for Your Small Tank
- Troubleshooting: When the Water Change Doesn’t Go as Planned
- Conclusion: The Small Tank, The Big Commitment
Why Small Tanks Are a Different Beast: The Nitrogen Cycle on Fast-Forward
Before we grab a bucket, we need to understand why this is so crucial. The secret villain in every aquarium is the nitrogen cycle. It’s a natural process where fish waste (ammonia) is converted by beneficial bacteria into nitrite (still toxic) and then into nitrate (less toxic but still problematic in high amounts). In a large, well-established tank, this cycle is a stable, invisible workforce. But in a small betta tank—let’s say 2 to 5 gallons—that workforce is tiny, and the waste-to-water ratio is huge.
The Toxicity Timeline in a Small Volume
Imagine your betta produces a small amount of ammonia. In a 50-gallon tank, that ammonia is diluted into a vast ocean. In a 3-gallon tank, that same amount of ammonia becomes a concentrated poison almost immediately. Ammonia burns a fish’s gills and skin. Nitrate, while less immediately deadly, causes long-term stress, suppresses the immune system, and leads to issues like fin rot and lethargy. A small tank can go from perfectly balanced to dangerously toxic in a matter of days, not weeks. This is why the common myth that bettas can live in bowls without changes is not just wrong—it’s cruel. They are hardy, yes, but hardy against a slow, stressful poisoning is not a life worth living.
The “Mini-Cycle” Danger
Another unique challenge of small tanks is the “mini-cycle.” If you over-clean, especially by washing all your filter media in tap water, you wipe out the colonies of good bacteria. With the biological filter gone, the tiny amount of remaining bacteria in the gravel and on surfaces must repopulate. During this repopulation, ammonia and nitrite can spike erratically because the bacteria population isn’t stable. This is why our water change method focuses on preserving the filter’s bacteria while cleaning the physical waste from the gravel.
Your Betta Water Change Toolkit: What You Actually Need
Having the right tools makes the job 90% easier and prevents mistakes. You don’t need a fancy, expensive setup, but you do need specific items. Gather these before you start; fumbling for tools with a stressed betta in a cup is no fun.

Visual guide about How to Change Betta Fish Water Small Tank
Image source: quickanswer.org
Essential Tools
- A Dedicated Bucket (5-gallon size is ideal): This bucket is only for aquarium use. Never use a bucket that has held soap, chemicals, or is used for household cleaning. Residues are fatal. A clean food-grade bucket with a pour spout is perfect.
- A Gravel Vacuum/Siphon: This is your most important tool. It’s a plastic tube with a wider end that you squeeze to start a siphon, allowing you to suck debris from the gravel without removing all the water. Get one sized for your tank—a thin one for nano tanks, a wider one for 5-gallon tanks.
- Water Conditioner/Dechlorinator: This is non-negotiable. Brands like Seachem Prime are popular because they detoxifies ammonia for 24-48 hours, which is a great safety net for small tanks. You must treat all new water before it enters the tank.
- A Clean Sponge or Algae Scraper: For wiping the inside glass. Use a new, unused sponge dedicated solely to the aquarium. Never use the same sponge you use for your kitchen.
- A Thermometer: Your tank’s heater may have one, but having a separate, accurate thermometer to check the temperature of your new water is a best practice.
- A Clean Cloth or Paper Towels: For wiping up spills. Keep these aquarium-only as well.
- A Separate, Clean Holding Container: A small plastic container or a clean pitcher to temporarily hold your betta during the clean. It should be large enough for him to swim a bit and have a lid or cover (bettas are jumpers!).
Nice-to-Have Extras
For tanks with live plants, a pair of long tweezers for planting or pruning is useful. A magnetic algae cleaner can make glass cleaning easier if you have a large opening. A small net can help corral a curious betta, but many people find cupping them with a container is less stressful.
The Step-by-Step Water Change Process: From Prep to Rehoming
Now, let’s get our hands wet. This process should take about 20-30 minutes for a small tank. The key is to do it calmly and methodically. Rushing leads to mistakes.
Visual guide about How to Change Betta Fish Water Small Tank
Image source: i.ytimg.com
Phase 1: Preparation (The 5-Minute Setup)
Before you touch anything, have your bucket, siphon, conditioner, and holding container ready. Fill your bucket with the amount of new water you plan to replace (e.g., 1.5 gallons for a 3-gallon tank). This is a critical safety step: Treat this new water with the correct dosage of water conditioner according to the bottle’s instructions. Let it sit for a minute to ensure it’s fully mixed. Place your thermometer in the bucket to check its temperature. Your tap water temperature will vary by season and home. The goal is to match your tank’s temperature (typically 78-80°F / 25.5-26.5°C for bettas). If the new water is too cold, you can add a small amount of warm (not hot!) tap water and remix. If it’s too warm, let it sit for a bit or add a little cool tap water. Never use boiling water to heat the bucket.
Phase 2: Removing the Betta & Old Water
Gently net or cup your betta and transfer it to the holding container. Add a few cups of the existing tank water to this container to cover the betta and maintain water parameters. This container should be placed somewhere safe and stable, away from drafts or direct sunlight.
Now, set up your siphon. Submerge the entire tube in the tank and the bucket end in a lower position (like on the floor). Squeeze the bulb on the siphon several times to start the flow. Once water is flowing steadily, place the wide end of the vacuum into the gravel. Move it slowly in a grid pattern across the entire bottom, lifting it slightly and pressing it back down to dislodge debris. You’ll see old food, fish poop, and other gunk being sucked into the bucket. Do not remove more than the planned percentage of water (30-50%). Stop siphoning when you’ve removed the target amount. If your tank has sand, be extra gentle, as the vacuum can suck up the sand itself.
Phase 3: Cleaning Without Crashing the Cycle
With the dirty water removed, it’s time for a light clean. Use your dedicated algae sponge to gently wipe the inside glass from top to bottom. Wipe any decorations or the tank hood. Do not use any soap, detergent, or cleaning agents. A little elbow grease with clean water is all that’s needed. If you have a filter, this is the moment of truth. If your filter media (sponges, ceramic rings, bio-balls) is visibly clogged, you can gently rinse it in the bucket of old tank water you just removed. Swish it around to dislodge debris. The goal is to unclog it so water flows freely, not to make it pristine. You are preserving the bacteria that live on the media. Never, under any circumstances, rinse filter media under the tap—the chlorine will kill the beneficial bacteria instantly.
Phase 4: The Refill & Acclimation
Slowly pour the conditioned, temperature-matched new water from your bucket back into the tank. Pour it against the glass or use a cup to diffuse the flow to avoid stirring up the gravel too much. Fill the tank to the desired level. Now, take your betta in its holding container (with its old water) and float it in the freshly cleaned tank for 15-20 minutes. This allows the temperature in the container to equalize with the tank temperature. After floating, you can very slowly add a small amount of tank water to the holding container every 5 minutes for about 15-20 minutes. This drip acclimation further eases stress from any minor differences in water chemistry (like pH). Finally, use a net to gently transfer your betta into the tank. Discard the water from the holding container. Do not pour your betta or the old holding container water into the clean tank.
Common Water Change Mistakes (And How to Avoid Them)
Even with the best intentions, it’s easy to slip up. Here are the most frequent errors new betta keepers make during water changes.
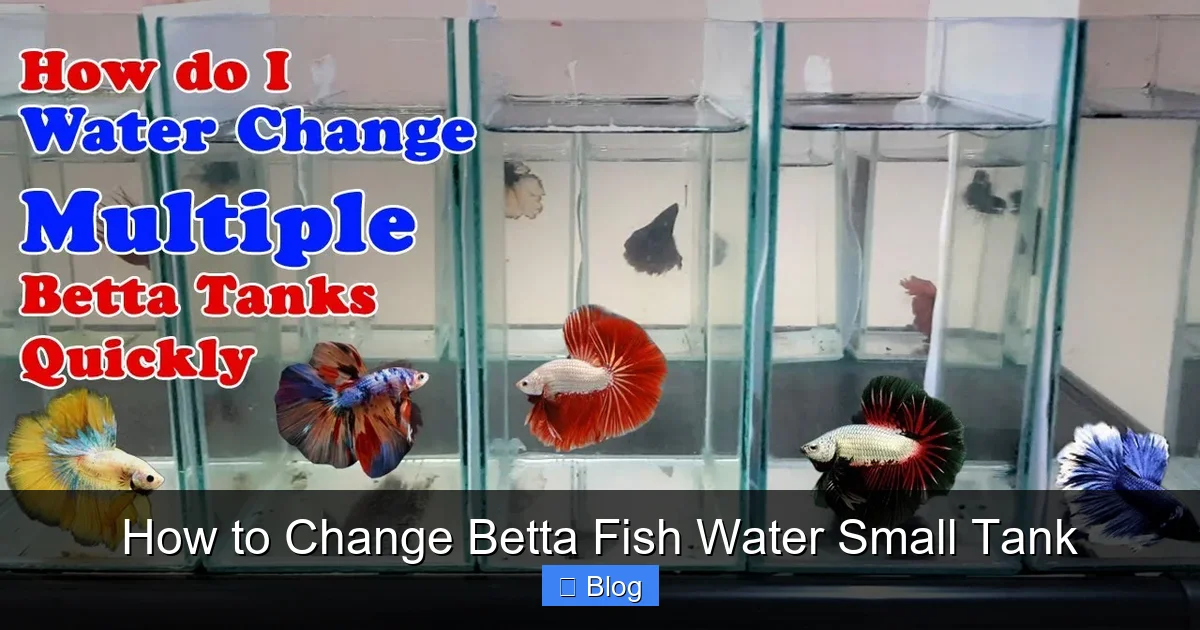
Visual guide about How to Change Betta Fish Water Small Tank
Image source: fishaquariumshop.org
Mistake 1: Changing 100% of the Water
This is the cardinal sin. A full water change strips away all the beneficial bacteria that form the backbone of your biological filter. It also causes massive, stressful swings in pH, temperature, and mineral content. Your betta’s immune system will be compromised, making it susceptible to disease. Solution: Stick to the 30-50% weekly change rule. This removes enough toxins while preserving the stable, healthy bacterial colony.
Mistake 2: Temperature Shock
Pouring in cold tap water (or water that’s too warm) is a direct path to a sick fish. A sudden drop or rise of even a few degrees can cause shock, leading to clamped fins, loss of appetite, and increased disease susceptibility. Solution: Always, always use a thermometer. Match the new water to the tank water within 1-2°F. In winter, you may need to use a small aquarium heater in your water change bucket, or mix in some warm tap water.
Mistake 3: Forgetting the Dechlorinator
It seems obvious, but in the rush of the process, it’s easily forgotten. Chlorine and chloramines in tap water will damage your betta’s gills on contact. Solution: Make adding conditioner the very first step after filling your bucket. Treat the entire bucket’s volume. If you forget and add some untreated water, immediately add the appropriate dose of conditioner for the entire tank volume as a safeguard.
Mistake 4: Over-Cleaning the Filter
The filter is not a trash can; it’s a bio-reactor. Washing it in tap water until it’s sparkling clean annihilates the bacterial colonies. Solution: Clean filter media only when visibly clogged (water flow is reduced), and only in old tank water. A quick swish is enough. Replace only 25-50% of filter media at a time, never all of it at once.
Mistake 5: Using the Wrong Tools/Soaps
A bucket that held bleach or a sponge used for dishes introduces lethal chemicals. Solution: Designate specific, clean tools for aquarium use only. Label them if you must. A simple rinse with hot water (no soap) is sufficient for cleaning tools after use.
Establishing a Foolproof Maintenance Schedule for Your Small Tank
Consistency is the holy grail of aquarium keeping. A set schedule prevents forgotten water changes and helps you spot problems early.
The Weekly Ritual (For Tanks Under 5 Gallons)
For a 1-3 gallon tank, a 50% water change weekly is the standard. For a 4-5 gallon tank, you might get away with 30% weekly, but 50% is still safer. Mark it on your calendar. Set a specific day and time—maybe every Sunday morning with your coffee. This turns it into a habit, not a chore you dread and postpone.
The Monthly Deep Dive
Once a month, during your regular water change, add a few extra tasks. Test your water parameters (ammonia, nitrite, nitrate, pH) using a liquid test kit (dip strips are less accurate). This gives you a baseline and alerts you to any hidden issues. While the tank is partially empty, you can also do a more thorough glass cleaning and inspect all equipment (heater, filter, decor) for wear or buildup.
Signs Your Schedule Needs Adjustment
If your water becomes cloudy quickly between changes, or if you see algae blooming, it might mean your weekly change volume isn’t enough for your specific bioload (how much waste your betta produces). You can increase the change percentage to 60% temporarily. Conversely, if your betta seems stressed after changes, double-check your temperature matching and acclimation.
Troubleshooting: When the Water Change Doesn’t Go as Planned
Even following all the rules, sometimes things go sideways. Here’s how to handle common post-change issues.
“My tank water is cloudy after the change!”
This is usually a bacterial bloom. It’s harmless and often caused by a large amount of disturbed debris in the gravel or a sudden shift in water chemistry. It should clear within 24-48 hours as the filter catches the particles. Ensure you are vacuuming thoroughly but not violently stirring the substrate. If it persists, check your water parameters.
“My betta is acting stressed or lethargic after the change.”
First, check the temperature of the tank water immediately with your thermometer. Shock is the most likely culprit. Second, did you acclimate properly? Float and drip are key. Third, did you accidentally disturb or remove all the filter media? If so, the bacteria crash is causing poor water quality. Test for ammonia and nitrite immediately. Perform an emergency 25-30% water change with perfectly conditioned, temperature-matched water to dilute any toxins.
“I see algae growing on the glass and decor.”
Some algae is normal, but a bloom indicates an imbalance, usually excess light or nutrients (nitrates). Ensure the tank is not in direct sunlight. Reduce feeding to only what your betta eats in 2 minutes. Increase the frequency or volume of your water changes to remove nitrates. You can manually wipe the algae during the change. For stubborn spots, a dedicated algae scraper or a toothbrush (designated for the tank) can be used on decor.
Conclusion: The Small Tank, The Big Commitment
Changing the water in your betta’s small tank isn’t just a cleaning task—it’s the primary act of care you perform for its entire well-being. It’s the direct line between you and the health of the creature that depends entirely on you. By understanding the urgency created by the small water volume, arming yourself with the correct tools, and executing a gentle, consistent weekly ritual, you transform that small glass box from a potential hazard into a pristine, stable home. You’ll see the results in your betta’s brilliant colors, energetic flares, and long, healthy life. It’s a simple process with profound rewards. Now, go set that calendar reminder. Your betta is counting on you.
Frequently Asked Questions
Can I use bottled spring water instead of tap water for my betta?
While spring water is free of chlorine, it often lacks essential minerals and can have an unpredictable pH. It’s also expensive and inconsistent. Properly conditioned tap water is almost always the best, most stable, and most cost-effective choice for a betta tank.
Is it okay to change my betta’s water with a pitcher instead of a siphon?
You can, but it’s inefficient and risky. A pitcher makes it very difficult to remove debris from the gravel without taking out too much water. A siphon/gravel vacuum is specifically designed to clean the substrate while controlling water removal, making it the superior and recommended tool.
How long can I go without a water change in my 2-gallon betta tank?
Not long. In a tank that small, toxins can reach lethal levels within a week. Going longer than 7 days without a 50% water change is gambling with your betta’s health and will likely lead to poor water quality and disease.
My betta jumped out during the water change! What do I do?
Immediately scoop them up and gently place them back in the tank. Check for injuries. Ensure the water temperature is correct. Keep a close eye on them for signs of stress or infection over the next few days. To prevent this, always use a lidded holding container and work quickly but calmly.
Do I need to clean the inside of the filter housing or impeller?
Yes, but only with old tank water. Once every few months, disassemble your filter according to the manufacturer’s instructions. Use a toothbrush or your fingers (rinse hands first with dechlorinated water!) to scrub out any gunk from the housing and impeller well. This maintains flow without harming bacteria.
My tap water is very hard. Will this hurt my betta?
Betta fish are native to soft, acidic waters, but they are quite adaptable to a range of water hardness. Consistently hard water is not ideal long-term but is generally not an immediate danger if properly conditioned. The priority is always removing chlorine/chloramines and maintaining stable parameters. If hardness is extreme (very high GH/KH), research your specific tap water report for long-term considerations.