How to Draw a Realistic Betta Fish
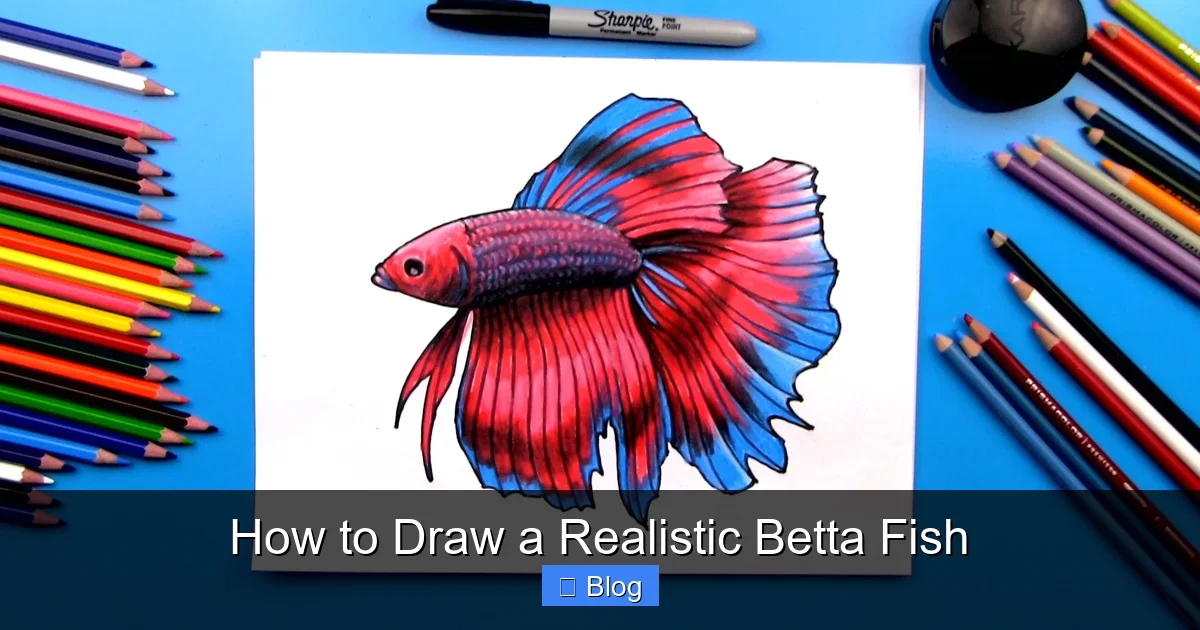
Drawing a realistic betta fish is a rewarding challenge that combines careful observation with foundational art skills. Success hinges on understanding the fish’s unique anatomy, particularly its elaborate, flowing fins and iridescent scales. By building your drawing from simple shapes to complex details and mastering techniques for texture and light, you can capture the breathtaking beauty and elegant movement of this aquatic gem.
Key Takeaways
- Master the Anatomy First: A realistic betta drawing starts with understanding its key body parts—the torpedo-shaped torso, caudal peduncle, and the distinct, flowing fins (dorsal, anal, ventral, and caudal).
- Build from Simple Forms: Always begin with light, basic geometric shapes (cylinders, ovals, triangles) to map the pose and proportions before adding any complex details.
- Fin Flow is Everything: Betta fins are not flat; they have volume, curvature, and overlap. Draw them as separate, transparent “sheets” that fold and ripple to imply liquid motion.
- Capture Iridescent Scales: Use a combination of small, directional strokes and layered, translucent washes of color (blues, reds, greens) to mimic the shimmering, light-catching quality of betta scales.
- Light Defines Form: Consistently apply a light source to create highlights and shadows. This is crucial for making the fish look three-dimensional and alive, not like a flat sticker.
- Patience with Layers: Realism comes from building layers. Start with a base color, add mid-tones and shadows, then finish with crisp highlights and fine details like fin rays and scale texture.
- Reference is Non-Negotiable: Constantly use high-quality photos or videos from multiple angles to understand how the fins move, how light interacts with the scales, and the subtle nuances of the breed you’re drawing.
📑 Table of Contents
- The Allure of the Betta: Why Drawing This Fish is a Fantastic Challenge
- Foundation First: Understanding Betta Fish Anatomy
- From Circles to Curves: Sketching the Base Form
- Bringing It to Life: Adding Detail and Form
- The Magic of Color and Texture: Making it Iridescent
- Final Touches and Common Pitfalls to Avoid
- Conclusion: Your Journey to a Lifelike Betta
The Allure of the Betta: Why Drawing This Fish is a Fantastic Challenge
There’s something undeniably magical about the betta fish. With fins that flow like silk veils in a gentle current and colors that shift from deep emerald to fiery crimson under the light, they are living jewels of the aquatic world. Capturing that ethereal beauty on paper is a dream for many artists. But how do you translate that liquid elegance into graphite, ink, or paint? Drawing a realistic betta fish is more than just copying a picture; it’s about understanding form, movement, and the science of light on a complex, shimmering surface. This guide will walk you through the entire process, from the first sketch to the final shimmer, breaking down the seemingly intimidating into manageable, joyful steps. Whether you’re a beginner picking up a pencil for the first time or an intermediate artist looking to refine your skills, this is your complete roadmap to creating a betta drawing that truly breathes.
Foundation First: Understanding Betta Fish Anatomy
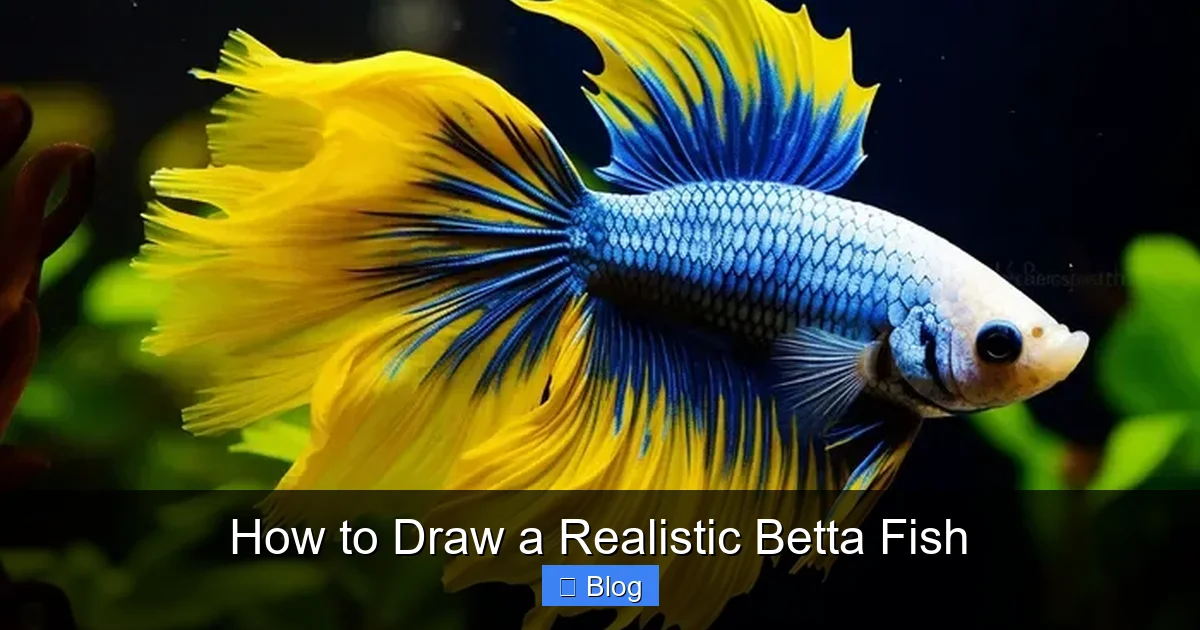
Before you draw a single line, you need to know what you’re looking at. A realistic drawing is built on accurate structure. The betta’s stunning appearance can distract from its simple, efficient anatomy. Let’s demystify it.
Visual guide about How to Draw a Realistic Betta Fish
Image source: promptsideas.b-cdn.net
The Core Body: A Torpedo of Power
Ignore the fins for a moment. The betta’s body is a sleek, elongated oval or a slightly flattened cylinder—think of a small, streamlined bullet. This is the torso. From the middle of this torso extends a narrow, muscular section called the caudal peduncle. This is the powerhouse that drives those magnificent fins. The head is small and streamlined, with a tiny, upward-facing mouth (a labyrinth organ breather) and large, expressive eyes that sit high on the head. The gill cover (operculum) is a subtle flap behind the eye. Getting this core body shape correct and proportioned is 50% of the battle. A wobbly torso will make even the most beautiful fins look awkward.
The Fin Family: Names, Shapes, and Functions
This is where the betta gets its fame. A typical halfmoon or veiltail betta has six primary fin sections you must identify:
- Dorsal Fin: The fin on the back, starting just behind the head. It’s often long and flowing, with a gentle curve.
- Caudal Fin: The tail fin. This is the showstopper. In a halfmoon, it spreads out in a perfect 180-degree semi-circle. It’s composed of two lobes (upper and lower) that meet at the tips.
- Anal Fin: Located on the belly, just in front of the tail. It’s usually long and mirrors the shape of the dorsal fin but is often slightly shorter.
- Ventral Fins: The pair of “feelers” under the head, just below the gills. They are long, thin, and often trail below the fish.
- Pectoral Fins: The pair on the sides, near the gill cover. These are used for steering and are typically translucent and smaller than the other fins.
- Pelvic Fins: Sometimes confused with ventral fins, these are actually the pair located between the pectorals and the anal fin, often small and tucked close.
Critical Insight: Betta fins are not solid sheets. They are supported by thin, bony rays (fin rays) that branch out. The webbing between them is thin, translucent, and often shows the individual rays, especially near the edges. This structure is key to drawing them realistically.
From Circles to Curves: Sketching the Base Form
With anatomy in mind, it’s time to pick up your pencil. The goal here is not detail, but proportion, posture, and flow. Use a light hand (HB or 2H pencil) so you can erase construction lines later.
Visual guide about How to Draw a Realistic Betta Fish
Image source: promptsideas.b-cdn.net
Step 1: The Line of Action
Observe your reference photo. What is the fish’s overall pose? Is it swimming gracefully upward? Gliding horizontally? Resting with fins fanned? Draw a single, smooth, curved line that captures this primary movement. This is your line of action, the spine of your drawing. It ensures your betta feels dynamic, not stiff.
Step 2: Building the Torso
On your line of action, sketch an oval for the main body. Place it where the line curves most. Then, add a smaller, tapered cylinder or cone shape extending backward for the caudal peduncle. Check the proportions: the caudal peduncle should be about 1/3 to 1/2 the length of the main torso oval.
Step 3: Mapping the Fin Placements
This is where most artists go wrong—drawing fins as flat shapes attached to the body. Instead, think of them as separate, three-dimensional planes.
- Draw a simple triangle or curved wedge shape on the back for the dorsal fin.
- For the caudal fin, sketch two large, curved triangles (like a butterfly wing) emerging from the end of the caudal peduncle. The angle between them defines the tail spread.
- The anal fin is a similar triangle on the belly, starting just before the caudal peduncle.
- Indicate the ventral fins with two long, thin lines dangling below the head.
- Add small ovals or triangles on the sides for the pectoral fins.
Pro Tip: At this stage, draw the fins as if you’re seeing them from slightly above or the side. This helps establish their volume. Use very light, tentative lines. Your goal is a wireframe skeleton, not the final art.
Bringing It to Life: Adding Detail and Form
Now the fun begins. We’ll refine our sketch, giving the betta its distinctive features and three-dimensional shape.
Visual guide about How to Draw a Realistic Betta Fish
Image source: promptsideas.b-cdn.net
Defining the Head and Face
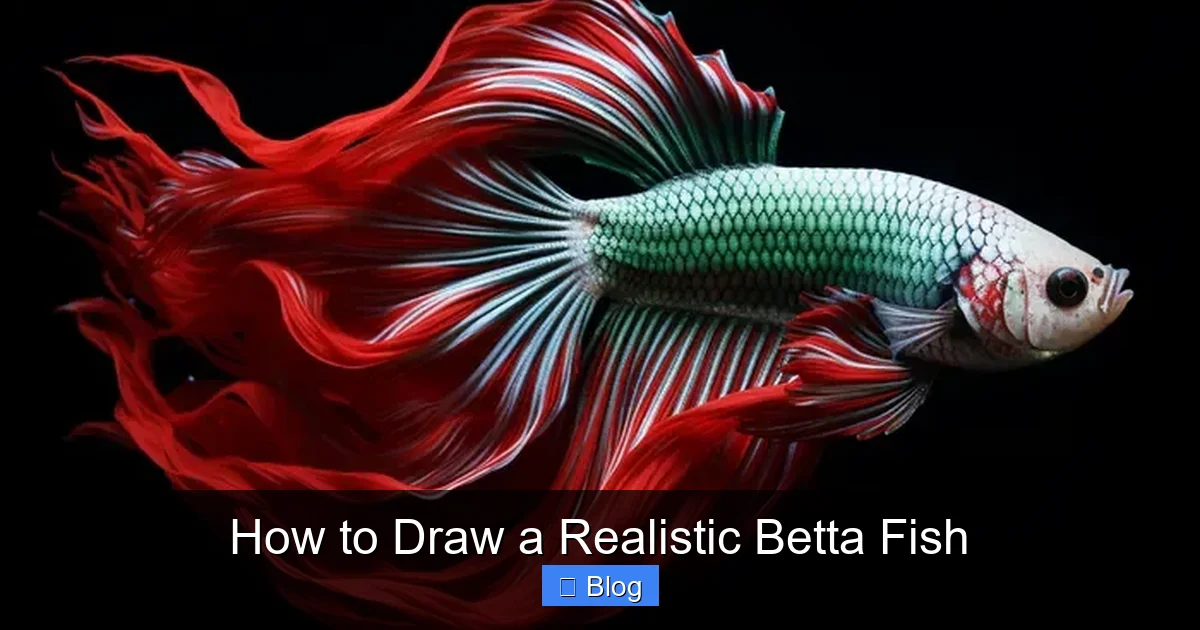
Refine the oval into a more fish-like head. The mouth is a tiny, upward curve. The eye is a circle with a smaller pupil. Add a slight bump for the operculum (gill cover) behind the eye. Betta eyes are often a solid black or dark color with a tiny, sharp white highlight—this highlight is crucial for making the eye look alive. Place it precisely.
sculpting the Fins: The Illusion of Transparency
This is the most important step for realism. Erase your initial fin triangles. Now, redraw each fin as a series of curved, overlapping fin rays.
- Start at the base where the fin attaches to the body. Draw 5-7 strong, slightly curved lines radiating out. These are the primary rays.
- From these primary rays, draw secondary rays branching out like a tree’s limbs. They should get finer and closer together toward the fin’s edge.
- The webbing connects them. Instead of drawing a solid line, draw a soft, curved line that connects the tips of the rays, following their direction. The webbing is often thinnest and most transparent at the very edges.
- Crucial Detail: Fins are not flat. They have folds. Where a fin curves, the rays on the outside of the curve stretch out and become more visible, while rays on the inside compress and may even overlap. Draw this! It creates the illusion of a thin, flowing membrane caught in water.
Sketching the Scale Pattern
Betta scales are small, concentric rings. You don’t need to draw every single one. Instead, suggest the texture: on the main torso, draw tiny, overlapping curved lines or short, dashes that follow the form of the body—wider on the sides, tighter on the top and bottom near the spine. The scales on the head are often smaller and may form a different pattern. Keep this layer light; it’s a texture map for your colors later.
The Magic of Color and Texture: Making it Iridescent
This is where your betta transforms from a pencil sketch into a shimmering creature. The key to betta color is iridescence—colors that change based on viewing angle and light. We’ll achieve this with layers.
Choosing Your Palette and Medium
For beginners, colored pencils (especially water-soluble ones) or watercolor brushes offer great control. Digital artists can use soft, low-opacity brushes. Look at your reference: note the dominant color (e.g., blue), the secondary color (e.g., red or green), and the metallic sheen (often a mix of yellow/white). You’ll need at least 3-4 shades of your main color (light, mid, dark) and a contrasting color for the iridescent flash.
Layering for Luminous Color
Step 1: The Base Wash. Apply a light, even layer of your main mid-tone color over the entire body and fins. Leave the scale texture areas slightly lighter. For fins, use a very light touch—they are translucent.
Step 2: Building Depth. Using a darker shade of your main color, add shadows. Where does shadow fall? Typically: under the jaw, along the belly, on the side opposite your light source, and in the folds and creases of the fins. Follow the form of the body—shadows on a curved torso should be curved.
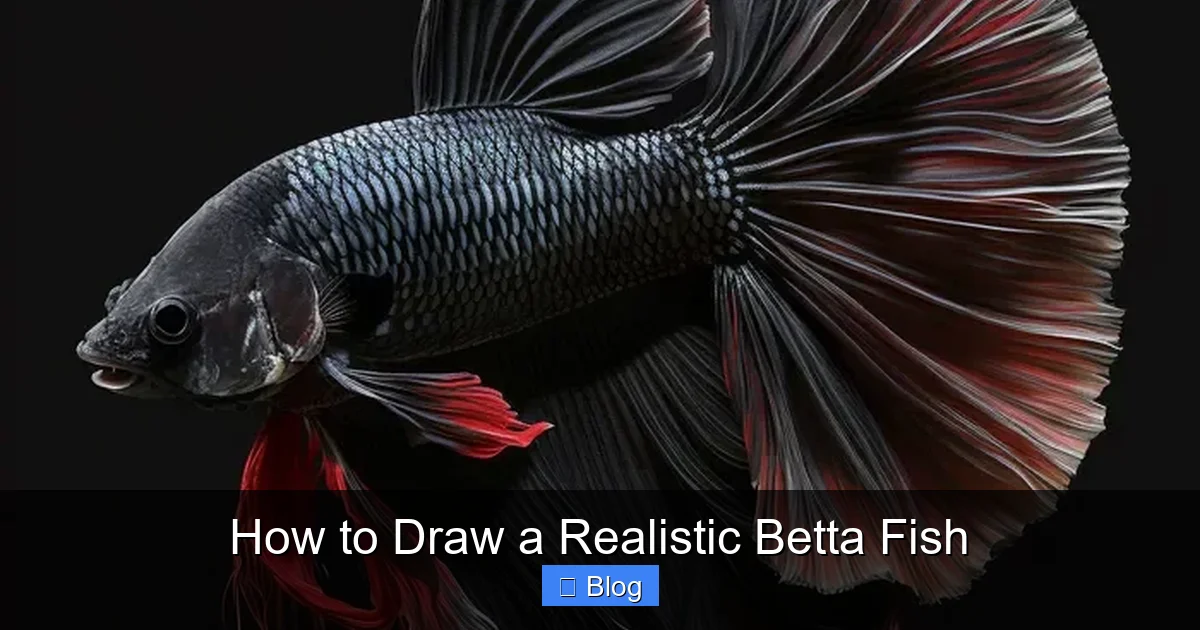
Step 3: The Iridescent Flash. This is the secret weapon. Identify the areas where the light hits most directly—the very tops of the dorsal and anal fins, the crown of the head, the upper edge of the caudal fin. Here, apply a thin, bright layer of your contrasting iridescent color (e.g., a touch of bright teal on a red betta, or electric blue on a dark blue one). Blend it softly into the base color. This creates the magical color shift.
Step 4: Final Highlights. Use a white colored pencil, gel pen, or opaque watercolor to add sharp, tiny highlights. Place them on the very tips of fin rays, the top edge of the head, and the highest points of the body curve. These are the “sparkles” that sell the wet, shiny look.
Final Touches and Common Pitfalls to Avoid
Step back. Look at your drawing as a whole. Now, refine.
Deepening the Background and Contrast
A simple, soft background (a gradient of pale blue or black) can make your betta pop. It doesn’t need to be detailed. More importantly, check your value contrast. Is the darkest part of the fish (the shadow under the belly) dark enough? Is the lightest highlight (on the fin tip) bright enough? Increasing this contrast will add instant drama and realism.
Sharpening Key Details
With a sharp pencil or fine brush, go back and reinforce:
- The delicate, branching pattern of the fin rays.
- The tiny, crisp scales along the spine and cheek.
- The sharp white glint in the eye (this is often overlooked but is vital for life).
- The subtle texture of the gill cover.
Three Classic Mistakes (and How to Fix Them)
- Mistake: Fins look like flat paper cutouts. Fix: Always draw fins as curved, overlapping planes. Add internal shadow within the fin folds to show volume.
- Mistake: The fish looks like a sticker, not in water. Fix: Add a very soft, diffused glow or a few tiny, rising bubbles around the body. Ensure your highlights are sharp and your shadows are soft and blended.
- Mistake: Colors look muddy and flat. Fix: Layer, layer, layer. Use clean, saturated colors for your base. Add the iridescent flash as a separate, bright layer. Reserve your pure white for only the brightest highlights.
Conclusion: Your Journey to a Lifelike Betta
Drawing a realistic betta fish is a journey of patience and observation. It teaches you to see not just a fish, but a collection of elegant forms, translucent planes, and shimmering light. By starting with solid anatomical foundations, building with simple shapes, and mastering the layered techniques for color and texture, you equip yourself to capture that impossible elegance. Don’t be discouraged if your first attempt isn’t perfect. Each sketch teaches you more about fin flow, scale pattern, and light. So gather your references, start with a light curve, and let the flow of the fins guide your hand. The stunning, lifelike betta waiting on your page is worth every careful stroke.
Frequently Asked Questions
What’s the single most important thing for drawing realistic betta fins?
The most critical element is to draw fins as three-dimensional, curved planes with overlapping fin rays, not as flat shapes. Always show the folds and the transparency by varying the darkness and density of your lines or color.
I keep making my betta look stiff. How can I add more movement?
Focus on the line of action—a single, smooth curve that defines the fish’s overall pose and flow. Also, ensure the fins are curving and trailing in the direction of that implied water current, not sticking straight out like a fan.
What art supplies are best for a beginner?
Start simple! A good set of graphite pencils (HB, 2B, 4B), smooth drawing paper, and a kneaded eraser are perfect for practicing form and value. For color, professional-grade watercolor pencils or a basic set of alcohol markers (like Copic or Prismacolor) offer beautiful, blendable results.
How do I choose the right reference photo?
Look for high-resolution, well-lit photos where the betta’s fins are fully spread and you can clearly see the individual fin rays and scale texture. Avoid blurry or overly filtered images. Having multiple angles (side, top, 3/4 view) is incredibly helpful.
My betta’s colors look dull. How do I achieve that shiny, iridescent look?
The key is layering and contrast. Establish a clean, saturated base color. Then, add a brighter, contrasting color (like turquoise on red, or electric blue on dark) only in the areas of strongest direct light. Finish with a sharp, pure white highlight on the very tips and highest curves.
Is it okay to stylize or simplify the fins for a less realistic look?
Absolutely! Realism is just one goal. Once you understand the true structure and flow of the fins, you can intentionally simplify or exaggerate them for a more graphic, stylized, or artistic effect. Knowledge of the real thing gives you the power to bend the rules creatively.