How to Clean Out Betta Fish Tank
Cleaning a betta fish tank properly is crucial for your fish’s health and longevity. It involves regular partial water changes with dechlorinated water, gentle cleaning of decorations, and never using soap. Consistent maintenance, not occasional deep cleans, is the secret to a crystal-clear tank and a vibrant, stress-free betta. Avoid over-cleaning and always match water temperature and parameters to prevent shock.
Welcome to the wonderful, rewarding world of betta fish ownership! Those flowing fins and bold personalities captivate us. But behind that beautiful betta is a simple, non-negotiable truth: a clean tank is a healthy tank. A dirty environment is the fastest route to a sick, stressed, or prematurely lost fish. Yet, “cleaning the tank” is often misunderstood. It’s not about tearing the whole setup apart every week. It’s a gentle, science-backed routine that respects the delicate ecosystem you’ve built. This guide will walk you through exactly how to clean out a betta fish tank the right way, ensuring your aquatic friend lives a long, vibrant life.
Key Takeaways
- Partial water changes (25-50%) weekly are the gold standard: This removes toxins and waste without disrupting the beneficial bacteria colony or stressing your betta.
- Never use soap, detergents, or household cleaners: Even a tiny residue is lethal to fish. Use only water and designated aquarium tools (like a gravel vacuum) for scrubbing.
- Always treat tap water with a water conditioner: Chlorine and chloramines in tap water are fatal; conditioner makes it safe instantly.
- Match water temperature and parameters precisely: New water must be within 1-2°F of tank water and have similar pH/GH to avoid dangerous thermal or osmotic shock.
- Clean the glass and decorations, but don’t over-scrub: Remove algae with an algae pad or toothbrush, but leave some beneficial biofilm on surfaces and never sterilize all decorations at once.
- Your filter needs gentle cleaning, not a deep clean: Rinse filter media in the old tank water you just removed during the water change to preserve good bacteria.
- Observe your betta during and after cleaning: Lethargy, clamped fins, or frantic swimming post-cleaning indicate a problem with water parameters or temperature mismatch.
📑 Table of Contents
- Why Cleaning Your Betta Tank is Non-Negotiable
- Gathering Your Betta Tank Cleaning Arsenal
- The Step-by-Step Guide to a Partial Water Change
- When and How to Perform a Full Tank Clean
- Mastering Water Parameters: The Key to a Healthy Betta
- Establishing a Sustainable Cleaning Routine
- Common Cleaning Mistakes That Harm Bettas
- A Strong Conclusion: Clean Tank, Happy Betta
Why Cleaning Your Betta Tank is Non-Negotiable
Before we dive into the “how,” let’s establish the “why.” Your betta lives in a closed environment. Everything it excretes, every uneaten food pellet, and every decaying plant leaf breaks down into toxic compounds. The primary villains are ammonia and nitrites, which burn gills and poison the fish. Beneficial bacteria in your filter and on surfaces convert these into less harmful nitrates. But nitrates accumulate too, causing stress and algae blooms. Regular water changes dilute these toxins, replenish essential minerals, and maintain stable water chemistry. For a betta, with its famous labyrinth organ (which allows it to breathe air) but still highly sensitive gills, pristine water quality is absolutely critical. A clean tank isn’t about aesthetics alone; it’s the foundation of disease prevention and vitality.
The Myth of the “Self-Sustaining” Tank
Some new keepers hear about the “nitrogen cycle” and assume a cycled tank needs no maintenance. This is a dangerous misconception. A cycled tank has bacteria to *process* toxins, but it does not *remove* them. The nitrates produced by the cycle are still present and need physical removal via water changes. Think of your filter as a busy factory converting ammonia to nitrate, and your siphon as the truck hauling the waste product (nitrate) away. Without the truck, the warehouse (your tank) fills up with trash.
Signs Your Betta Tank Needs Immediate Attention
Sometimes, you need to act before your weekly schedule. Watch for these red flags:
- Visible debris or murky water: Cloudiness often indicates a bacterial bloom from excess waste.
- Algae overgrowth: While some is normal, thick green hair algae, black beard algae, or a pervasive film signal nutrient imbalances.
- Your betta is lethargic, gasping at the surface, or has clamped fins: These are classic signs of poor water quality.
- A strong, “fishy” odor: A clean aquarium has little to no smell. A pungent odor means waste is breaking down.
If you see these, a partial water change is the first and most important step.
Gathering Your Betta Tank Cleaning Arsenal
You cannot clean a betta tank properly without the right tools. Having everything ready makes the process smooth and fast, minimizing stress for you and your fish. Invest in quality items once; they’ll last for years.
Essential Tools: The Non-Negotiables
- Aquarium Gravel Vacuum/Siphon: This is your #1 tool. It’s a plastic tube with a wide mouth that sucks debris from the substrate while removing water. Get a size appropriate for your tank (a 6-inch mini-siphon is perfect for a 5-gallon betta tank).
- Water Conditioner/Dechlorinator: Seachem Prime is the industry gold standard, but any reputable brand will do. It neutralizes chlorine, chloramines, and heavy metals instantly.
- Bucket (Dedicated):strong> Have a clean 5-gallon bucket used only for aquarium work. Never use a bucket that held soap or chemicals.
- Algae Pad/Scraper: A non-scratch pad (magic eraser-type works well) or a single-edged razor blade (for glass only, be careful!) for the inside glass.
- Old, Clean Towels or Paper Towels: For wiping up spills. Keep them separate from kitchen towels.
- Thermometer: To verify the temperature of your new water matches the tank.
Optional but Helpful Extras
- Bucket Pump or Python: For larger tanks, a system that connects to your sink can make water changes incredibly easy.
- Plant Tweezers/Scissors: If you have live plants, for precision trimming.
- Magnetic Glass Cleaner: Great for tanks with thick glass, allowing you to clean the outside without getting your arm wet.
- Turkey Baster: Excellent for sucking out debris from tight corners or plant bases without disturbing substrate too much.
What You Will Never Use: The Forbidden List
This cannot be stressed enough. The following items have no place near your aquarium:
Soap, detergent, vinegar (for cleaning inside), bleach (except in extreme, isolated disinfection cases), household cleaning sprays, abrasive scrubbers (like steel wool), and any cloth that has been washed with fabric softener. Residue from these is toxic. For stubborn mineral deposits on the glass outside, use vinegar on a cloth, rinse thoroughly with water, and wipe again with a water-dampened cloth before any water from that cloth touches the tank.
The Step-by-Step Guide to a Partial Water Change
This is the heart of betta tank maintenance. A 25-50% partial water change (PWC) should be done weekly. It’s quick, effective, and low-stress. Let’s walk through the process.
Preparation: Unplug, Test, and Gather
First, unplug any heaters and filters. This is for safety and to prevent them from running dry if the water level drops too low. Next, test your tank water with a liquid test kit (dip strips are inaccurate). Note your ammonia, nitrite, nitrate, and pH. This establishes a baseline. Now, gather your bucket, siphon, water conditioner, and towel. Rinse your siphon hose with dechlorinated water or tap water (just don’t let soap near it).
Step 1: Siphon Out the Old Water & Debris
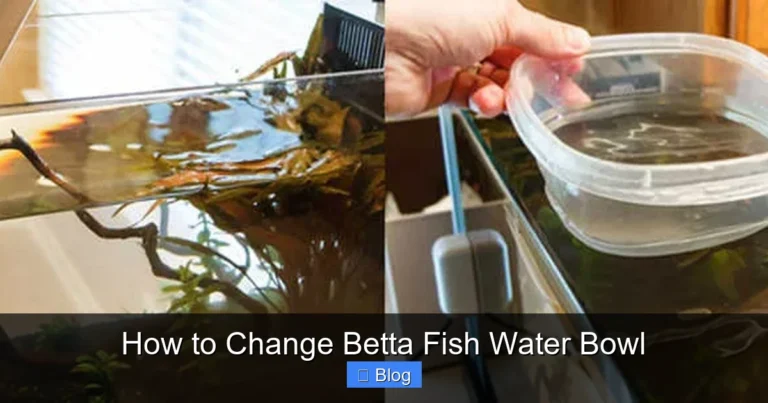
Submerge the wide end of your gravel vacuum in the tank and the other end in your bucket. Start the siphon by sucking on the tube (be careful not to swallow water!) or by using a pump. Once flowing, plunge the vacuum’s mouth into the substrate. Gently push it down a half-inch and lift. You’ll see debris and fish waste getting sucked up into the bucket. Move systematically around the tank, focusing on areas where waste accumulates—behind decorations, in corners, and in front of the filter outlet. Do not dig deeply into the substrate. Just skim the top layer. Your goal is to remove detritus, not to sterilize every grain of gravel. This process simultaneously removes water and solid waste.
Step 2: Clean the Glass and Decorations
While the siphon is running (or after), use your algae pad to gently scrub the inside glass. Use short strokes, pressing lightly. For tough algae, use a single-edged razor blade held at a low angle, but never on acrylic tanks. Next, remove any large decorations (rocks, castles, logs). If they have algae, use your algae pad or a dedicated, never-used toothbrush to scrub them in the old tank water you just siphoned into the bucket. Never use soap. Rinse them well in the same bucket of old water. This preserves beneficial bacteria that live on these surfaces.
Step 3: Clean the Filter (The Gentle Touch)
Your filter media (sponges, ceramic rings, bio-balls) houses the crucial beneficial bacteria. You must clean it, but gently. Remove the filter cartridge or media from the filter. Gently rinse it in the same bucket of old tank water you’ve been using. Squeeze sponge filters a few times to dislodge debris. The water will turn brown—that’s fine. You are removing the large, clogging particles, not sterilizing it. Do not use tap water, as chlorine will kill the bacteria. If your filter has a separate mechanical stage (like a sponge pre-filter), clean that more thoroughly. Reassemble and place it back in the tank.
Step 4: Prepare the New Water
Fill your dedicated bucket with fresh tap water. Check the temperature with your thermometer. It must be within 1-2°F of your tank water. If it’s too cold, add a bit of warm (not hot) tap water and mix. If it’s too warm, let it sit for 10 minutes. Once the temperature matches, add the correct dosage of water conditioner. Follow the bottle instructions—for Prime, it’s 1 cap (5ml) per 50 gallons, but for a small betta tank, you’ll need a fraction. Use a dropper for accuracy. Let it sit for a minute to fully neutralize chemicals.
Step 5: Refill the Tank Slowly
This is a critical step. Never dump the new water in. Place the end of your siphon hose (or a clean pitcher) above the water line and create a gentle stream. You can pour the water onto a clean plate or decoration to diffuse the flow. The goal is to avoid shocking your betta with a sudden current or temperature change. Fill the tank to the original water line. Take your time. Once full, wipe down the outside of the tank with a clean, dry microfiber cloth.
Step 6: Restart and Observe
Plug your heater and filter back in. Ensure the filter is flowing properly and the heater is submerged. Now, watch your betta for 15-30 minutes. It should swim normally, exploring the refreshed water. If it’s darting or hiding excessively, double-check your water temperature and parameters. A slight increase in activity is normal as the betta enjoys the cleaner water.
When and How to Perform a Full Tank Clean
A full tank clean—removing all fish, water, and substrate—is a major event and should be rare, done only once or twice a year at most, or if you’re dealing with a serious disease outbreak that requires tank sterilization. For a healthy betta, this is overkill and extremely disruptive. The goal is to preserve your beneficial bacteria colony, which lives in the filter media and substrate. Draining everything and scrubbing it all with water (never soap) resets the cycle, forcing you to start the nitrogen cycle from scratch—a dangerous 4-6 week process where ammonia and nitrite can spike and kill your fish.
The Rare Exceptions for a Full Clean
- Major Disease Outbreak: If your betta has a highly contagious disease like columnaris or severe velvet, a full sterilization may be necessary after treatment.
- Persistent, Uncontrollable Algae: If every surface is coated in stubborn algae despite proper maintenance, a reset can help.
- Tank Upgrade: Moving to a larger, properly cycled tank.
The Safe Full Clean Procedure (If Absolutely Necessary)
If you must do a full clean, here is the safest way:
- Prepare a Hospital Tank: Have a clean, cycled quarantine tank (even a small 2.5-gallon) ready with heated, conditioned water at the exact same parameters. Move your betta here first.
- Preserve Your Filter Bacteria: Take your filter media (sponges, bio-rings) and place them in a bucket with just enough old tank water to keep them damp. Do not rinse them under tap water.
- Remove Everything: Take out all decorations, plants, and substrate. Rinse substrate in a bucket of dechlorinated water, swishing it to remove debris. Discard the old substrate if you’re replacing it.
- Clean Tank and Decor: Use hot tap water and an algae pad/scrubber on the empty tank and all decorations. For disinfection (in disease cases), a very dilute bleach solution (19 parts water to 1 part bleach) can be used for 10-15 minutes, followed by multiple, thorough rinses in dechlorinated water and air-drying. For routine cleans, hot water is sufficient.
- Reassemble and Re-cycle: Put clean substrate back in. Add decorations. Place your filter media (still damp with old tank water) back into the filter. Fill with new, conditioned, temperature-matched water. Do not add your betta yet.
- The Waiting Game: You now have a “new” tank with no nitrogen cycle. Test water daily. You will likely see ammonia appear, then nitrite, then finally nitrates. Only when ammonia and nitrite are consistently at 0 ppm for several days is it safe to reintroduce your betta. Use water changes to control ammonia spikes during this period. This process can take 4-6 weeks.
This is why a full clean is a last resort. The weekly partial water change is infinitely better for your betta’s long-term health.
Mastering Water Parameters: The Key to a Healthy Betta
Cleaning isn’t just about removing gunk; it’s about maintaining specific water chemistry. Bettas are tropical fish from slow-moving waters in Thailand. They prefer warm, stable, slightly acidic to neutral water.
The Critical Parameters to Know and Test
- Temperature: 78-80°F (25.5-26.5°C) is ideal. A reliable aquarium heater is non-negotiable for most climates. An inaccurate heater is a silent killer.
- pH: 6.5 – 7.5 is the safe range. Sudden swings are more dangerous than a stable, slightly “off” pH.
- Ammonia (NH3/NH4+): Always 0 ppm. Any detectable ammonia is toxic.
- Nitrite (NO2-): Always 0 ppm. Highly toxic.
- Nitrate (NO3-): Should be kept below 20 ppm, ideally below 10 ppm. This is what your water changes control.
- General Hardness (GH): 3-4 dGH (50-70 ppm) is ideal. Bettas come from soft water.
- Carbonate Hardness (KH): 3-5 dKH (50-90 ppm). This buffers pH, preventing crashes.
Use a liquid test kit like the API Freshwater Master Test Kit. Dip strips are notoriously inaccurate, especially for ammonia and nitrite. Testing is the only way to know what’s in your water.
The Role of Water Conditioner Beyond Dechlorination
Modern conditioners like Seachem Prime do more than neutralize chlorine. They also temporarily bind to ammonia and nitrite, making them less toxic for 24-48 hours. This is a crucial safety net during a cycle or if you accidentally overfeed. However, it is not a substitute for actual removal via water changes. It buys you time, but the toxins are still present and must be physically removed.
Understanding the Nitrogen Cycle in Your Betta Tank
This is the ecosystem you’re maintaining. Fish waste -> Ammonia (toxic) -> Nitrosomonas bacteria convert to -> Nitrite (toxic) -> Nitrobacter bacteria convert to -> Nitrate (less toxic). The bacteria live on surfaces, especially in your filter’s media. When you clean your filter in tap water, you wipe out these colonies. When you do massive water changes with very different water, you shock the remaining bacteria. This is why gentle, consistent maintenance is key—it supports a stable bacterial population that keeps your betta safe.
Establishing a Sustainable Cleaning Routine
Consistency is everything. A predictable schedule prevents parameter crashes and keeps the tank looking great. Here is a sample routine for a 5-gallon planted betta tank with a filter.
The Weekly Maintenance Checklist (30-45 Minutes)
- Test Water: Check ammonia, nitrite, nitrate, pH. Log results.
- Partial Water Change (25-50%): Follow the step-by-step guide above.
- Clean Glass: Scrape algae off the inside.
- Gently Rinse Filter Media: In old tank water, only if it’s visibly clogged (flow is reduced). If it’s not dirty, leave it.
- Trim Plants & Remove Debris: Use tweezers to remove dead leaves and trim overgrowth.
- Wipe Down Exterior: Clean the outside glass and hood.
- Check Equipment: Ensure heater is on, filter is flowing, and no unusual sounds.
The Monthly/Bi-Monthly Deep(ish) Tasks
- Deep Clean Gravel Vacuuming: On your monthly PWC, go a little deeper into the substrate in different sections (rotate zones) to get more settled waste, but still not to the bottom of the tank if you have a deep substrate layer.
- Clean Powerheads/Pump Intakes: If you have an external filter or powerhead, disassemble and clean the intake sponge or pre-filter.
- Inspect and Replace Filter Media: Replace mechanical media (like filter floss) monthly. Biological media (ceramic rings, bio-balls) should only be replaced a small portion at a time (e.g., 25% every 6 months) to avoid a bacteria crash.
- Prune Plants More Aggressively: Trim roots and foliage to maintain shape and light penetration.
Adjusting for Your Specific Setup
Unfiltered Betta Bowl (Not Recommended, but Common): You must do a 100% water change every 2-3 days. There is no bio-filter. Use a clean container for the fish, and a separate clean container for the new water. Scrub everything with hot water only. This is labor-intensive and why a filtered tank is strongly advised.
Heavily Planted “Walstad” Tank: These soil-based, no-filter tanks rely on plants to consume waste. Water changes are smaller (10-20%) and less frequent (every 2-4 weeks), but you must monitor nitrate levels closely. Gently prune plants and remove dead leaves.
Tank with a Betta Sorority (Multiple Females): Bioload is higher. You may need to do 50% water changes twice a week and monitor parameters daily.
Common Cleaning Mistakes That Harm Bettas
Even with good intentions, it’s easy to make errors. Here are the most frequent pitfalls and how to avoid them.
Over-Cleaning: The “Sterile Tank” Fallacy
The biggest mistake is the urge to make everything sparkle and brand new. Scrubbing every surface with (heaven forbid) soap, replacing all filter media at once, or using untreated tap water to rinse decorations annihilates your beneficial bacteria. This causes “new tank syndrome” in an established tank—a spike in ammonia and nitrite that can kill your betta within hours. Your goal is to remove waste, not sterilize. Leave the brown gunk on your filter sponge and the slight biofilm on decorations. It’s good bacteria!
Temperature and Parameter Shock
Dumping cold tap water into a warm tank, or using water with a vastly different pH or mineral content, causes osmotic shock. Your betta’s cells can rupture or collapse. Always match temperature and, if possible, pH/GH. Using a separate heater to warm your change water in the bucket is a pro tip for consistency.
Ignoring the Filter’s Role
Some people turn off the filter during the water change for hours. Don’t do this. Keep it running if the water level doesn’t drop below the intake. If you must turn it off, do so only for the 15-20 minutes you’re physically working in the tank, then turn it back on. Prolonged shutdown kills the aerobic bacteria in the media.
Using the Wrong Tools in the Wrong Way
Poking a gravel vacuum deep into the substrate can stir up anaerobic gas pockets (hydrogen sulfide) that are toxic. Just skim the top ½ inch. Using a razor blade on an acrylic tank will scratch it permanently. Know your tank material.
Forgetting to Dechlorinate
It seems obvious, but it happens. Always, always add conditioner to the new water before it touches your fish or the tank. If you forget and add untreated water, immediately do another partial change with properly conditioned water.
A Strong Conclusion: Clean Tank, Happy Betta
Cleaning your betta fish tank doesn’t have to be a dreaded chore. When you understand the “why” behind each step—preserving beneficial bacteria, removing toxins, and maintaining stability—it becomes a simple, weekly ritual of care. It’s the single most impactful thing you can do for your betta’s health, color, and activity level. A clean tank means a betta that flares happily, builds bubble nests, and lives its full 3-5 year lifespan (or more!). By following this guide, using the right tools, and avoiding the common mistakes, you’re not just maintaining an aquarium; you’re providing a pristine, stress-free home for a truly special pet. Now, grab your siphon and give your betta the gift of clean water this week. It will thank you with every elegant fin sweep.
Frequently Asked Questions
How often should I completely clean my betta fish tank?
You should never need to do a full tank clean (removing all water and substrate) on a healthy, cycled betta tank. A 25-50% partial water change weekly is sufficient and far healthier. Reserve a full clean for rare cases like a severe disease outbreak or a complete reset after a major algae problem.
Can I use tap water directly for my betta tank water changes?
Never. Tap water contains chlorine and chloramines, which are lethal to fish. You must always treat tap water with a complete water conditioner/dechlorinator like Seachem Prime before it enters the tank. Let the conditioned water sit for a minute to ensure full treatment.
Do I need to take my betta out of the tank during a partial water change?
No, you do not. A properly performed partial water change (25-50%) is done with the fish in the tank. Removing the betta causes unnecessary stress. Only remove your betta if you are performing a full tank clean or if it is extremely stressed and you need to isolate it.
What temperature should the new water be for a betta tank?
The new water must be within 1-2°F (about 0.5-1°C) of your existing tank water temperature. For a betta, this is typically 78-80°F (25.5-26.5°C). Use an in-tank thermometer to check both the tank and your new water bucket before refilling. A temperature mismatch is a common cause of shock.
How do I control algae without harming my betta?
Control algae by managing light (8-10 hours max per day), not overfeeding, and performing regular water changes to remove nitrates. Physically scrub it off glass and decorations during your weekly clean. You can also add live plants to out-compete algae for nutrients. Avoid chemical algae removers, as they can harm your betta and disrupt the cycle.
My betta is acting stressed after a water change. What did I do wrong?
>Stress after a water change is usually due to one of three things: 1) The new water temperature was too different from the tank. 2) The water parameters (pH, GH) changed drastically. 3) You accidentally used tap water without conditioner. Test your new water parameters and temperature before the next change. Ensure you are matching them closely and always use conditioner.