How to Clean Your Betta Fish Bowl
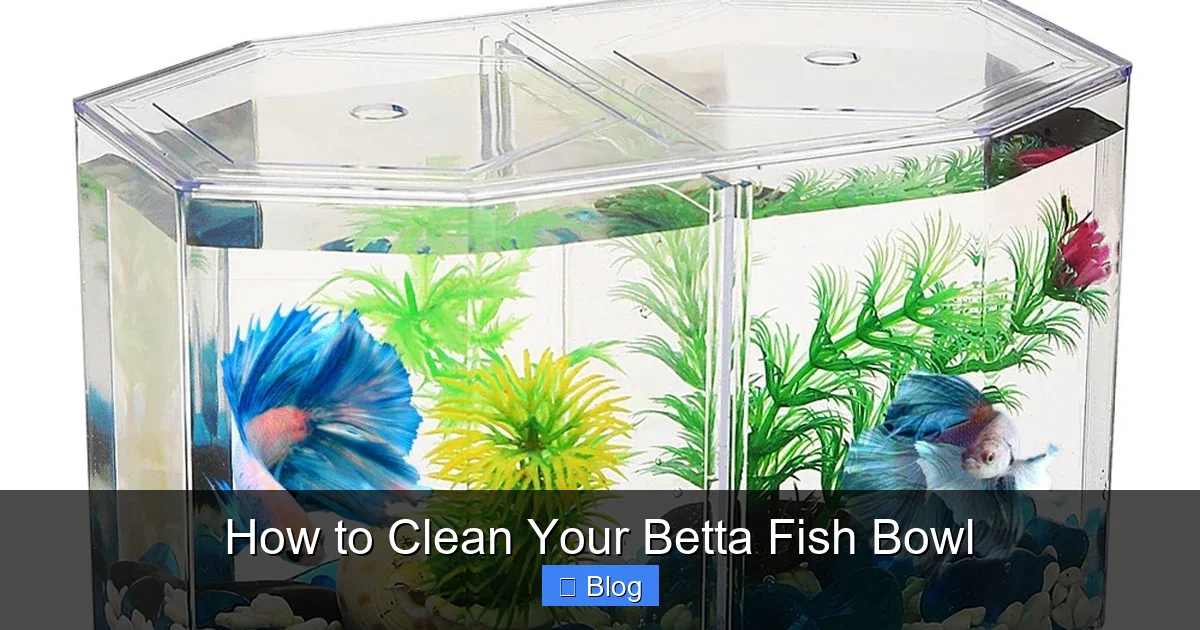
Cleaning your betta’s bowl incorrectly is a leading cause of stress and illness. It’s not about scrubbing everything clean, but about preserving the essential good bacteria. This guide shows you exactly how to perform a partial water change safely, condition tap water properly, and avoid deadly cleaning products. A clean bowl is a happy, healthy bowl.
So, you’ve got a beautiful betta fish, a vibrant little personality swimming gracefully in his bowl. You love him, you want the best for him, and you know a clean home is part of that. But here’s the critical thing you need to understand right away: cleaning your betta fish bowl is not about making it sparkle like a new glass. It’s a delicate balancing act between removing harmful waste products and protecting the invisible, life-sustaining ecosystem that lives in that water. Do it wrong, and you can harm or even kill your fish. Do it right, and you provide a foundation for a long, healthy life. Let’s walk through exactly how to clean your betta fish bowl the safe and effective way.
Key Takeaways
- Never use soap or chemicals: Even a tiny residue of dish soap, bleach, or household cleaner is lethal to bettas and will destroy the nitrogen cycle.
- Preserve the filter media: If your bowl has a filter, never rinse the cartridge in tap water. Gently swish it in old tank water to remove debris and keep beneficial bacteria alive.
- Match water temperature exactly: The new water you add must be within 1-2°F (0.5-1°C) of the old water to prevent thermal shock, a serious stressor for bettas.
- Condition all tap water: Tap water contains chlorine and chloramines that are toxic to fish. Always use a complete water conditioner before adding water to the bowl.
- Clean the glass with algae pads only: Use magnetic algae cleaners or pads designed for aquariums. Never use sponges, paper towels, or your hands that may have soap residue.
- Change 25-50% of the water weekly: A full, 100% water change is traumatic. Partial changes remove toxins while maintaining a stable environment and beneficial bacteria.
- Never remove your betta unless absolutely necessary: Moving the fish is highly stressful. Clean the bowl around him with a siphon and careful wiping.
📑 Table of Contents
- Why Proper Cleaning is Non-Negotiable for Betta Health
- Gathering Your Safe Cleaning Supplies
- The Step-by-Step Guide to a Safe Partial Water Change
- Common Cleaning Mistakes That Harm Bettas
- The Importance of Water Conditioning & Testing
- Establishing a Long-Term Cleaning & Maintenance Schedule
- Conclusion: A Clean Bowl is a Commitment, Not a Chore
Why Proper Cleaning is Non-Negotiable for Betta Health
Before we get to the “how,” we must firmly establish the “why.” Bettas are often kept in small, unfiltered bowls, which is already a compromise to their natural habitat. In these confined spaces, water quality can deteriorate with shocking speed. Fish waste (ammonia), uneaten food, and decaying plant matter create a toxic soup. Beneficial bacteria are your silent allies, converting deadly ammonia to less harmful nitrite and then to nitrate. The goal of cleaning is to remove the nitrate and solid debris while leaving these bacterial colonies intact. A proper cleaning routine prevents:
- Ammonia & Nitrite Poisoning: Causes burns, respiratory distress, and death.
- High Nitrate Levels: Leads to stress, suppressed immune system, and makes your betta susceptible to diseases like fin rot.
- Bacterial Blooms & Cloudy Water: Sign of an unbalanced ecosystem, often caused by over-cleaning.
- Fin Rot & Other Infections: Often a direct result of poor water parameters.
Think of it this way: you’re not cleaning a glass on a shelf. You’re performing maintenance on a living, breathing, miniature aquatic world. Your approach must be surgical, not industrial.
The #1 Myth: “Clean It Like a Drinking Glass”
The most dangerous misconception is that a betta bowl should be scrubbed with soap and rinsed until it’s spotless. This is a death sentence for your fish. Soap residues are acutely toxic. More importantly, it strips every surface of the beneficial bacteria that process waste. After such a “clean,” the bowl will cycle through a toxic ammonia spike within days as new waste has no biological filter. You’ve reset the entire ecosystem to zero, putting your betta in immediate danger. We will never, ever use soap.
Gathering Your Safe Cleaning Supplies
Having the right tools on hand makes the process smooth and prevents you from making dangerous substitutions. Assemble these items before you begin:
Visual guide about How to Clean Your Betta Fish Bowl
Image source: m.media-amazon.com
- A Dedicated Bucket or Container: This is for the old water you remove. It must be used only for your aquarium. Never use a bucket that has held cleaning chemicals, even if you think it’s clean.
- A Gravel Vacuum/Siphon: This is your most important tool. A simple plastic squeeze-bulb siphon (like the Python or Aqueon models) is perfect. It removes debris from the substrate without disturbing it too much and allows you to control water removal.
- Water Conditioner: A non-negotiable product that neutralizes chlorine, chloramines, and heavy metals. Seachem Prime is a gold-standard, but any reputable brand (API Stress Coat+, Tetra AquaSafe) will work. Have it ready before you add new water.
- Algae Scraper/Pad: A plastic-bladed scraper for glass or acrylic. Magnetic cleaners are great for bowls as you don’t need to stick your hand in. Use a new, unused pad that has never touched soap.
- Clean Cloth or Paper Towels: Dedicated to the aquarium. Do not use the kitchen towel! Use these to wipe the outside of the bowl and any decorations you remove.
- Thermometer: To ensure your new water temperature matches the old water perfectly.
- A Large Container for New Water: To hold and temperature-match the replacement water before it goes in the bowl.
What You Absolutely MUST NOT Use
Memorize this list. Keep it on the fridge if you must. Never use:
- Dish soap, hand soap, or any household cleaner.
- Bleach (unless in a separate, extreme quarantine tank disinfection process, which is advanced and not for routine cleaning).
- Vinegar or other acids (can leave harmful residues and alter pH).
- Sponges or scrubbers from your kitchen.
- Any towel that has been washed with fabric softener or dryer sheets (residues are toxic).
The Step-by-Step Guide to a Safe Partial Water Change
This is the core of your cleaning routine. We will perform a 25-50% water change. For a single betta in a 2-5 gallon bowl, 25% is often sufficient weekly; for smaller bowls (under 2.5 gallons), you may need to do 25% twice a week. Never do a 100% change unless in an emergency, and even then, you must be exceptionally careful.
Step 1: Preparation – The Golden Rule of Temperature
This is the most critical step for preventing shock. Your new replacement water must be the exact same temperature as the water in the bowl. Start by filling your clean container with the amount of new water you plan to add (e.g., 1 gallon for a 25% change in a 4-gallon tank). Place the container near the bowl and let it sit for 30-60 minutes so it adjusts to room temperature. Then, use your thermometer to check the temperature of both the old tank water and the new water. Adjust the new water with a little warm or cool tap water until they are identical. This simple step eliminates one of the biggest stressors for your betta.
Step 2: The Siphon – Removing Old Water & Debris
Now, gently insert the gravel vacuum into the substrate. Do not dig deep and violently churn up everything. The goal is to remove loose debris—uneaten food pellets, fish poop, dead plant matter—that has settled on top. Squeeze the bulb to start the siphon, then hold the end of the tube above a bucket. Gently move the vacuum over the gravel in a slow, systematic pattern. You’ll see junk being sucked up. Stop squeezing once the flow starts, and let gravity do the work. If you see your betta, simply guide the vacuum away from him. Siphon out the desired percentage of water (e.g., 1 gallon from a 4-gallon bowl).
Step 3: Cleaning Decor & Glass (Without Soap!)
With the water level lowered, you have better access.
- Decorations: Remove any ornaments, rocks, or silk plants. Gently rinse them in the bucket of old tank water you just siphoned out. Swish them around to dislodge algae or slime coat. The old water contains beneficial bacteria, so this is a safe rinse. Do not use the new, conditioned water for this.
- The Glass: Use your dedicated algae scraper or pad. For stubborn algae on the inside, hold the scraper at a 45-degree angle and use gentle, short strokes. For the outside, just wipe with your clean, damp cloth. Never sand or scratch the glass.
- The Filter (If Present): If your bowl has a small internal filter, unplug it. Remove the filter cartridge. Gently swish it back and forth in the bucket of old tank water to remove clogged debris. Do not squeeze it dry or run it under the tap. You would destroy the bacterial colony. If the media is falling apart, replace it, but do a staggered replacement (e.g., replace half the cartridge one month, the other half the next).
Step 4: The Refill – Slow and Steady
This is the moment of truth. Take your container of perfectly temperature-matched, conditioned water. (You did condition it right after filling the container, correct? Add the water conditioner to the new water according to the dosage on the bottle, and let it sit for a minute). Now, slowly pour the new water into the bowl. Do not dump it. Use a clean cup or your hand to deflect the stream so it doesn’t create a torrent that stresses your betta. Fill until the water level is back to where it was. The gentle flow will also help clean any remaining loose particles from the substrate back into the water column, where your filter (if you have one) will catch them.
Step 5: The Final Check & Cleanup
Wipe down the outside of the bowl with your clean cloth. Check for any spills. Ensure the filter (if you have one) is properly reassembled and plugged back in. Observe your betta for a few minutes. He might be a bit curious or startled by the change in water clarity, but he should be swimming normally. If he’s gasping at the surface or lethargic, double-check your water temperature and conditioner dosage.
Common Cleaning Mistakes That Harm Bettas
Even with the best intentions, it’s easy to slip up. Let’s highlight the pitfalls:
Mistake 1: Overcleaning the Gravel
Digging deep into the gravel and sucking out every last bit of “dirt” removes the vast majority of your beneficial bacteria, which live in the substrate. You only need to clean the top layer where debris collects.
Mistake 2: Using the Wrong Tools
A kitchen sponge that’s seen dish soap is a chemical weapon in your aquarium. A toothbrush used for scrubbing grout is full of abrasives and residues. Use only tools dedicated to your tank.
Mistake 3: Ignoring the Nitrogen Cycle
If you’re cleaning so much that the water stays crystal clear all the time, you’re probably removing too much bacteria. A slight, natural haze after a proper partial change is normal and indicates a healthy bacterial population. Constant, perfectly clear water in a small bowl is often a sign of an under-stocked or sterile, unstable system.
Mistake 4: Inconsistent Water Changes
Skipping weeks and then doing a massive 75% change is terrible. It causes huge swings in water chemistry. Consistency with smaller, weekly changes is infinitely better.
The Importance of Water Conditioning & Testing
You cannot skip water conditioning. It’s as simple as that. But understanding why helps you commit to it.
What’s in Your Tap Water?
Municipal water treatment facilities add chlorine and/or chloramines to kill pathogens. These are fatal to fish and will burn their gills. Chloramines are especially tricky because they don’t evaporate like chlorine; they must be chemically neutralized. A water conditioner does this instantly. It also often detoxifies ammonia from fish waste for 24-48 hours (a helpful safety net) and may bind heavy metals.
Should You Use a Water Test Kit?
Absolutely, yes. For a responsible betta owner, a liquid-based test kit (like the API Freshwater Master Test Kit) is one of the best investments you can make. It takes 5 minutes and tells you the truth about your water. Test for:
- Ammonia: Should be 0 ppm.
- Nitrite: Should be 0 ppm.
- Nitrate: Should be kept below 20 ppm, ideally under 10 ppm. This is what your weekly water changes control.
- pH: Bettas are adaptable, but a stable pH between 6.5 and 7.5 is ideal. Don’t chase a specific number; stability is key.
Testing once a week, before your water change, gives you a clear picture of your tank’s health and confirms your cleaning routine is working.
Establishing a Long-Term Cleaning & Maintenance Schedule
Routine is everything. Here is a simple, sustainable weekly and monthly schedule for a standard unfiltered betta bowl (2-3 gallons). For filtered setups, adjust slightly.
Weekly Tasks (The Essential Routine)
- Test your water parameters. Write them down to track trends.
- Perform a 25-30% partial water change using the siphon method described.
- Clean the inside glass of any algae.
- Wipe down the outside of the bowl.
- Check your betta’s health. Look for clamped fins, spots, ragged edges, or changes in behavior.
- Remove any uneaten food after 5 minutes with a net or siphon.
Bi-Weekly / Monthly Tasks
- Deep clean the substrate: During one water change a month, spend a little more time with the siphon, methodically cleaning each section of gravel.
- Inspect and clean decorations: Take them out and give them a more thorough rinse in old tank water.
- Prune any live plants and remove dead leaves.
- Inspect filter media (if present) and gently rinse if flow is reduced.
- Check all equipment: Ensure heaters (if used) are functioning and cords are safe.
Signs It’s Time for an Unscheduled Cleaning
Sometimes, you need to intervene between scheduled cleanings:
- Cloudy, murky water (bacterial bloom – often from overfeeding).
- Visible algae bloom on glass or decor.
- Strong, “fishy” odor.
- Your betta is lethargic, gasping, or has clamped fins. Test water immediately.
In these cases, a 30-40% water change is usually the first and best step.
Conclusion: A Clean Bowl is a Commitment, Not a Chore
Cleaning your betta fish bowl isn’t a tedious task; it’s the primary way you care for your pet’s health. It’s a direct line of communication with the miniature world you’ve created for him. By following this method—using the right supplies, preserving beneficial bacteria, matching water temperature, and conditioning religiously—you move from being a bowl-scrubber to a true aquatic guardian. You’ll notice the difference in your betta’s vibrant colors, energetic swimming, and flowing fins. A stable, clean environment is the greatest gift you can give your little aquatic companion. It’s not about perfection; it’s about consistency, knowledge, and gentle care. Now, grab your siphon and your conditioner, and give your betta the healthy home he deserves.
Frequently Asked Questions
Can I use bottled spring water instead of tap water?
You can, but it’s not always ideal. Spring water varies in mineral content and pH, which can be unstable. It’s also expensive and lacks minerals that bettas need. Tap water, properly conditioned, is perfectly safe and provides a stable mineral balance. If you use spring water, you must still use a conditioner to neutralize any chlorine, and you should test parameters regularly.
My betta’s bowl gets algae really fast. How do I clean it?
Algae is caused by excess light and nutrients. First, move the bowl away from direct sunlight. Then, during your weekly clean, use an algae scraper on the glass. For decorations, remove them and scrub with your dedicated algae pad or a soft toothbrush (used only for the tank) in old tank water. You can also add a live plant like a marimo moss ball or java fern, which competes with algae for nutrients.
Is it okay to use hot water to clean the bowl or decorations?
No. Hot water can crack glass bowls and, more importantly, it can kill any beneficial bacteria that may be present on decorations or substrate. Use only cold or room-temperature tap water for rinsing, and always use the bucket of old tank water for cleaning decorations to preserve bacteria.
How do I know if my water change was successful?
After 24 hours, your water should be clear (a slight haze is normal and indicates bacteria). Test your water parameters. Ammonia and nitrite should be 0 ppm. Nitrate should have decreased from the level it was at before the change. Most importantly, observe your betta. He should be active, alert, and eating normally.
My betta is very stressed during cleaning. How can I make it easier for him?
The key is to minimize disruption. Never net him unless it’s an emergency. Work quickly and calmly. Perform the water change slowly, using a cup to pour the new water in gently to avoid strong currents. You can also use a small plastic container (like a clean food container) to create a temporary “island” in the bowl, placing it over your betta to gently herd him to one side while you siphon the other side.
I have a filtered betta tank. Is the cleaning process different?
The core principles are the same, but frequency changes. With a properly cycled filter, you can typically change 25% of the water every 1-2 weeks. The filter media (sponges, cartridges, bio-balls) should never be rinsed in tap water. Only swish it in the bucket of old tank water during your water change to remove large debris. Replace media only when it’s literally falling apart, and replace only half at a time to preserve bacteria.