How to Fill Betta Fish Tank
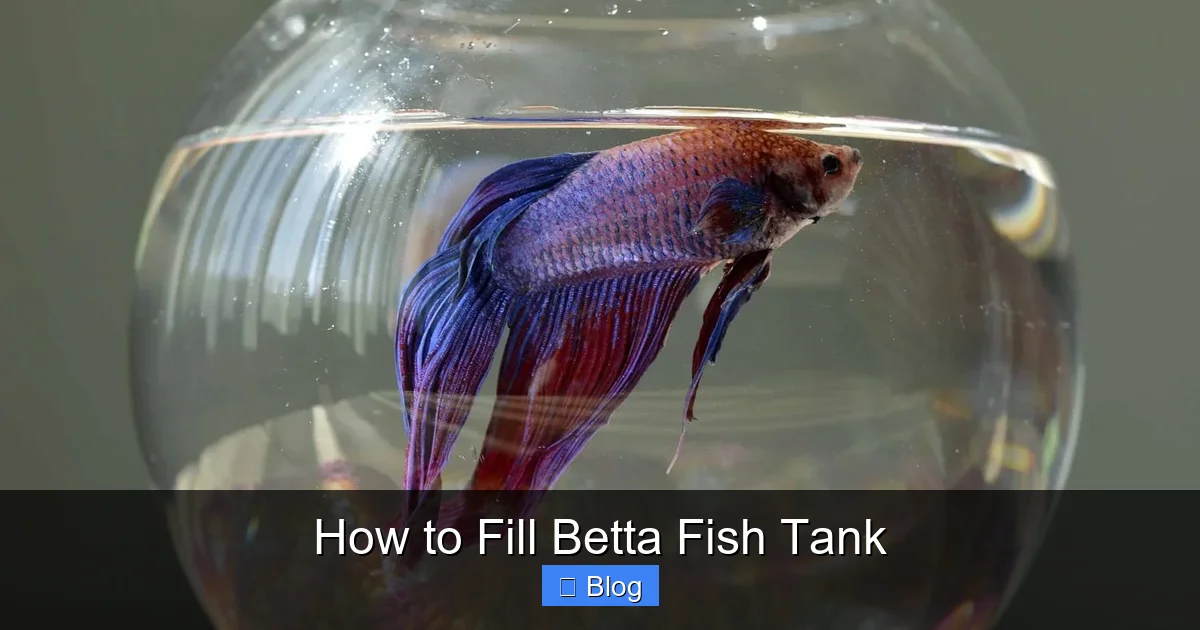
Always start with dechlorinated water at a consistent temperature to safeguard your betta from harmful chemicals and stress. Fill the tank gradually to prevent shock and ensure a smooth, healthy transition to its new home.
So, you’ve finally brought home that stunning betta fish with its flowing fins and vibrant colors. You’ve got the perfect spot picked out, maybe a cool little castle or a plant for it to explore. But then it hits you: the tank is empty. How do you actually fill it? It seems simple, right? Just pour in some water and plop your new buddy in. If only it were that easy. I’m telling you, learning how to fill betta fish tank properly is the single most important thing you can do for your betta’s health and happiness. Get this step wrong, and you’re setting the stage for stress, disease, or worse. Do it right, and you’ll create a thriving underwater world your betta will love. Trust me, I’ve learned this the hard way. Let me walk you through everything, from why it matters to the exact steps to take, so you can start your betta-keeping journey on the right fin.
Filling a betta tank isn’t just about adding water. It’s about recreating a stable, safe, and chemical-free environment that mimics the slow-moving, warm waters of Southeast Asia where these beauties come from. It involves understanding your water source, using the right treatments, and giving your fish a gentle, stress-free introduction. This guide will break it all down, conversation-style, so you feel confident and prepared. No confusing jargon, just clear, actionable advice from one fish lover to another.
Key Takeaways
- Dechlorinate water: Always use a water conditioner to make tap water safe for bettas.
- Maintain proper temperature: Keep water between 78-80°F to support betta health.
- Fill slowly and carefully: Pour water gently to prevent disturbing substrate and decorations.
- Leave headspace: Do not fill to the brim; allow room for oxygen exchange.
- Test water parameters: Ensure pH is neutral and ammonia levels are zero before filling.
- Use filtered water: Opt for filtered or treated water to reduce contaminants.
- Cycle the tank first: Let the tank establish beneficial bacteria before introducing the betta.
📑 Table of Contents
Understanding Your Betta’s Natural Habitat
The Betta’s Wild Origins
Before we dive into buckets and hoses, let’s talk about where bettas come from. Native to the shallow rice paddies, slow-moving streams, and warm floodplains of Thailand, Cambodia, and Vietnam, bettas (also called Siamese fighting fish) are accustomed to specific water conditions. The water is typically warm (often 75-82°F or 24-28°C), slightly acidic to neutral (pH 6.5-7.5), and rich in tannins from decaying plants, which gives it a soft, tea-colored tint. It’s also generally still or very slow-flowing. These fish are labyrinth fish, meaning they breathe air from the surface, but they still rely on clean, well-balanced water to thrive. When you fill your tank, your goal is to simulate this gentle, stable environment as closely as possible.
Recreating a Thriving Environment
This is why the “fill and forget” method is so dangerous. Tap water contains chemicals like chlorine and chloramine that are harmless to us but toxic to fish. It might also have fluctuating pH or hardness levels. Recreating that natural habitat means you must treat the water, stabilize its temperature, and ensure it’s free from harmful substances before your betta even sees it. Think of it like setting up a nursery for a newborn—you wouldn’t put a baby in a crib without washing the sheets and adjusting the room temperature, right? Your betta deserves the same careful preparation.
Essential Equipment for Filling Your Tank
The Tank Itself: Size and Shape Matters
First things first, you need a suitable home. While bettas are often sold in tiny cups, they absolutely need more space. A common misconception is that a 1-gallon tank is enough. It’s not. For a single betta, the absolute minimum is 5 gallons, but 10 gallons is even better. Why? Larger volumes of water are more stable. They dilute toxins more effectively and maintain consistent temperature and pH, reducing stress on your fish. As for shape, opt for a long, rectangular tank over a tall, narrow one. Bettas are surface-dwellers and need access to the top to breathe their labyrinth organ. A wide surface area is crucial. I once used a tall, decorative vase for a betta—a huge mistake. He was constantly stressed and didn’t last long. Learn from my error!
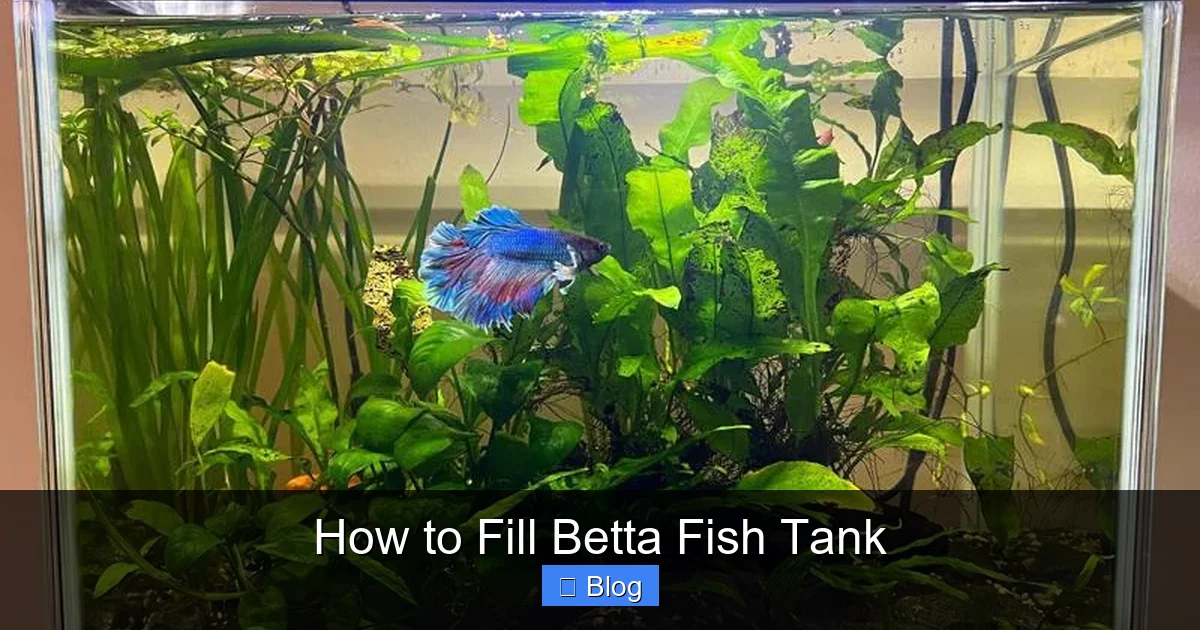
Visual guide about How to Fill Betta Fish Tank
Image source: acaquarium.com
Water Conditioner: Your First Line of Defense
This is non-negotiable. A quality water conditioner (also called a dechlorinator) is the most important product you’ll buy for how to fill betta fish tank. It instantly neutralizes chlorine, chloramine, and heavy metals found in municipal tap water. Some advanced conditioners also detoxify ammonia and nitrites, which is a huge bonus. Look for a product from a reputable brand like Seachem Prime, API Stress Coat, or Tetra AquaSafe. These are proven, reliable choices. You will use this every single time you add water to the tank, whether during the initial fill or future water changes. Don’t skip this step. Ever.
Thermometer and Heater: Betta’s Tropical Needs
Bettas are tropical fish. They require a stable water temperature between 78-80°F (25.5-26.5°C). An adjustable aquarium heater is essential, even in a warm room, because room temperatures can drop at night or vary seasonally. Pair it with a simple stick-on or digital aquarium thermometer to monitor the temperature accurately. Never guess. I’ve seen so many new betta owners think their home is warm enough, only to find their fish lethargic and susceptible to illness because the water was too cool. The heater ensures that consistent, tropical warmth that bettas crave.
Other Handy Tools for the Job
To make the filling process smooth, gather a few more items:
- A clean bucket or large container: Dedicate this solely to your aquarium. Never use a bucket that held cleaning chemicals.
- A gravel siphon/vacuum: Useful for future water changes, but also helps position the water flow when filling to avoid disturbing your substrate.
- A clean cup or pitcher: For gently pouring water onto a plate or decor to disperse the flow and protect delicate plants or substrate.
- pH and water test strips or a liquid test kit: Not strictly for the initial fill, but invaluable for monitoring water parameters long-term.
Step-by-Step Guide to Filling Your Betta Tank
Step 1: Prepare the Tank and Substrate
Before a single drop of water goes in, give your tank a good rinse with plain water—no soap! Soap residues are deadly. Do the same with your chosen substrate (gravel, sand, or specialized betta soil). Rinse it thoroughly until the water runs clear to remove dust and debris. Now, add your substrate to the tank, creating a gentle slope if you like. Then, arrange your decorations—plants (live or silk), caves, and ornaments. Rinse these too. Place your heater and thermometer in the tank, but don’t plug them in yet. This setup is now ready for water.
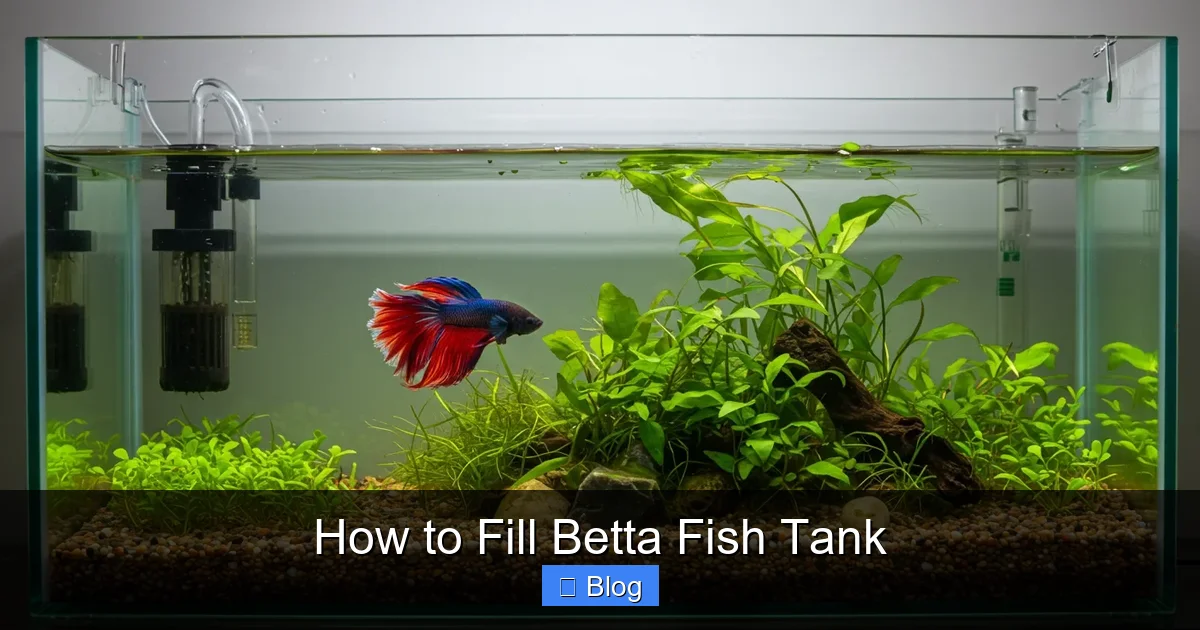
Visual guide about How to Fill Betta Fish Tank
Image source: img.houseui.com
Step 2: Add Water the Right Way
This is where technique matters. Take your clean bucket and fill it with tap water. If your tap water is very cold, you might let it sit for 15-20 minutes to reach room temperature, but this does NOT remove chlorine. You still need conditioner. Now, here’s the pro tip: place a clean plate, saucer, or even your hand gently on the substrate. Slowly pour the water onto this barrier. This disperses the water’s force, preventing your gravel from flying everywhere and creating a cloudy mess. Alternatively, you can use the end of your gravel siphon to trickle water in gently. Fill the tank until the water level is about 1-1.5 inches from the top. This leaves room for your betta to gulp air and for you to perform water changes without spilling.
Step 3: Condition and Temperature-Check
Now the critical chemistry step. With the tank full, add your water conditioner according to the dosage instructions on the bottle. Usually, it’s a certain number of drops per gallon. Be precise. Squirt it directly into the water, preferably near a water flow (like from your filter) to help it distribute. Next, plug in your heater and set it to 78-80°F. Let the heater run for at least 30 minutes to an hour, monitoring with your thermometer, until the entire water column reaches a stable, consistent temperature. This ensures no cold or hot spots that could shock your fish later. During this time, your filter should also be running to cycle the water and oxygenate it.
Step 4: Final Checks Before Adding Your Betta
Patience is a virtue in fishkeeping. Do not rush this final stage. Once the water is conditioned and at the right temperature, let the tank sit with the filter and heater running for at least 24-48 hours. Why? This allows any remaining cloudiness from new substrate to settle and, most importantly, begins the nitrogen cycle—a biological process where beneficial bacteria establish themselves to break down fish waste. While a full cycle takes weeks, this initial settling period is crucial. Use this time to double-check your water parameters with a test kit if you have one. You’re looking for 0 ppm ammonia, 0 ppm nitrite, and a low nitrate reading. Only when the water is crystal clear, chemically treated, and temperature-stable is your tank truly ready for its new resident.
Water Conditioning and Treatment Deep Dive
What’s in Your Tap Water? The Hidden Dangers
To understand why conditioning is vital, let’s look at what’s coming out of your faucet. Municipal water supplies are treated with chlorine to kill bacteria. Some use chloramine, a more stable compound of chlorine and ammonia, which lasts longer in pipes. Both are highly toxic to fish, damaging their gills and causing acute respiratory distress. Additionally, tap water can contain trace amounts of heavy metals like copper or lead from old pipes, which are also poisonous. Even if you use well water, it might have high mineral content or other contaminants. A water conditioner chemically binds to and neutralizes these threats, making the water safe.
Visual guide about How to Fill Betta Fish Tank
Image source: modestfish.b-cdn.net
Choosing the Right Water Conditioner
Not all conditioners are created equal. Basic ones only handle chlorine. You need one that tackles both chlorine and chloramine, as chloramine is increasingly common. For betta tanks, I recommend a conditioner that also detoxifies ammonia, like Seachem Prime. This is a lifesaver because it gives you a safety net during the cycling process or if you accidentally overfeed. It converts toxic ammonia into a non-toxic form for 48 hours, protecting your fish. Always read the label and follow dosage rates exactly based on your tank’s gallon size. When in doubt, slightly overdosing is generally safer than underdosing, but stick to the instructions.
Beyond Dechlorination: Addressing pH and Hardness
Conditioner handles the immediate toxins, but what about pH and water hardness? Bettas prefer slightly acidic to neutral water (pH 6.5-7.5) and soft to moderately hard water. Your tap water’s natural profile might be outside this range. While bettas are somewhat adaptable, extreme or rapidly fluctuating pH can cause stress. For the initial fill, focus on conditioning and temperature first. If your tap water is very hard (high GH/KH) or very alkaline (high pH), you may need to consider long-term solutions like using reverse osmosis (RO) water mixed with minerals, or adding natural driftwood or Indian almond leaves to gently lower pH and soften water. But for most, a good conditioner and stable tank parameters are sufficient to start.
| Water Issue | Potential Cause | Immediate Solution | Long-Term Management |
|---|---|---|---|
| High Chlorine/Chloramine | Municipal water treatment | Use a quality water conditioner | Continue conditioning with every water change |
| Ammonia Spike | Incomplete cycling, overfeeding | Partial water change, ammonia detoxifier (like Prime) | Ensure tank is fully cycled, don’t overfeed |
| pH Too High/Alkaline | Hard water, certain substrates | Use a water conditioner that helps stabilize pH | Add natural botanicals (driftwood, almond leaves), use RO water |
| Temperature Fluctuation | No heater, room drafts | Adjust heater setting, insulate tank | Maintain consistent room temperature, use a reliable heater |
Acclimating Your Betta to Its New Home
The Float and Drip Method: A Gentle Introduction
Your tank is perfect. The water is conditioned, warm, and clear. Now, how do you get your betta from the pet store bag into this paradise without shocking its system? Acclimation is key. Never just dump the fish in. The float and drip method is the gold standard. First, float the sealed bag in the tank for 15-20 minutes to equalize temperature. Then, open the bag and roll down the top to create a floating ring. Using a clean airline tubing (or a small cup), start a very slow drip of tank water into the bag. Aim for 2-4 drops per second. After about 30-45 minutes of dripping, the water in the bag will have mostly been replaced with your conditioned tank water. Now, gently net your betta from the bag and release it into the tank. Discard the bag water—do not pour it in, as it contains waste from the store.
Monitoring Your Betta’s First 24 Hours
The first day is critical. Turn off the tank lights to reduce stress. Keep the room quiet and avoid tapping on the glass. Your betta will likely explore cautiously, maybe hide for a few hours. This is normal. Observe for signs of distress: frantic swimming, gasping at the surface (could indicate poor water quality or low oxygen), lying on the bottom (could be temperature shock or illness). Mild stress is common, but severe symptoms need immediate attention—a quick water test and perhaps a partial water change with perfectly conditioned water. Resist the urge to feed immediately. Wait at least 24 hours, then offer a tiny pinch of high-quality betta pellets. The first meal is often a good sign of recovery.
Common Mistakes to Avoid When Filling Your Tank
Mistake 1: Using Untreated Tap Water
This is the #1, deadliest error. Pouring straight tap water into the tank introduces chlorine and chloramine, which can kill a betta within hours. The fish’s gills will burn, it will gasp for air, and it can die quickly. No exceptions. Always, always use a water conditioner. It’s not optional; it’s as essential as the water itself. I learned this with my very first betta, a beautiful blue veiltail named Azure. I thought the water looked clean, so I skipped the conditioner. Within a day, he was lethargic and pale. A swift rescue with treated water saved him, but it was a terrifying lesson.
Mistake 2: Skipping the Cycling Process
Filling the tank and immediately adding the fish is like moving into a new house without hooking up the sewage system. The nitrogen cycle is the process of establishing beneficial bacteria that convert toxic fish waste (ammonia) into less harmful nitrites and then nitrates. A tank that isn’t cycled will have dangerous ammonia spikes that can burn your betta’s gills and skin. Cycling takes 4-6 weeks. While you can do a “fish-in cycle” with your betta, it’s risky and stressful for the fish. The best practice is to fill the tank, condition the water, add a source of ammonia (like pure ammonia or a bacteria starter), and let it cycle completely before introducing your betta. It requires patience, but it’s the foundation of a healthy aquarium.
Mistake 3: Temperature Shock
Bettas are sensitive to rapid temperature changes. Pouring cold water into a warm tank, or adding a fish from a cold bag into warm water, can cause thermal shock, weakening their immune system and making them susceptible to diseases like ich. Always match the temperature of the new water to the existing tank water within 1-2°F. Use your thermometer! When doing water changes, always treat and temperature-match the replacement water before adding it. And during acclimation, the slow drip method helps adjust the fish to the tank’s temperature gradually.
Mistake 4: Overfilling or Underfilling
Filling the tank to the very brim leaves no room for water displacement from decorations, filters, or the fish itself, leading to spills and potential overflow. It also reduces the crucial air gap at the surface that bettas use to breathe. Conversely, underfilling limits swimming space and can cause your filter to suck in air, damaging it. Aim for that 1-1.5 inch gap from the top. Also, ensure your water level is above the filter intake to prevent it from running dry. A quick visual check before sealing the lid saves a lot of headaches.
Conclusion
Learning how to fill betta fish tank correctly is more than a chore—it’s an act of care. It’s the foundational step that sets the tone for your betta’s entire life. By taking the time to understand your fish’s needs, gathering the right equipment, following a careful filling process, treating the water, and acclimating gently, you’re not just setting up a tank; you’re building a healthy home. Remember my mistakes so you don’t have to make them. Patience, attention to detail, and a little bit of science go a long way. The reward is incredible: watching your betta flare its fins, build bubble nests, and explore its vibrant, well-prepared world. You’ve got this. Now, go fill that tank with confidence and give your new friend the best start in life.
Frequently Asked Questions
How do I fill a betta fish tank for the first time?
First, thoroughly rinse any substrate and decorations with plain water. Place them in the tank, then slowly add dechlorinated water to avoid disturbing the layout. Finally, install and start your filter and heater before introducing your betta.
Do I need to treat tap water before filling my betta tank?
Yes, always treat tap water with a water conditioner to neutralize harmful chlorine and chloramines. Bettas are sensitive to these chemicals, so skipping this step can cause illness or death. Let the treated water sit for a few minutes to ensure full dechlorination.
What temperature should the water be when filling a betta tank?
The water should be between 76-82°F (24-28°C) when you fill the tank. Use an aquarium heater to maintain this stable, warm temperature after filling. Always check the temperature with a reliable aquarium thermometer before adding your fish.
What’s the best way to fill the tank without making a mess?
Place a clean plate or plastic bag on the substrate and pour water onto it slowly. This disperses the water flow and prevents gravel or sand from being displaced. You can also use a siphon with a spray bar attachment for a gentler fill.
Should I fill the tank completely before adding my betta?
Yes, fill the tank completely to the desired level, usually about an inch below the top rim. This allows for proper water volume, stable parameters, and space for your betta to gulp air from the surface. Only add the fish after the tank is fully set up and water parameters are safe.
What common mistakes should I avoid when filling my betta tank?
Avoid using untreated tap water, overfilling the tank, or adding fish immediately after filling. Never use soap or detergents to clean the inside of the tank. Most importantly, do not add your betta until the tank is fully cycled and water tests are safe.