How to Catch Better Fish Stardew Valley
Catching better fish in Stardew Valley isn’t just about luck—it’s a skill you can master. By understanding fish behavior patterns, optimizing your gear for the right location, strategically choosing when and where to fish, and investing in the Fishing skill, you can consistently land rarer, more valuable catches. This guide breaks down everything from beginner basics to advanced pro-tips, turning you from a novice angler into a fishing legend.
Key Takeaways
- Fish have specific spawn conditions: Success depends on matching the correct season, time of day, weather, and location for your target fish.
- Your rod and tackle are critical tools: Upgrade from the Bamboo Pole as soon as possible and use Bait and specialized Tackle to improve bite rates and control.
- The Fishing skill directly impacts your ability: Higher levels increase your fishing bar size and unlock essential professions that make catching difficult fish significantly easier.
- Location is everything: Different bodies of water (ocean, river, lake, pond, jungle) host unique fish pools; fish in the right spot for your goal.
- Master the mini-game mechanics: Learning to control the green bar, anticipate fish movement, and use the “hold and release” technique is non-negotiable for legendary fish.
- Patience and preparation pay off: Use the “Fisher” profession, eat food for buffs, check the TV forecast, and have the right bait ready before you cast.
- Some fish require special conditions: Legendary fish often need specific weather (rain), seasons, and times; always verify requirements before attempting.
📑 Table of Contents
- Introduction: Why Fishing is Your Secret Weapon
- Section 1: Decoding Fish Behavior – The Science of the Spawn
- Section 2: Gear Optimization – Your Rod and Tackle Are Everything
- Section 3: Location & Time Strategy – Fish Where the Fish Are
- Section 4: Skill Progression & The Critical Professions
- Section 5: Advanced Mini-Game Mastery – It’s All About the Bar
- Section 6: Common Mistakes That Keep You From Catching Better Fish
- Conclusion: Your Journey to Fishing Mastery
Introduction: Why Fishing is Your Secret Weapon
Let’s be honest: when you first start Stardew Valley, fishing can feel like a frustrating, random mini-game where you constantly lose fish and wonder if it’s even worth it. But here’s the secret the veterans know: learning how to catch better fish in Stardew Valley is one of the most profitable, rewarding, and skill-based activities in the entire game. Whether you need cash for a farm upgrade, want to complete the museum collection, need specific fish for a community center bundle, or are chasing the legendary fish for bragging rights, mastering fishing is essential.
This guide will move you beyond the basics. We’ll dissect the hidden systems that govern fish spawns, optimize every piece of your gear, decode the best locations for each season, and perfect your mini-game technique. You’ll stop guessing and start catching the big ones consistently. Forget leaving it to chance—by the end, you’ll have a clear, actionable plan to catch better fish on every farm.
Section 1: Decoding Fish Behavior – The Science of the Spawn
Before you even cast your line, you need to understand that fish in Stardew Valley are not random. Each species has a strict set of conditions it requires to appear. Ignoring these is the #1 reason beginners catch only junk and common fish. Think of it like a secret password: if you present the right combination of season, time, weather, and location, the fish will appear.
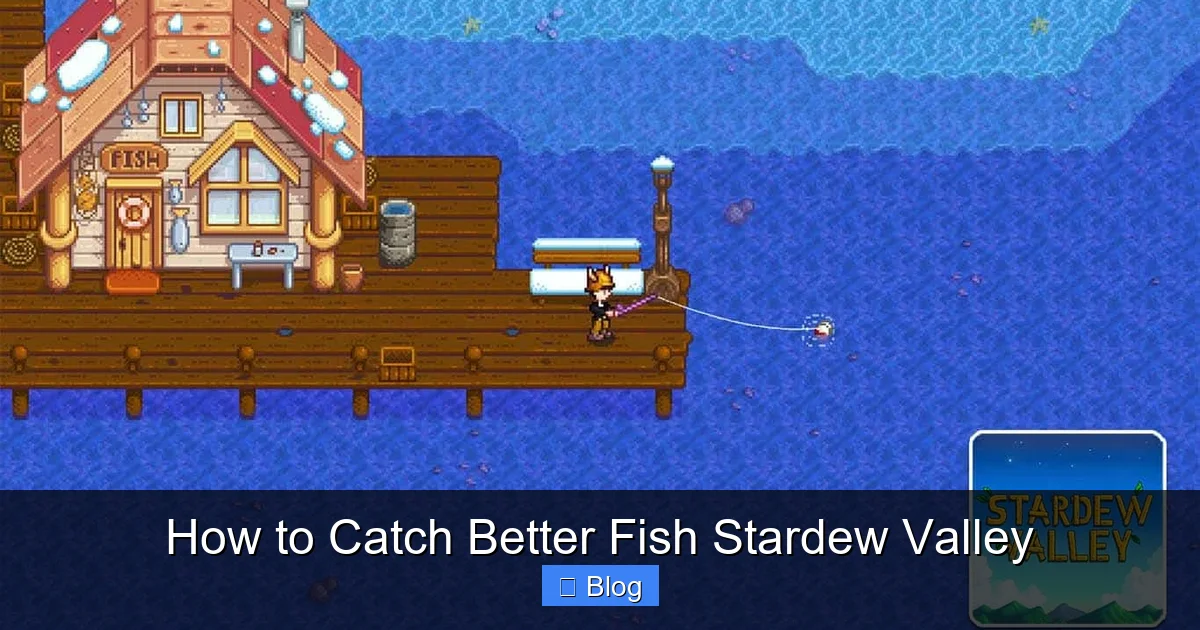
Visual guide about How to Catch Better Fish Stardew Valley
Image source: pockettactics.com
The Four Pillars of Fish Spawns
Every fish in the game is governed by four core rules. You must satisfy all applicable ones for a catch to be possible.
- Season: This is the most basic filter. A Largemouth Bass won’t spawn in winter; a Sturgeon won’t spawn in spring. The game has distinct seasonal fish pools.
- Time of Day: The clock matters! Many fish are only available between 6 AM and 7 PM (dayfish), others between 6 PM and 2 AM (nightfish), and some are available all day. The legendary fish have extremely tight time windows.
- Weather: Rain dramatically changes the fish pool, especially in the ocean. Fish like the Catfish or the legendary “Crimsonfish” only appear when it’s raining. Always check the TV forecast or the in-game icon.
- Location: This is huge. The “Ocean” (beach), “River” (in town), “Lake” (Forest Pond or Mountain Lake), “Pond” (your farm’s pond), and “Jungle” (Ginger Island) each have unique fish. A Red Mullet is ocean-only; a Bullhead is river-only.
How to Find & Use This Information
You don’t have to memorize everything! Your in-game menu is your best friend. Open your inventory, go to the “Collections” tab, and click the fish icon. Here you will see every fish you’ve ever caught, along with a detailed description that lists its exact spawn conditions: season, time, weather, and location. When you need a specific fish, check here first. This is your ultimate reference for how to catch better fish.
Practical Example: You need a Sturgeon for the “Dye Bundle” or to make Caviar. Open your Collections. It says: “Mountain Lake, 6am-7pm, Summer & Winter.” So, on a summer or winter day (rain or shine doesn’t matter), go to the lake on the mountain (the one near the mines entrance), and fish between morning and evening. That’s it. No guesswork.
Section 2: Gear Optimization – Your Rod and Tackle Are Everything
Imagine trying to catch a marlin with a kiddie fishing pole. That’s what using the starting Bamboo Pole feels like once you know what’s possible. Your gear directly determines your success rate and the quality of fish you can even attempt to catch.
Visual guide about How to Catch Better Fish Stardew Valley
Image source: hypercarry.com
The Essential Rod Upgrades
There are four main rods, and you must progress through them.
- Bamboo Pole (Free): The starter. No bait slot. Very small fishing bar. Only use this for the first few days until you can afford the next upgrade.
- Fiberglass Rod (1,800g from Willy’s Fish Shop): The first must-buy. It has a bait slot. Bait increases the bite rate by 50% and reduces the time a fish takes to bite. This rod alone will massively improve your haul. Buy it as soon as you have the gold.
- Iridium Rod (7,500g from Willy’s Fish Shop): The endgame rod. It has slots for both Bait and a Tackle. This is non-negotiable for serious fishing. The ability to use Tackle like the “Cork Bobber” (increases bar size) or “Trap Bobber” (slows fish movement) is what allows you to consistently catch the legendary fish.
- Specialized Rods: The “Training Rod” (from Willy) is useless for progress. The “Bamboo Pole” can be turned into a “Fiberglass Rod” via a quest, but just buy the new one.
Bait and Tackle: The Force Multipliers
Once you have the Iridium Rod, your setup should almost always be: Iridium Rod + Bait + Cork Bobber/Trap Bobber.
- Bait (Crafted: 5 Bug Meat, or purchased): Always use it. The bite rate increase is massive for efficiency.
- Cork Bobber (Crafted: 1x Wood, 1x Slime): Increases the size of your fishing bar by ~25%. This is the single best tackle for making the mini-game easier, especially on difficult fish. Prioritize this.
- Trap Bobber (Crafted: 1x Copper Bar, 1x Slime): Slows the fish’s movement when it’s not biting. This makes it much harder for the fish to escape the green bar. Excellent for fast, erratic fish.
- Spinner Bobber & Lead Bobber: Less crucial. Spinner increases bite rate slightly; Lead decreases the fish’s movement speed constantly. Use these situationally if you don’t have Cork/Trap.
Pro-Tip: You can attach bait to any rod with a bait slot (Fiberglass & Iridium). To attach a tackle, you must be using the Iridium Rod. Tackles are consumed on use, so bring extras!
Section 3: Location & Time Strategy – Fish Where the Fish Are
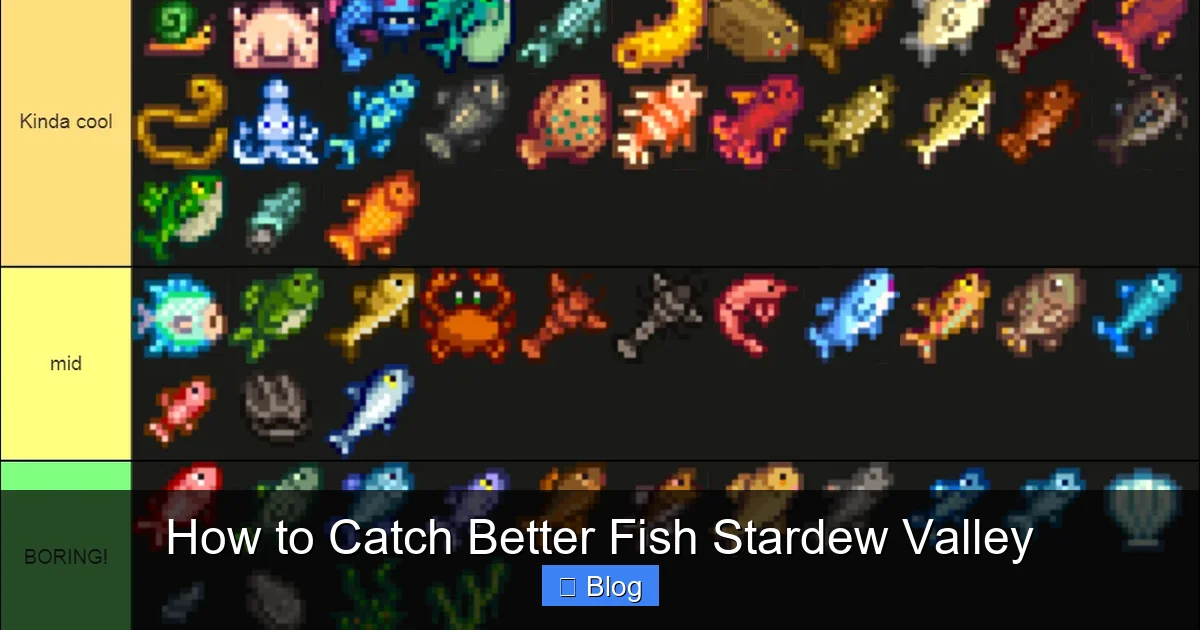
Even with perfect gear, fishing in the wrong spot at the wrong time is a waste of energy. Strategic location hopping is key to catching better fish efficiently.
Visual guide about How to Catch Better Fish Stardew Valley
Image source: tiermaker.com
Seasonal & Weather-Based Location Guide
Here’s a practical framework. Don’t try to fish everywhere randomly.
- Spring: Focus on the River (in town) for high-value fish like the Catfish (rain required) and the legendary “Legend” (requires high skill). The Forest Pond has unique fish like the Bullhead and Catfish.
- Summer: The Ocean (beach) is king. This is your best season for rare ocean fish like the Red Snapper, Super Cucumber (high profit!), and the legendary “Crimsonfish” (on the beach, during rain, 6am-7pm). The Mountain Lake is great for Sturgeon and Bass.
- Fall: The River shines again with the legendary “Mutant Carp” (in the mutated lake, requires rain). The Forest Pond has the valuable Tiger Trout. The ocean has the Octopus.
- Winter: The Mountain Lake is your primary spot. It’s the only place with winter-exclusive fish like the Glacierfish (legendary) and the Sturgeon (yes, still there!). The ocean and river have very few fish in winter.
- Rainy Days: Always check the ocean first. Rain unlocks the best ocean fish (Catfish, Red Snapper, Octopus, etc.). If you’re after a specific rain-only fish, this is your day.
The Power of the Farm Pond
Don’t forget your own farm! Once you build a Fish Pond (Robin’s Carpenter Shop), you can stock it with most fish. It will then produce that fish (and sometimes roe) every few days. This is a passive, energy-free income stream. Stock it with high-value fish like Sturgeon (for Caviar) or Lava Eel (for Iridium bars) for massive long-term profit. It’s the ultimate way to catch better fish without even casting a line.
Section 4: Skill Progression & The Critical Professions
Fishing isn’t just a mini-game; it’s a skill with its own XP and profession choices at levels 5 and 10. These choices dramatically alter your capabilities.
Leveling Up the Fishing Skill
You gain Fishing XP every time you successfully catch a fish (the amount depends on the fish’s difficulty). Higher levels = bigger fishing bar. This is the single most important stat in the game for catching fish. A larger bar gives you more room for error and makes controlling the mini-game vastly easier. To level up fast, focus on catching as many fish as possible in the early game, even the common ones.
Choosing Your Professions: A Critical Decision
At Fishing Level 5, you choose between:
- Fisher (+25% fish value): Simple, direct profit increase. Great if your primary goal is money. This affects the sell price of all fish you catch.
- Trapper (+3x trap catch rate): Only relevant if you use Crab Pots. If you plan to build a Crab Pot empire (highly recommended for passive income), this is the obvious choice. It makes your pots much more efficient.
At Fishing Level 10, your choice branches based on your Level 5 pick:
- If you chose Fisher: Choose between Angler (+50% fish value – amazing for profit) or Pirate (+15% chance to find treasure). Pirate is fun for finding extra gems and artifacts, but Angler is the undisputed king for making bank from fishing.
- If you chose Trapper: Choose between Mariner (Crab Pots never produce trash) or Luremaster (Bait is not consumed from Crab Pots). Both are fantastic for streamlining your Crab Pot operation. Luremaster saves you massive amounts of bait; Mariner is more consistent.
Recommended Path for “Catching Better Fish” & Profit: Level 5: Fisher. Level 10: Angler. This combo maximizes the gold you get from every single catch, making every fishing session more rewarding.
Section 5: Advanced Mini-Game Mastery – It’s All About the Bar
All the preparation in the world fails if you can’t master the fishing mini-game itself. This is the hands-on skill that separates beginners from experts.
Understanding the Green Bar & Fish Movement
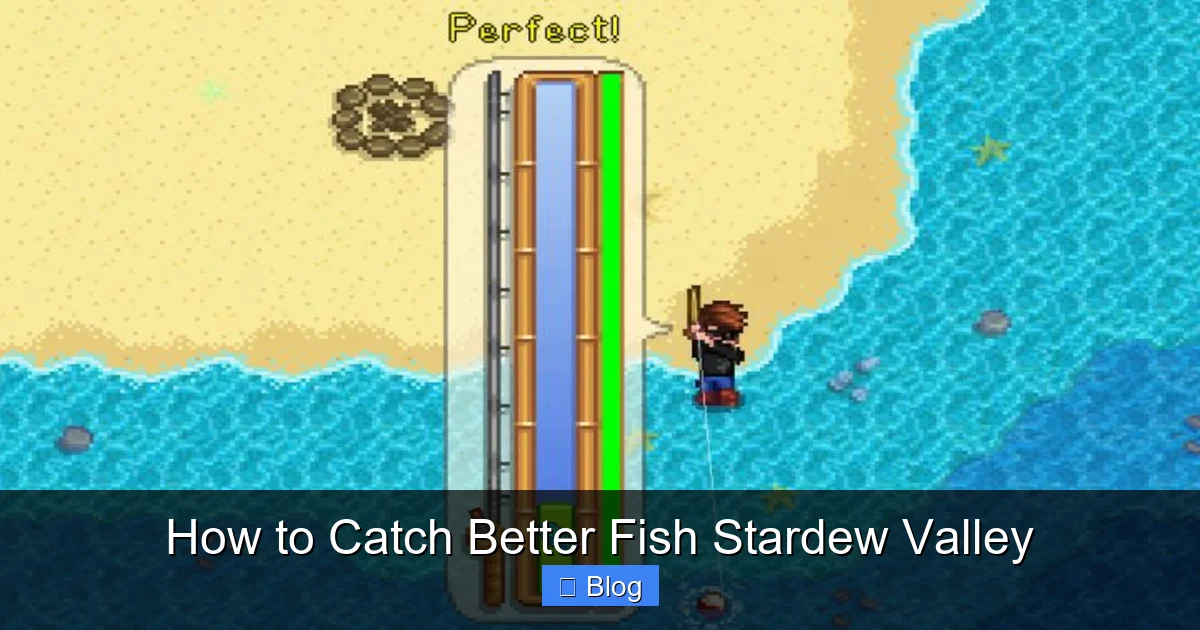
The green bar is your “catch zone.” The fish icon moves up and down on a vertical track. Your goal is to keep the fish inside the green bar by clicking/holding the left mouse button (which raises the bar) and releasing (which lets it fall). The fish’s movement pattern varies by species:
- Slow, predictable fish (e.g., Sunfish): Easy. Just match their rhythm.
- Fast, erratic fish (e.g., Tiger Trout, many legendary fish): They dart quickly. You need to anticipate and react faster. The Trap Bobber is invaluable here.
- Fish that “sprint” when the bar is near them: Some fish will suddenly move away rapidly if your green bar gets too close. This is where patience is key—let the fish come to you, don’t chase it aggressively.
The “Hold-Release” Technique for Control
Don’t just mash the button. Develop a rhythm. A pro technique is to hold the mouse until the green bar is just above the fish, then release and let it fall to meet the fish. This gives you smoother control than constantly clicking. Practice this on common fish to build muscle memory.
Managing the “Exclamation Point” and Treasure Chest
When a fish is hooked, you’ll see an exclamation point (!) above your character. That’s your cue to start the mini-game. If you see a treasure chest icon appear instead of a fish during the mini-game, you’ve hooked treasure! In this case, your goal changes: you must keep the green bar over the treasure chest icon until it’s caught. Treasure catches are easier than fish and give valuable items. Never let a treasure get away.
Section 6: Common Mistakes That Keep You From Catching Better Fish
Even with all this knowledge, players often fall into traps. Here are the top errors to avoid:
- Fishing without Bait: Using the Fiberglass Rod without bait cuts your bite rate in half. Always have bait on your hook.
- Using the Wrong Rod for the Job: Trying to catch a legendary fish with the Fiberglass Rod (which can’t use Tackle) is setting yourself up for failure. Upgrade to Iridium.
- Ignoring Weather & Time: Wasting a whole afternoon at the beach on a sunny day when all the good fish require rain. Check the TV forecast!
- Chasing the Fish Too Aggressively: If you keep your bar constantly high, the fish will often sprint away. Sometimes you need to let the bar drop and wait for the fish to come to the middle of your zone.
- Not Eating a Food Buff: Foods like “Dish O’ The Sea” (from the “Dish O’ The Sea” recipe, which requires Catfish) or “Coconut Milk” (from the Saloon) give a +3 Fishing buff for a few hours. This increases your fishing bar size even more, making difficult catches trivial. Always eat before a big fishing session.
- Giving Up Too Soon on Legendary Fish: These require perfect conditions and can take 10+ attempts. Save your game before trying one, so you can reload if you run out of energy/bait without losing progress.
Conclusion: Your Journey to Fishing Mastery
Learning how to catch better fish in Stardew Valley is a journey of knowledge, preparation, and practice. It starts with checking your Collections to understand spawn conditions, continues with relentlessly upgrading to the Iridium Rod and using Cork Bobbers, and is perfected by choosing the Angler profession and mastering the mini-game’s rhythm. Combine this with strategic location hopping based on season and weather, and you’ll transform fishing from a chore into your most reliable source of income and collection completion.
Remember: every expert was once a beginner who kept casting. Use this guide as your roadmap. Start simple—grab some bait, fish in the town river in spring, and get comfortable with the mini-game. Then, gradually incorporate more advanced strategies. Before you know it, you’ll be reeling in the Legend, the Glacierfish, and the Crimsonfish with confidence, your inventory full of rare, valuable catches. Now, get out there, farmer—the fish are waiting!
Frequently Asked Questions
What is the single best piece of advice for a beginner to catch better fish immediately?
Buy the Fiberglass Rod from Willy as soon as you have 1,800g and always use Bait. This one upgrade will increase your bite rate by 50% and make fishing less frustrating right from the start, allowing you to catch more and better fish with less wasted time.
How much does my Fishing skill level actually affect what I can catch?
Directly and significantly. Your Fishing level determines the maximum size of your green fishing bar. A larger bar makes it much easier to control and keep fish inside it. Certain fish, especially the legendary ones, are nearly impossible to catch with a small bar from low levels. Leveling up is essential.
What is the best rod to buy first, and why?
The Fiberglass Rod is the best first upgrade. Its bait slot is the critical feature. Bait is a game-changer for bite rate. You can fish effectively with just the Bamboo Pole, but you will catch far fewer fish and have a much harder time with anything uncommon. Prioritize saving for this rod.
What are the top 3 most valuable fish to target for profit?
For consistent high profit: 1) Sturgeon (Mountain Lake, Summer/Winter) to make Caviar (750g each). 2) Lava Eel (Volcano, any season) for its high base price and Iridium ore. 3) Super Cucumber (Ocean, Summer, any time) for its excellent sell price and use in high-quality recipes. Always check current prices as they can change with buffs.
Should I use Crab Pots if I want to catch better fish with a rod?
Yes, but they serve different purposes. Crab Pots are passive, energy-free income that catches shellfish and trash (unless you have the right professions). They are fantastic for consistent daily cash and items like Lobster or Crayfish, but they do not catch the “better fish” like Bass, Sturgeon, or legendary fish. Use both systems together for maximum profit.
Is there a way to predict a fish’s movement pattern in the mini-game?
Yes. Each fish species has a programmed movement pattern. Common fish like Carp or Sunfish have slow, predictable bobs. Rare fish like the Tiger Trout or most legendary fish have fast, erratic movements and may “sprint” when your bar gets too close. The best way to learn is to practice on common fish first, then apply that patience and rhythm to harder species. Using a Trap Bobber can help you learn by slowing the fish down.