How to Clean Betta Fish Water
Keeping your betta fish’s water clean is the single most important factor for its health and longevity. This requires a consistent routine of partial water changes using properly conditioned water, gentle gravel cleaning, and careful filter maintenance. Never use soap or harsh chemicals, and always match the new water’s temperature to the tank. Regular water testing for ammonia, nitrite, nitrate, and pH is non-negotiable to catch problems before they harm your fish. Following these simple steps creates a thriving, stress-free environment for your vibrant companion.
So you’ve brought home a beautiful betta fish, with its flowing fins and bold personality. You’ve picked out a lovely tank, maybe even a small plant or two. But here’s the thing that every new betta owner must understand: your job isn’t just to feed your fish. Your primary job is to be a water quality manager. Learning how to clean betta fish water correctly isn’t a occasional chore—it’s the foundation of your betta’s entire world. That crystal-clear water you see? It’s not just for looks. It’s a complex, living ecosystem that your betta breathes, lives in, and depends on for survival. Let’s dive deep into the why and, more importantly, the how of maintaining a pristine aquatic home.
Key Takeaways
- Clean water is critical: Poor water quality is the leading cause of betta illness and death, causing stress and compromising their immune system.
- Partial water changes are essential: Replace 25-50% of the tank water weekly with dechlorinated, temperature-matched water to dilute toxins and waste.
- Dechlorinate every time: Always use a reliable water conditioner to neutralize chlorine, chloramines, and heavy metals in tap water.
- Clean the gravel, not the rocks: Use a gravel vacuum to siphon debris from the substrate during water changes without removing all the gravel.
- Maintain your filter carefully: Rinse filter media in old tank water (never tap water) once a month to preserve beneficial bacteria.
- Test your water regularly: Use a liquid test kit to monitor ammonia, nitrite, nitrate, and pH levels at least once a week.
- Avoid overcleaning: Never scrub everything down with soap, replace all filter media at once, or perform 100% water changes frequently.
📑 Table of Contents
- Why Clean Water is Non-Negotiable for Betta Health
- Essential Tools and Supplies for Cleaning
- The Step-by-Step Guide to Partial Water Changes
- Filter Maintenance: Cleaning Without Wiping Out Your Cycle
- Water Testing: The Invisible Guardian of Your Betta’s Health
- Common Mistakes and How to Avoid Them
- Conclusion: A Routine for a Lifetime
Why Clean Water is Non-Negotiable for Betta Health
Before we get our hands wet, we need to understand what we’re fighting against. A betta tank, no matter how small, is a bioreactor. Your fish eats, excretes, and sheds skin. Any uneaten food and plant debris decompose. All this organic matter is broken down by bacteria in a process called the nitrogen cycle. The first byproduct of this breakdown is ammonia (NH3/NH4+). Ammonia is acutely toxic, burning a fish’s gills and skin. Beneficial bacteria then convert ammonia into nitrite (NO2-), which is also highly toxic, as it prevents blood from carrying oxygen. Finally, a second set of bacteria converts nitrite into nitrate (NO3-), which is far less toxic but still a problem at high levels, causing stress and algae growth.
The Myth of the “Low-Maintenance” Betta
You’ve probably heard it: “Bettas are low-maintenance; they live in puddles in the wild.” This is the most dangerous myth in the hobby. While bettas are hardy and can survive in poor conditions, surviving is not thriving. In the wild, bettas inhabit vast, shallow rice paddies and slow-moving streams with constant water movement and a huge volume of water diluting waste. A small, static bowl is the absolute opposite of this. In a confined space, toxins build up rapidly. That “low-maintenance” label often leads to neglect, resulting in a fish that is lethargic, has torn or clamped fins, is prone to fungal and bacterial infections, and has a drastically shortened lifespan. Your goal is to replicate the clean, stable conditions of their natural habitat, not a dirty puddle.
Common Health Issues from Poor Water Quality
When you don’t know how to clean betta fish water effectively, you invite a host of specific problems:
- Fin Rot: A bacterial or fungal infection that causes fins to become ragged, blackened, or disintegrate. It’s almost always directly linked to elevated ammonia or nitrite.
- Swim Bladder Disorder: Constipation from overfeeding and poor digestion is a common cause, but water pollutants and stress also severely impact swim bladder function, causing your betta to float upside down or sink.
- Lethargy and Loss of Appetite: High nitrate levels and general poor water quality cause immense stress, leading to a fish that just sits at the bottom, disinterested in food.
- Ich (White Spot Disease): This parasitic infection often strikes fish whose immune systems are weakened by suboptimal water parameters.
- Labored Breathing: If your betta is gulping air at the surface constantly or its gills are moving rapidly, it’s a red flag for toxic ammonia or nitrite poisoning or severely low oxygen levels.
Essential Tools and Supplies for Cleaning
Trying to clean a betta tank without the right tools is like trying to fix a car with a butter knife. It’s frustrating and ineffective. Assemble your cleaning kit before you start. This makes the process quick, easy, and less stressful for both you and your fish.

Visual guide about How to Clean Betta Fish Water
Image source: quickanswer.org
The Basic Cleaning Kit
You don’t need a fancy, expensive setup. Here’s what you absolutely need:
- A Dedicated Bucket (5-gallon/19L minimum): This is for water changes only. Never use a bucket that has held soap, bleach, or other household chemicals. Label it clearly so no one in your household uses it for anything else.
- A Gravel Vacuum/Siphon: This is the most important tool. It’s a simple plastic tube with a wide mouth that you squeeze to start a siphon. It removes debris from the gravel while you take out old water. Get a smaller, thin one for a 5-gallon betta tank.
- A Water Conditioner (Dechlorinator): This is non-negotiable. It instantly makes tap water safe by neutralizing chlorine, chloramines, and heavy metals. Seachem Prime is a popular, highly concentrated, and reliable choice.
- A Thermometer: You must match the temperature of the new water to your tank water within 1-2 degrees Fahrenheit. A simple stick-on or floating aquarium thermometer is perfect.
- A Clean Sponge or Algae Scraper: For wiping down the inside glass. Use a brand-new, plain kitchen sponge (no scrubber side, no soap residue) or a dedicated aquarium algae pad. Never use the same sponge you use for your kitchen.
- A dedicated container for holding new water: Your bucket can serve this purpose, but some people use a clean jug or a second bucket.
Water Conditioner: Your #1 Ally
Let’s talk more about water conditioner. Tap water is treated with chlorine or chloramines to make it safe for us to drink. For fish, these chemicals are lethal. Chlorine will burn their gills. Chloramines are even more stubborn and require a conditioner to break them down. Always add the conditioner to the new water you are about to put in the tank, following the dosage instructions on the bottle. A common mistake is adding conditioner to the tank while siphoning. While this can help in an emergency ammonia spike, it’s not the proper method. Treat the new water in your bucket first, then add it to the clean tank.
Choosing the Right Gravel Vacuum
Gravel vacuums come in various sizes. For a standard 5-gallon betta tank, you want a thinner, more flexible tube. The process is simple: you place the wide end into the gravel, squeeze the rubber bulb to start the siphon, and then move the tube through the gravel. The suction pulls out debris (fish poop, uneaten food) and old water, while the gravel itself stays put. Practice in a sink first if you’re new to it. The goal is to clean about a third of the gravel substrate each water change, rotating areas so you don’t disturb the entire tank bed at once.
The Step-by-Step Guide to Partial Water Changes
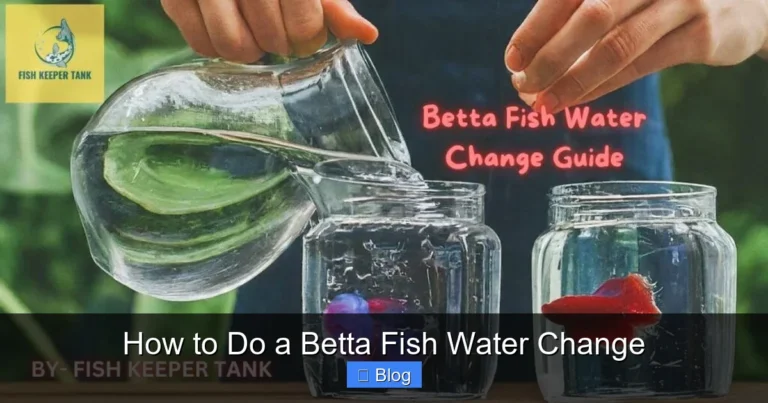
This is the heart of how to clean betta fish water. A partial water change (PWC) is the safest, most effective way to remove toxins and dilute waste products without shocking your fish or destroying the beneficial bacteria colony in your filter. Here is the detailed, foolproof process.
Visual guide about How to Clean Betta Fish Water
Image source: koibettafish.com
How Much Water to Change
The golden rule is to change 25-30% of the tank’s water weekly. For a 5-gallon tank, that’s about 1.25 to 1.5 gallons. Changing more than 50% at once can cause significant parameter swings (pH, temperature, mineral content), which is a major stressor. If your nitrate levels are very high (above 20 ppm), you might do a 50% change, but then resume the 25% weekly schedule. Consistency is far more important than occasional large, disruptive changes.
The Perfect Water Temperature Match
Temperature shock is a silent killer. Bettas are tropical fish, accustomed to stable, warm water (78-80°F / 25.5-26.5°C). The new replacement water must be within 1-2 degrees of your tank’s current temperature. Here’s how to achieve it:
- Fill your clean bucket with tap water.
- Add the correct dose of water conditioner. Stir gently.
- Use an aquarium heater in the bucket if you need to warm it up. This is the most reliable method. A small, submersible heater can bring several gallons to the correct temp in 30-60 minutes.
- Alternatively, let the bucket sit for an hour or two to reach room temperature, then check with your thermometer. You may need to add a small amount of warm (not hot) tap water to raise the temperature.
- Never add cold tap water directly to the tank.
The Cleaning Process: A Detailed Walkthrough
Now, let’s put it all together. Set aside 30-45 minutes once a week.
Step 1: Prepare Your New Water. Follow the temperature matching and dechlorination steps above. Have this ready before you touch the tank.
Step 2: Unplug All Equipment. Turn off and unplug your heater and filter. This is crucial for safety and to prevent the filter from running dry.
Step 3: Decorate and Algae (Optional). If you have algae on the glass, now is the time to wipe it down with your clean sponge or scraper. Do this before you siphon, so the dislodged algae can be removed by the vacuum. You can also gently wipe decorations if needed.
Step 4: Start the Siphon and Clean the Gravel. Assemble your gravel vacuum. Place the wide end into the gravel at one corner of the tank. Squeeze the bulb several times to start the water flow into your bucket. Once it’s flowing steadily, push the tube into the gravel and move it in small circles. You’ll see debris being sucked up. Continue this process, moving to a new spot every few inches, until you have siphoned out the planned amount of dirty water (e.g., 1.5 gallons). Focus on areas with visible waste, like under the filter outflow or feeding spot.
Step 5: Clean or Adjust Filter (Monthly, not weekly). For a weekly water change, you typically don’t touch the filter. However, if your filter is very dirty or has reduced flow, you can gently rinse the media (see next section). For now, just ensure the intake isn’t clogged with debris.
Step 6: Add the New, Conditioned Water. Slowly pour the prepared new water into the tank. Pour it against the glass or use a cup to diffuse the flow to avoid startling your betta and disturbing the substrate too much. Fill to the desired level, leaving about an inch from the top to prevent splashing.
Step 7: Restart Equipment and Check. Plug your heater and filter back in. Check that they are functioning properly. Verify the water level is correct and the heater is fully submerged. Place your thermometer in the tank and confirm the temperature is stable.
Step 8: Acclimate Your Betta (if needed). If you moved your betta to a separate container during the clean, float that container in the tank for 15-20 minutes to acclimate temperature, then gently add a little tank water to the container before netting your fish back home. Often, bettas can stay in the tank during the process if you’re careful and gentle.
Filter Maintenance: Cleaning Without Wiping Out Your Cycle
Your filter is home to the vast majority of the beneficial bacteria that process ammonia and nitrite. This biological filtration is the engine of your aquarium’s health. The cardinal rule of filter maintenance is: Never destroy your bacterial colony.
Visual guide about How to Clean Betta Fish Water
Image source: storiesofwater.com
Types of Filters for Betta Tanks
Common filter types for small betta setups:
- Sponge Filters: Excellent for bettas. They provide gentle flow and huge surface area for bacteria. The sponge itself is the media.
- Hang-On-Back (HOB) Filters: Common, but flow can be too strong for bettas. Often require a baffle to soften the output. Media typically includes a foam pad, ceramic rings, and activated carbon.
- Internal Power Filters: Sit inside the tank. Can also have strong flow. Media is usually a cartridge.
- Canister Filters: Overkill for a single betta in a 5-gallon tank but great for larger, heavily planted setups.
When and How to Clean Filter Media
Clean your filter media once a month, or when you notice a significant reduction in water flow. Never clean it during a weekly water change unless it’s visibly clogged.
The process is simple but must be done correctly:
- Unplug the filter and remove it from the tank.
- Take out all the filter media (sponges, ceramic rings, bio-balls, cartridges).
- Rinse the media in a bucket of water you just siphoned from the tank. This is the most critical step. Tap water contains chlorine/chloramines that will kill your beneficial bacteria. Using old tank water preserves them.
- Gently squeeze and agitate sponges and floss until the water runs relatively clear. Don’t over-clean! A slight brownish tint is fine; you’re just removing the large chunks of solid waste that are blocking water flow.
- For ceramic rings or bio-balls, just swirl them in the old tank water. Never replace all your media at once. If a sponge is falling apart, replace only half of it at a time, and place the new piece alongside the old for a month to seed it with bacteria.
- Reassemble the filter and place it back in the tank. Prime it if necessary (some HOB filters need to be filled with water to start). Plug it in.
Water Testing: The Invisible Guardian of Your Betta’s Health
You cannot see ammonia, nitrite, or nitrate. Your betta’s behavior is often the last warning sign. By then, the water may have been toxic for days. Regular testing with a reliable kit is your early warning system.
Key Parameters to Test
- Ammonia (NH3/NH4+): Should always be 0 ppm. Any detectable ammonia is an immediate problem.
- Nitrite (NO2-): Should always be 0 ppm. Like ammonia, it’s highly toxic.
- Nitrate (NO3-): Should be kept below 20 ppm. It’s less toxic but causes stress over time. The goal of water changes is to keep this low.
- pH: Bettas are adaptable but prefer a stable pH between 6.5 and 7.5. Stability is more important than a perfect number. Sudden swings are dangerous.
Interpreting Test Results and Acting
Use a liquid test kit like the API Freshwater Master Test Kit. They are more accurate than test strips.
- If Ammonia or Nitrite is above 0: This indicates your tank is not fully cycled or the cycle has crashed. Immediately perform a 50% water change. Check your filter—is it running? Is the media clogged? Have you overcleaned? Reduce feeding. Use a water conditioner like Seachem Prime that also detoxifies ammonia for 48 hours while you fix the cycle. Test daily until 0 is confirmed.
- If Nitrate is high (e.g., 40+ ppm): Increase the frequency or volume of your water changes. Ensure you are vacuuming the gravel thoroughly. Check if your tank is overstocked or overfed.
- If pH is stable but outside 6.5-7.5: Don’t chase it with chemicals. Stability is key. If it’s slowly drifting (e.g., from 7.5 to 8.0 over months), investigate your water source and consider using driftwood or Indian almond leaves to gently lower it.
Common Mistakes and How to Avoid Them
Even with the best intentions, it’s easy to make errors. Here are the most frequent pitfalls in learning how to clean betta fish water.
Overcleaning the Tank
This is the #1 mistake. New owners often want to scrub everything spotless once a week. They use soap, replace all the gravel, and wash every decoration in tap water. This obliterates the beneficial bacteria, forcing the tank to restart the nitrogen cycle from scratch—a process that releases toxic ammonia and nitrite and can take weeks. Your fish will suffer. The solution: be gentle. Clean only what you need (glass, some gravel, filter media in old tank water). Leave the rocks, decorations, and most of the substrate alone. They are coated in good bacteria.
Using Harsh Chemicals
Never, ever use household cleaners like Windex, bleach (unless for a very specific, thorough quarantine item disinfection with extreme rinsing), or soap on anything that will go back into the tank. Even a tiny residue can be fatal. Your cleaning tools (sponge, algae scraper) should be dedicated and new. For stubborn algae on decorations, a 1:10 bleach solution soak for a few minutes followed by thorough rinsing in dechlorinated water is acceptable for non-porous items, but it’s rarely necessary for a betta tank.
Ignoring Water Parameters
“The water looks clear, so it must be clean.” This is a fatal illusion. Toxins are invisible. You could have crystal clear water with lethal ammonia levels. Testing is not optional; it’s fundamental. Spend the money on a good liquid test kit and use it weekly. It’s the best investment you can make in your betta’s health.
Conclusion: A Routine for a Lifetime
Cleaning your betta’s water isn’t a daunting, all-day task. It’s a simple, predictable 30-minute weekly ritual that becomes second nature. The formula is straightforward: dechlorinated, temperature-matched water + a gravel vacuum + a gentle filter rinse + weekly testing = a healthy, vibrant betta. By respecting the nitrogen cycle and avoiding the common traps of overcleaning and chemical use, you create a stable, miniature ecosystem. You’ll be rewarded with a fish that displays its full color, active personality, and beautiful, flowing fins. Your betta doesn’t need a palace, but it absolutely demands clean water. That’s the one, non-negotiable requirement for a happy, healthy life. Now you know exactly how to provide it.
Frequently Asked Questions
Can I use tap water for my betta tank?
Yes, tap water is perfectly fine as long as you treat it with a reliable water conditioner before adding it to the tank. The conditioner neutralizes chlorine, chloramines, and heavy metals that are present in municipal water supplies and are toxic to fish.
How often should I do a full tank clean versus a partial water change?
You should perform a partial water change (25-30%) with gravel vacuuming weekly. A “full tank clean” where you remove all fish, decorations, and scrub everything should be extremely rare—perhaps once a year at most—and requires careful re-cycling of the tank. Weekly partial changes are sufficient to maintain water quality.
Can I use soap to clean my betta tank or decorations?
Absolutely not. Even a tiny residue of dish soap or detergent is lethal to fish. Use only dedicated, unused sponges and scrubbers with plain water. For stubborn algae, a rinse in a very dilute bleach solution (1 part bleach to 10 parts water) followed by thorough rinsing in dechlorinated water is acceptable for non-porous items.
Is a filter really necessary for a betta tank?
Yes, a filter is highly recommended, even for a 5-gallon betta tank. It provides crucial biological filtration (housing beneficial bacteria) and mechanical filtration (trapping debris). It also increases water surface agitation for gas exchange. Just choose a filter with an adjustable flow or add a baffle to create a gentle current, as strong flows stress bettas.
My betta tank water is cloudy after a water change. Is this normal?
Yes, slight cloudiness for a few hours after a water change is normal and usually caused by a temporary bacterial bloom or disturbed fine particles in the substrate. It should clear within 24 hours as the filter runs. If it persists for days, it could indicate overfeeding, a dirty filter, or an issue with your water source.
What if I miss a weekly water change?
Don’t panic, but do it as soon as you remember. One missed week won’t cause immediate disaster, but it will allow nitrate levels to climb higher. Perform the partial water change the next day. The key is to get back on your consistent weekly schedule to prevent toxin buildup.