How to Breed Betta Fish
Breeding betta fish is a fascinating but delicate process requiring meticulous preparation, patience, and pristine water conditions. Success hinges on proper conditioning of the pair, a dedicated breeding tank, and understanding the male’s bubble nest and parental role. After spawning, the male guards the eggs and newly hatched fry, which require specialized live foods and ultra-clean water. It’s a rewarding endeavor for dedicated aquarists ready for a multi-week commitment to raising the next generation of these stunning fish.
Key Takeaways
- Conditioning is Critical: Feed high-quality live or frozen foods to both male and female bettas for 2-4 weeks prior to breeding to boost health and spawning readiness.
- Separate Tanks are Essential: Use a dedicated breeding tank (5-10 gallons) with specific parameters, and always introduce the female to the male’s environment, never the reverse.
- Recognize Spawning Behavior: The male builds a bubble nest, performs a vibrant dance, and the “nuptial embrace” where eggs are released and fertilized before sinking.
- Male Parental Care Only: The male alone tends the nest, collects fallen eggs, and guards the fry for their first 2-3 days of life; he must be removed afterward.
- Fry Have Specialized Needs: Newly hatched fry survive on their yolk sacs for 24-36 hours, then require infusoria or commercial fry food, graduating to baby brine shrimp.
- Water Quality is Non-Negotiable: Perform daily, gentle water changes (10-20%) with aged water from the fry’s first day of free-swimming to prevent lethal ammonia spikes.
- Patience and Space: The entire process from conditioning to free-swimming fry takes 4-6 weeks. Have a plan and space for housing dozens of growing juvenile bettas.
📑 Table of Contents
- How to Breed Betta Fish: A Complete, Step-by-Step Guide
- Phase 1: Essential Preparation and Conditioning
- Phase 2: Introducing the Pair and The Spawning Process
- Phase 3: The Male’s Guard Duty and Egg Development
- Phase 4: Raising the Most Fragile Fish in the World
- Phase 5: Growth, Development, and Common Challenges
- Conclusion: The Cycle of Life
How to Breed Betta Fish: A Complete, Step-by-Step Guide
So, you’ve mastered the art of keeping a single betta fish healthy and vibrant. Its flowing fins and bold personality have captivated you, and now you’re wondering, “How do I breed betta fish?” This is the natural progression for many dedicated hobbyists, drawn by the magic of creating new life. Breeding bettas, or Siamese fighting fish, is an incredibly rewarding experience that offers a deep dive into their complex behaviors. However, it is not a project for the casual owner. It demands careful planning, pristine water management, and a significant time commitment. This comprehensive guide will walk you through every phase, from preparation to raising the first generation of fry, ensuring you approach the process with confidence and care.
The Reality of Betta Breeding
Before we dive into the “how,” let’s set the stage. Breeding bettas is a study in contrasts. You’ll witness breathtaking displays of color and courtship, followed by the male’s devoted, sometimes fierce, nest-guarding. Yet, the journey from two adult fish to a tank of swimming fry is fraught with fragility. Fry are tiny, vulnerable, and susceptible to water quality issues. Mortality rates can be high, especially in the first few weeks. This isn’t about making a profit; it’s about participating in the life cycle of a remarkable species. Ethical breeding means having a concrete plan for the 30-100+ offspring you may produce, ensuring they go to good homes. With that mindset, let’s begin.
Phase 1: Essential Preparation and Conditioning
The single most important rule for how to breed betta fish successfully is this: preparation is everything. Rushing this stage is the most common cause of failure. You are not just setting up a tank; you are physiologically priming two animals for the strenuous act of reproduction.
Visual guide about How to Breed Betta Fish
Image source: buildyouraquarium.com
Tank Setup: The Breeding Arena
You need a dedicated breeding tank. A standard 5 to 10-gallon aquarium is ideal. It’s large enough to provide stable water parameters but small enough for the male to defend easily. The setup is minimalist:
- No Substrate: Use a bare bottom. This allows you to see eggs clearly and makes cleaning debris with a turkey baster effortless. Eggs that sink to the bottom can be lost in gravel.
- Water Level: Fill the tank only halfway (about 5-6 inches deep). This gives the male easy access to fallen eggs and reduces the distance fry must swim to the surface for air.
- Heater and Thermometer: Maintain a stable temperature of 78-80°F (25.5-26.5°C). Use a reliable heater and a separate thermometer for accuracy.
- Hiding Spot for the Female: Provide a solid, non-porous cave or a large PVC pipe section where the female can escape the male’s persistent attention if needed. A plant pot turned on its side works well.
- Floating Cover: Cover the top of the tank with plastic wrap or a tight-fitting lid. This increases humidity, which is crucial for the developing eggs in the bubble nest, and prevents the jump-prone adults from leaping out.
- Plants: Include several tall, live plants like java fern or anubias rooted to the bottom. Their leaves will break the water surface, giving the male anchor points for his bubble nest. Floating plants like water lettuce or dwarf water lettuce are perfect.
Water Parameters: The water must be pristine and aged (dechlorinated). Aim for a pH of 7.0-7.5 and zero ammonia and nitrite. A tiny sponge filter set on a very low flow can be added to the tank before introducing the fish to cycle the tank for a week, but turn it off during actual spawning to avoid disturbing the nest.
Selecting and Acquiring Your Breeders
Choosing the right fish is half the battle. Look for:
- Health: Active swimmers, no torn or clamped fins, no white spots (ich), clear eyes, and a good appetite. The body should be plump, especially in the abdomen for females.
- Age: Fish between 4 months and 1.5 years old are in their prime. Younger fish may be inexperienced; older fish may have reduced fertility.
- Color and Form: Select fish that exemplify the traits you wish to propagate. For a first-time breeder, choose robust, healthy fish over the most spectacular but potentially fragile show specimens.
- Compatibility: This is tricky. Some pairs click instantly; others may fight to the death. Always have a backup plan. A proven, docile pair is best for beginners.
It is highly recommended to quarantine any new fish for at least 2-4 weeks in a separate hospital tank to ensure they are not carrying diseases or parasites that could devastate your breeding project or your existing aquarium collection.
The Conditioning Diet: Building Vitality
For 2-4 weeks before you plan to spawn, both your male and female bettas need a high-protein, nutrient-dense diet. This builds fat reserves for energy and improves egg and sperm quality.
- Feed 2-3 times daily. Only feed what they can consume in 2-3 minutes.
- Primary Foods: High-quality pellet or flake as a base (soaked first).
- Supplemental Foods (The Key): Rotate between frozen or live foods. The best options are:
- Bloodworms
- Brine shrimp (especially enriched)
- Daphnia
- Mysis shrimp
- Fast Before Spawning: 24 hours before introducing the pair, stop feeding the female. A slightly empty gut makes her more receptive and reduces waste in the breeding tank. The male can continue to be fed lightly.
This conditioning period is when you observe your fish. A well-conditioned female will have a noticeably plump, rounded abdomen. Sometimes, you can even see a small white spot (the ovipositor) protruding slightly from her vent.
Phase 2: Introducing the Pair and The Spawning Process
With your conditioned fish and ready breeding tank, the moment of introduction arrives. This must be done with precision to prevent injury or death.
Visual guide about How to Breed Betta Fish
Image source: bettadata.weebly.com
The Introduction Method: Using a Divider
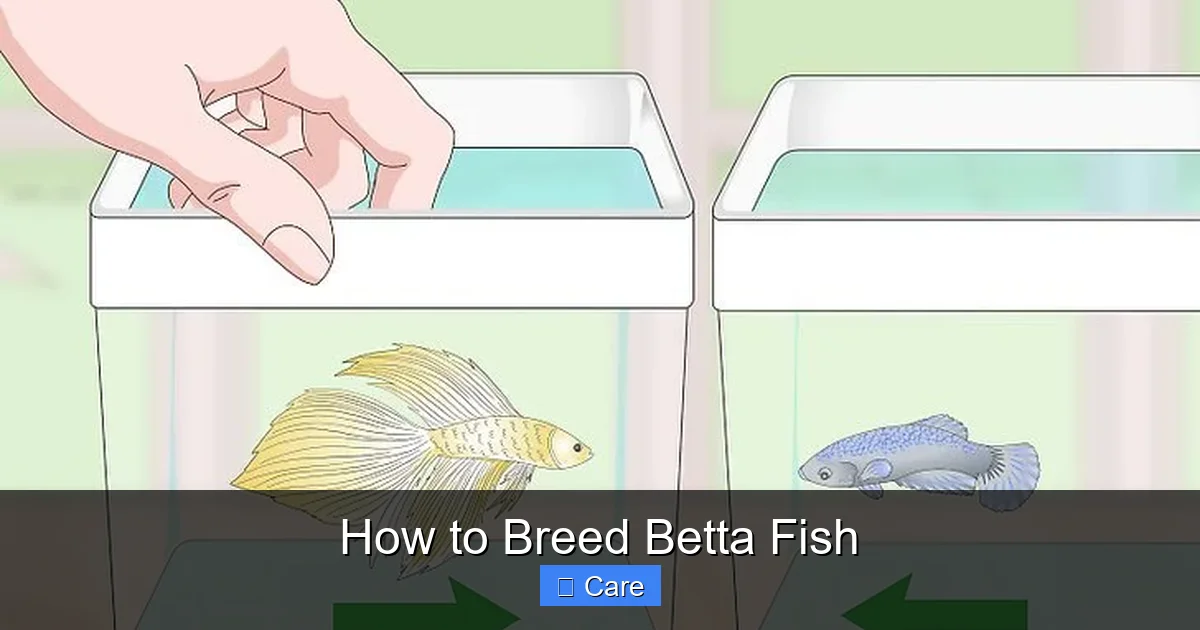
Never simply drop the female into the male’s tank. The safest method is using a tank divider.
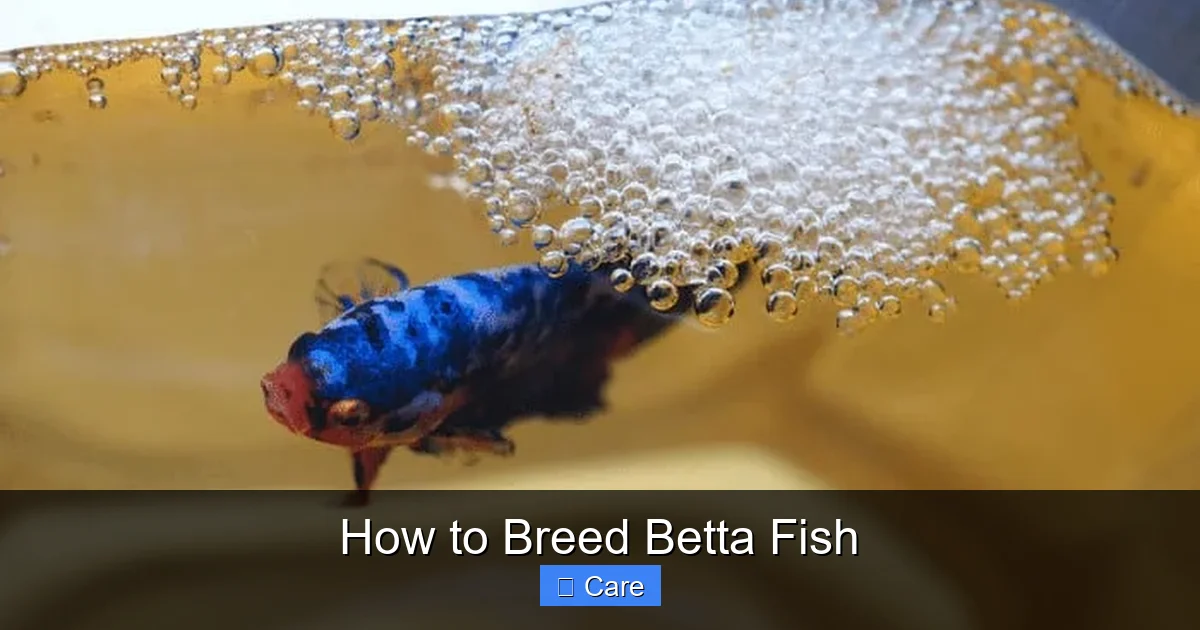
- Place the male in the bare breeding tank first. He will immediately begin exploring and, hopefully, start building a bubble nest under a plant leaf or in a corner. This may take a few hours to a couple of days.
- Once a substantial bubble nest is built (even a small one to start), place the female in the tank but on the opposite side of a clear, solid divider. She should be in a separate container or section within the same tank.
- Allow them to see each other through the divider for 12-24 hours. They will flare at each other. This “visual courtship” is important. The male will often intensify his nest-building.
- Observe their behavior. If the male constantly charges the divider with full flaring gills and the female appears terrified or vertically striped (a stress sign), give it more time or consider a different pair.
- When both seem calmer, with the male displaying more “dance-like” movements (flaring, spreading gills, leading the female toward the nest) and the female showing interest (darkening color, “submissive” barring), you can remove the divider.
Recognizing Spawning Behavior
Once the divider is removed, the real action begins. This can happen within minutes or take a few days. Stay near the tank, but observe from a distance to avoid stressing them.
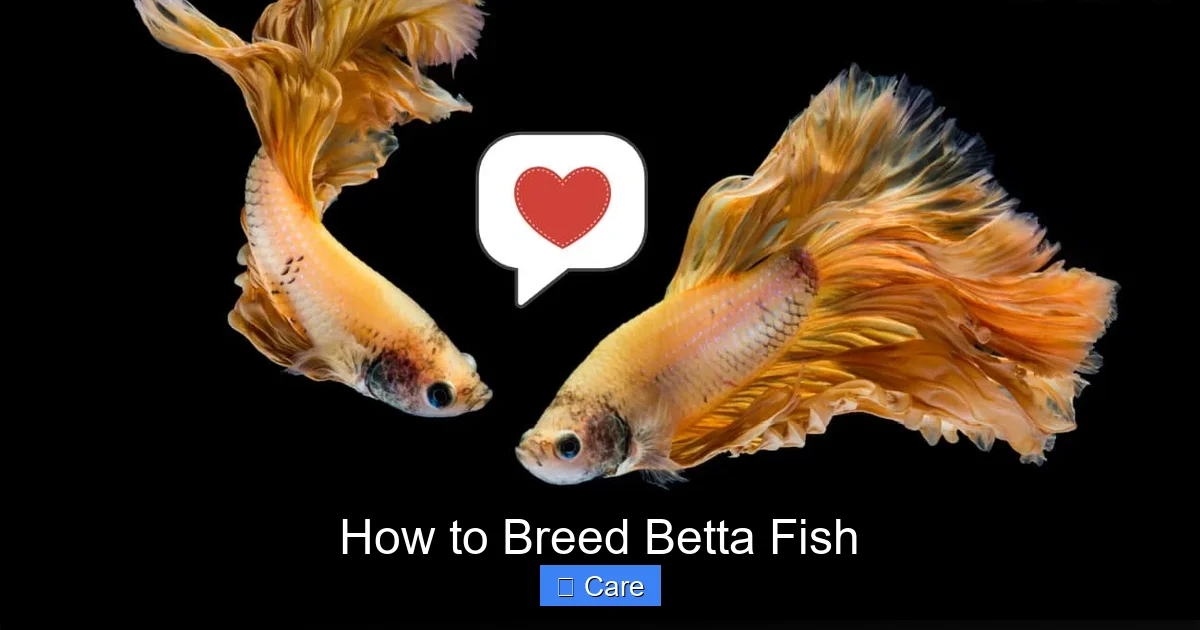
- The Dance: The male will perform a vibrant, quivering dance in front of the female, leading her to the bubble nest. He may flare his gills and opercula (gill covers) dramatically.
- The Embrace: The pair will wrap their bodies around each other in a tight embrace, often turning upside down. This is the “nuptial embrace.”
- Egg Release: During the embrace, the female releases eggs (10-40 at a time), and the male simultaneously releases milt to fertilize them.
- Egg Collection: The male, often with the female’s help, will use his mouth to scoop up the fertilized eggs as they sink and place them carefully into the bubble nest. The female may also help gather eggs.
- Post-Spawning: Spawning can last 1-3 hours, with dozens of embraces. The female may become exhausted, appearing skinny and pale. The male will now become intensely protective, chasing the female away from the nest. This is your cue to remove the female immediately. If left, he may kill her. Gently net her out and return her to her recovery tank.
You should now see a small, glistening cluster of eggs (they look like tiny, opaque marbles) in the center of the bubble nest. A successful spawn can yield 50-200+ eggs, depending on the female’s size and health.
Phase 3: The Male’s Guard Duty and Egg Development
For the next 24-48 hours, the male is a dedicated single parent. His job is to meticulously tend the nest, adding bubbles as needed, and retrieving any egg that falls.
Visual guide about How to Breed Betta Fish
Image source: wikihow.com
What to Expect During This Period
Do not disturb the male. Keep the tank in a quiet, low-light area. You may see him constantly hovering under the nest, gently adjusting it. This is normal. Some eggs will turn white and fuzzy—these are infertile and will be removed by the male or you can carefully pluck them out with a pipette or tweezers to prevent fungus from spreading.
The Hatching Timeline
- 24-36 Hours Post-Spawning: The tiny, dark-eyed fry will begin to wriggle inside their eggs. They are still attached to the yolk sac and remain in the nest.
- 48-72 Hours Post-Spawning: The fry will hatch. They will look like tiny, comma-shaped specks with a big yolk sac, still unable to swim freely. They will often fall from the nest but the male will herd them back up. At this stage, they are still absorbing their yolk sac and do not need food.
- 72-96 Hours Post-Spawning: Once the yolk sac is fully absorbed (they look thinner and more “fish-like”), the fry will become free-swimming and begin to explore the water column horizontally. This is the most critical moment. The male’s job is done.
As soon as the majority of fry are free-swimming, you must remove the male. His instinct to protect the nest turns to predation on the now-swimming fry. Gently net him out and return him to his own tank. He will likely rebuild his nest and be ready to spawn again in a few weeks.
Phase 4: Raising the Most Fragile Fish in the World
Welcome to the most challenging and rewarding phase. Betta fry are microscopic. They require live food of an appropriate size and immaculate water. Your routine changes dramatically.
The First Feed: Infusoria or Fry Food
The moment the fry are free-swimming and yolk-sacs are gone (usually day 4-5 post-hatch), you must start feeding. They cannot eat baby brine shrimp (BBS) yet.
- Infusoria: This is a culture of microscopic protozoa. It’s the classic first food. You need to start your infusoria culture at least 2 weeks before your expected spawn date. Use a jar with hay or lettuce in aged water. It takes time to bloom.
- Commercial Fry Food: Products like Hikari First Bites or Otohime A are excellent, easy-to-use alternatives. They are powdered foods that suspend in the water column.
- Feeding Method: Add a few drops of the infusoria or a tiny sprinkle of powder near the fry. Watch for their little bellies turning a slight orange or brown from the food. Feed 3-4 times daily.
Graduating to Baby Brine Shrimp (BBS)
After 7-10 days on infusoria, the fry should be large enough to accept newly hatched brine shrimp. This is a game-changer. BBS are packed with nutrients and their movement triggers the fry’s hunting instinct.
- You Must Hatch Your Own: Buy brine shrimp eggs (artemia). Hatch them in a simple hatchery using saltwater (1.5-2 tbsp salt per liter) and an air stone. The nauplii hatch in 24 hours. Rinse them thoroughly with fresh water before adding to the fry tank.
- Feeding: Offer a small swarm of BBS 2-3 times daily. You will see the fry darting to catch them. Continue this for 2-3 weeks as their primary diet.
Water Changes: The Lifeline
This cannot be overstated. Fry produce waste and consume oxygen at a phenomenal rate relative to their size. Poor water quality is the #1 killer of betta fry.
- Start on Day 1 of Free-Swimming: Begin with tiny, daily water changes of 10-15%.
- Method: Use a length of airline tubing with a piece of sponge or mesh over the end to syphon out debris from the bottom. Never use a gravel vacuum that creates a strong current. Replace with aged, temperature-matched water. Add a drop of a water conditioner like Seachem Prime if using tap water.
- Frequency: As the fry grow and eat more, increase to 20% daily changes after the first week. Consistency is more important than large, infrequent changes.
Phase 5: Growth, Development, and Common Challenges
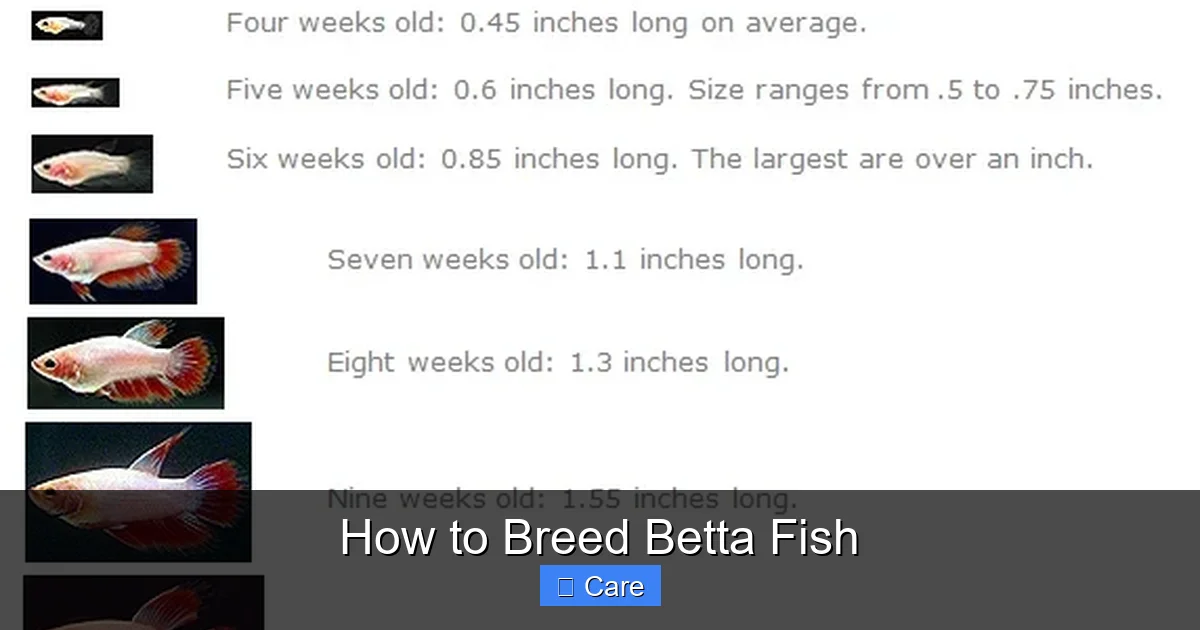
Over the next 4-8 weeks, your fry will transform dramatically. They will develop their characteristic labyrinth organ (a specialized breathing organ) by about 3-4 weeks old. Their fins will begin to show shape, and colors will start to emerge around 5-6 weeks.
Upgrading and Separating
As the fry grow, they will need more space and less competition.
- First Upgrade (3-4 weeks): If you have a large spawn, consider moving them to a larger, filtered tank (a 20-gallon long is great). A gentle sponge filter is now essential for biological filtration.
- Sexing and Separating (8-12 weeks):strong> This is the tricky part. Males will often develop more vibrant colors, longer fins, and begin to flare at each other. Females are usually smaller, with shorter fins, and may develop an ovipositor (a small white bump). When you see consistent flaring and aggression, separate the males immediately into individual containers (like kritter keepers or large jars). Do not wait. They will fight to the death. Females can often be kept in a “sorority” tank of 4+ with ample space and hiding places, but monitor closely for bullying.
Common Problems and Solutions
- Fry Not Growing: Usually a water quality issue or insufficient food. Test water. Increase BBS feedings. Ensure infusoria/BBS are rinsed and not over-salting the tank.
- High Mortality Rate: Normal in early days, but a spike suggests bad water, disease (like velvet or columnaris), or inbreeding issues from the parents.
- Male Eats the Eggs: Can happen if he is inexperienced, stressed, or the water is poor. Sometimes the female is infertile. A first-time male might eat a few, but if he devours the entire nest, he may not be a good father. Try again with a different pair.
- Females Becoming Egg-Bound: If a conditioned female does not spawn, she can retain eggs, leading to a fatal condition. Spawning with a proven male or gently massaging her abdomen (with extreme care and research) can sometimes relieve this.
Conclusion: The Cycle of Life
Learning how to breed betta fish is a profound lesson in aquatic life. It connects you to the raw beauty and brutal fragility of nature. You will marvel at the male’s bubble-nest architecture, feel a surge of pride at the first successful embrace, and experience the nail-biting tension of the first feed. You will also face loss, which is an inevitable part of the process. The ultimate reward is not in the number of survivors, but in the knowledge that you have responsibly participated in the continuation of a species that has captivated humans for centuries. As your fry grow, display their unique colors, and eventually find their own homes, you gain a deeper appreciation for the betta beyond its role as a solitary tank ornament. You become a steward. Remember to always breed for the health and vigor of the fish, not just for a rare color. Document your spawns, learn from each attempt, and connect with other breeders. The betta breeding community is a wealth of shared knowledge. Now, with your tank prepared and your mind armed with this guide, you are ready to begin this extraordinary journey.
Frequently Asked Questions
How long does the entire betta breeding process take from start to finish?
From the beginning of conditioning to having free-swimming fry ready to accept baby brine shrimp takes approximately 3-4 weeks. Raising the fry to a sellable or rehome-ready size (about 1-1.5 inches) takes an additional 2-3 months.
What is the biggest mistake beginners make when trying to breed bettas?
The most common and critical mistake is improper water quality during the fry stage. New breeders often underestimate how quickly tiny fouling from food and waste can poison the water. Starting daily, gentle water changes from the first day the fry are free-swimming is absolutely essential for survival.
Can I breed bettas in a community tank or a small tank?
No. Breeding requires a dedicated, species-only tank with a bare bottom and specific setup. A community tank introduces stress, predation, and competing water quality demands. A tank smaller than 5 gallons does not provide stable parameters or enough space for the male to build a proper nest and for the female to escape his attention.
How often should I feed the baby betta fry?
Feed 3-4 times daily, offering only as much food as they can consume within 2-3 minutes. Overfeeding is a direct path to fouled water and a mass die-off. The food (infusoria or powdered fry food) should create a slight cloud in the water that the fry swim through and consume.
When and how do I separate the male betta from the eggs/fry?
Remove the male as soon as the vast majority of the fry are free-swimming and have absorbed their yolk sacs, typically 72-96 hours after spawning. He will see the swimming fry as food. Gently net him out with a cup or net and return him to his own clean, cycled tank. Do not delay this step.
How can I tell if my betta spawn was successful?
You will see a small, glistening cluster of tiny, round eggs (like a cluster of fine sand or tapioca pearls) collected in the center of the male’s bubble nest. The male will be fiercely guarding this spot, adding bubbles and occasionally using his mouth to adjust the eggs. If you see no eggs after a few hours of intense embracing, the spawn was likely infertile.