How to Paint Watercolor Betta Fish
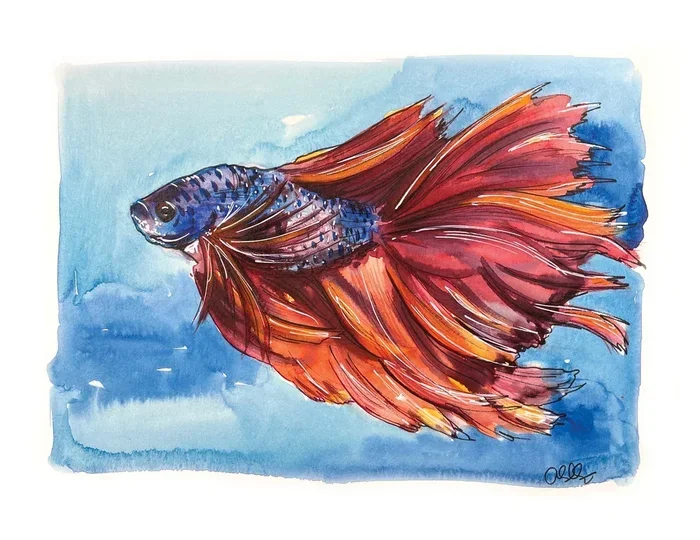
Watercolor betta fish painting is a fun and relaxing art hobby that lets you capture the beauty of these colorful aquarium fish on paper. This guide covers everything from choosing the right supplies to mastering blending techniques that make your betta fish come alive. You will learn simple steps, pro tips, and common mistakes so you can create gorgeous fish art even as a complete beginner.
Watercolor betta fish painting is one of the most rewarding art hobbies you can pick up. If you love the shimmering colors and flowing fins of betta fish, translating that beauty onto paper feels incredibly satisfying. Whether you are a complete beginner or someone who has painted before, this guide will walk you through everything you need to know.
The soft, translucent nature of watercolor perfectly matches the delicate look of a betta fish. Unlike heavy acrylics or oils, watercolor lets light pass through the paint, creating a glow that mimics how fish look underwater. This is exactly why so many artists choose watercolor for fish art.
In this article, you will find a full breakdown of supplies, step-by-step instructions, techniques, and tips that help you paint beautiful betta fish with confidence. Let us dive right in.
Key Takeaways
- Watercolor is the perfect medium for painting betta fish: Its soft, flowing nature mimics the natural beauty and vibrant colors of betta fins.
- You need only a few basic supplies: Watercolor paints, quality paper, brushes, and water are all you need to get started.
- Layering and blending are the core techniques: These methods help you build depth, shine, and realism in your betta fish art.
- Start with simple shapes: Breaking the fish into basic forms makes the painting process much easier and less intimidating.
- Practice makes progress: Even experienced artists started somewhere, and each painting helps you improve your skills.
- Avoid common mistakes like overworking the paper: Let the water do the work and resist the urge to add too much detail too soon.
📑 Table of Contents
What Is Watercolor Betta Fish Painting?
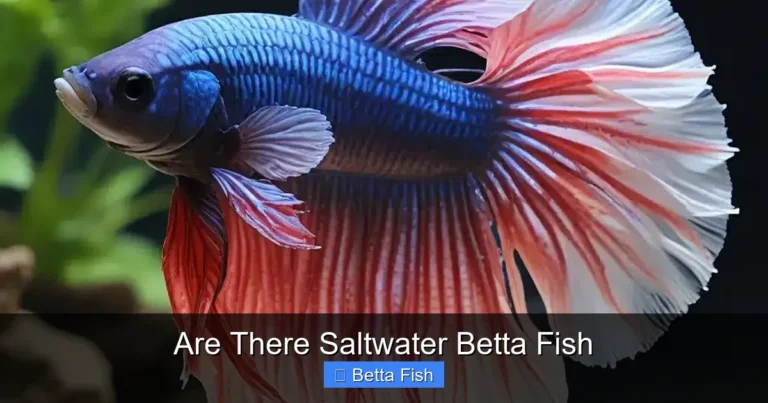
Watercolor betta fish painting is the art of using watercolor paints to create images of betta fish. Betta fish, also known as Siamese fighting fish, are famous for their long, flowing fins and brilliant colors. Artists love painting them because their natural patterns offer endless creative possibilities.
Watercolor painting works differently from other art forms. The paint is water-based, which means you can layer colors, create soft blends, and add highlights with ease. This makes it ideal for capturing the ethereal, almost magical look of a betta fish gliding through water.
Many people who paint aquarium fish choose watercolor because it allows for happy accidents. Colors bleed into each other in ways you cannot fully control, and that unpredictability often creates stunning results. If you enjoy betta fish care and also love art, this combination is a perfect creative outlet.
Supplies You Need to Get Started
One of the best things about watercolor painting is that you do not need a huge collection of supplies to begin. Here is a simple list of everything you need to start painting watercolor betta fish.
Watercolor Paint Set
You can use either a pan set or a tube set. Pans are convenient and travel-friendly. Tubes give you more control over color intensity. Look for sets that include reds, blues, greens, oranges, and metallic shades. Betta fish come in many colors, so having a good range helps you mix the exact shade you want.
Watercolor Paper
This is the one supply you should not skimp on. Regular paper will buckle and warp when wet. Heavyweight watercolor paper (at least 140 lb or 300 gsm) handles water beautifully and gives your painting a professional finish.
Brushes
You really only need two or three brushes to start. A round brush size 6 or 8 is great for the fish body. A smaller round brush (size 2 or 4) works well for fine details like fins and scales. A flat brush helps with background washes.
Water and Palette
Keep a jar of clean water nearby for rinsing your brushes. A white ceramic plate or a dedicated mixing palette lets you blend colors before applying them to paper.
Optional Extras
- Masking fluid: Preserves white areas for highlights.
- Pencil and eraser: For sketching the fish outline first.
- Salt or plastic wrap: Creates interesting texture effects.
Taking care of your betta fish water quality at home is one thing, but keeping your art supplies organized and clean is another small step that makes a big difference in your painting results.
Step-by-Step Guide to Painting Watercolor Betta Fish
Now comes the fun part. Follow these steps to create your first watercolor betta fish painting. Each step builds on the one before it, so go in order and take your time.
Step 1: Sketch the Fish Shape
Start by lightly drawing the basic shape of your betta fish with a pencil. Bettas have elongated bodies with flowing, fan-like fins. Keep your lines loose and simple. You are not trying to create a perfect drawing, just a guide for your painting. Think of it as a simple outline of a fish swimming through water.
Step 2: Paint the First Wash
Wet your paper slightly with clean water using a large brush. Then, drop in a light wash of color for the body. Use a pale version of your chosen base color. Let the water carry the pigment where it wants to go. This first wash sets the foundation for everything else.
Step 3: Build Up Layers
Once the first layer dries, add a second wash with a slightly deeper shade. Focus on the areas where color would be richer, like the head and tail. Watercolor works best with thin, layered builds rather than one thick coat. Patience here is key.
Step 4: Paint the Fins
Betta fins are the star of the show. Use a smaller brush and apply color with soft, flowing strokes. Let the edges bleed slightly for a natural, translucent look. If you want more control, use masking fluid on the fin edges before painting and remove it once dry.
Step 5: Add Details and Highlights
Now it is time to bring your fish to life. Add small details like eye dots, subtle scale patterns, and fin lines. Use a tiny brush and minimal paint. For highlights, leave white spaces or add a touch of white paint or salt texture where light would naturally hit the fish.
Step 6: Paint the Background
A simple background makes your fish pop. Use a light blue or green wash for a water effect. You can also add soft bubbles or aquatic plants. Keep the background lighter than the fish so it stays the focal point.
If you enjoy creating beautiful spaces for your fish, you might also like setting up a betta fish bowl with a plant for inspiration. Real aquarium setups can spark ideas for your art.
Common Watercolor Techniques for Fish Art
Mastering a few core watercolor techniques will level up your betta fish paintings dramatically. Here are the most useful ones.
Wet-on-Wet
This technique involves applying wet paint onto wet paper. Colors blend softly and naturally, which is perfect for creating the smooth, flowing look of betta fins. Wet-on-wet gives that dreamy, underwater feel that makes fish art so enchanting.
Wet-on-Dry
Here you apply wet paint onto dry paper. This gives you more control and sharper edges. Use wet-on-dry for details like the fish eye, fin lines, and small scale patterns.
Glazing
Glazing means layering thin, transparent washes of color on top of each other. Each layer adds depth and richness. This is how you build the complex, shimmering colors that betta fish are known for. Start light and gradually deepen the tones.
Dry Brush
With very little water on your brush, you drag it across the paper to create textured strokes. This works well for suggesting scales or adding texture to fins. Dry brush adds a nice contrast to the softer wet techniques.
Lifting
Lifting means removing wet or damp paint with a clean, damp brush or paper towel. This technique is great for creating highlights on the fish body or correcting small mistakes without damaging the paper.
Each technique has its place in painting watercolor betta fish. Experiment with all of them to find what feels most natural to you. Over time, you will develop your own style that makes your fish art unique.
Tips for Making Your Betta Fish Painting Stand Out
Even after you learn the basics, there are simple tips that take your paintings from good to truly stunning. Here are some expert-level insights to keep in mind.
- Study real betta fish: Look at photos of bettas in different colors and fin types. Notice how light reflects off their scales and fins. Observation is one of the best tools an artist has.
- Use a limited color palette: Too many colors can make a painting look muddy. Stick to three or four colors and mix them to create variety.
- Leave white space: White paper acts as a natural highlight. Resist the urge to cover every inch. The untouched areas give your painting life and sparkle.
- Practice fin movement: Paint the same fish in different poses. A fin stretched out looks very different from a fin curled up. Capturing movement adds energy to your art.
- Let paintings dry completely: Patience prevents colors from muddying. Use a hair dryer on low heat if you are in a hurry, but air drying is always best.
Much like how you would keep your betta fish warm to keep them healthy and vibrant, keeping your painting environment comfortable and well-organized helps your creativity flow smoothly.
Also consider how proper betta fish care and a healthy tank environment can inspire your art. When you observe a happy, well-cared-for betta, you notice details you might otherwise miss, and those details make their way into your paintings.
Common Mistakes to Avoid
Every artist, no matter the skill level, makes mistakes. The good news is that most common errors in watercolor betta fish painting are easy to avoid.
Overworking the Paper
This is the number one mistake beginners make. When a layer does not look right, it is tempting to go over it again and again. Overworking breaks down the paper fibers and creates a muddy, dull appearance. If a section is not working, let it dry and paint over it with a fresh wash instead.
Using Too Much Water
Watercolor needs balance. Too much water dilutes the pigment and causes colors to spread uncontrollably. Aim for a consistency like whole milk. Your brush should be wet but not dripping.
Skipping the Sketch
Jumping straight into painting without a light pencil sketch often leads to proportions that feel off. A quick, loose sketch takes only a minute and saves you from bigger problems later.
Ignoring the Background
Focusing only on the fish and forgetting the background can make your painting look flat. A simple wash behind the fish adds depth and context. It also draws the viewer’s eye straight to your subject.
Not Letting Colors Dry Between Layers
Adding a new layer on top of a wet one causes colors to bleed into each other in unwanted ways. Always wait for each layer to dry completely before adding the next. This is the golden rule of watercolor painting.
Remember that every mistake is also a learning opportunity. The more you paint, the more you understand how water and pigment interact on paper. Keep practicing and enjoy the process.
Conclusion
Watercolor betta fish painting is a wonderful way to combine a love for art with a love for these stunning aquarium fish. From gathering your basic supplies to mastering techniques like wet-on-wet and glazing, every step brings you closer to creating beautiful fish art that captures the magic of bettas. The key is to start simple, be patient with yourself, and enjoy the creative journey.
You do not need years of experience or expensive materials. A few brushes, some watercolor paper, and a willingness to experiment are all you need. Each painting you complete builds your skills and confidence. Soon, you will be creating vibrant, lifelike betta fish that you will be proud to display or share as gifts.
So grab your supplies, pick a reference photo of your favorite betta, and start painting. The world of watercolor fish art is waiting for you, and your first masterpiece is just a few brushstrokes away.
Frequently Asked Questions
Do I need to be an experienced artist to paint watercolor betta fish?
Not at all. Watercolor betta fish painting is beginner-friendly because the soft, flowing nature of watercolor hides imperfections beautifully. Start with simple shapes and basic colors, and your skills will grow with each painting you complete.
What type of watercolor paper is best for painting fish?
Heavyweight watercolor paper with a weight of at least 140 lb (300 gsm) works best. It absorbs water evenly, prevents buckling, and handles multiple layers without falling apart. Cold-pressed paper is a popular choice for fish art because it adds a nice texture.
Can I use reference photos of real betta fish for my paintings?
Absolutely. Using reference photos is one of the best ways to capture accurate colors and fin shapes. Look for high-quality images that show the fish from different angles and in different lighting conditions. This helps you understand how colors shift and shine on their bodies.
How long does it take to complete a watercolor betta fish painting?
A simple painting can take anywhere from one to two hours, including drying time between layers. More detailed pieces with complex backgrounds may take longer. The beauty of watercolor is that you can always pause and come back to it later.
What colors work best for painting betta fish?
Betta fish come in many colors, including red, blue, green, purple, and metallic shades. A basic set of red, blue, yellow, and a metallic or iridescent color gives you plenty of mixing options. Start with a limited palette and expand as you grow more confident.
How do I make my watercolor betta fish look shiny and realistic?
Leave white paper exposed for highlights, especially on the fins and body. Use thin, layered washes to build depth, and add fine details with a small brush. Studying how light reflects off real fish helps you place highlights in the right spots for a natural, shiny look.