How to Clean a Betta Fish Bowl with Rocks
Cleaning a betta fish bowl with rocks requires a gentle, methodical approach to protect your fish and the beneficial bacteria living in the substrate. Never use soap or chemicals; instead, use a gravel vacuum to remove debris while preserving old tank water for refilling. Always match water temperature and treat new water with a dechlorinator to keep your betta stress-free and healthy.
So, you’ve created a beautiful, tranquil world for your betta fish. A vibrant ceramic castle, a gentle betta leaf hammock, and a colorful bed of smooth river rocks at the bottom. It looks stunning. But then, you notice it. A faint haze in the water. Bits of uneaten food nestled between the stones. A thin film on the surface. The big question looms: How on earth do I clean this without hurting my fish or wrecking the carefully balanced setup? Cleaning a betta fish bowl with rocks is a common point of confusion for many owners. It’s more nuanced than just dumping the water and scrubbing everything down. Doing it wrong can spell disaster for your sensitive Siamese fighting fish. But doing it right? That’s the secret to a crystal-clear, healthy home that your betta will thrive in for years. This guide will walk you through every single step, from the “why” to the “how,” ensuring you feel confident and your betta stays blissfully unaware of the spa treatment you’re giving its home.
Key Takeaways
- Never use soap, detergents, or chemicals: These are lethal to betta fish and destroy the essential beneficial bacteria in the rocks and water.
- Clean rocks during every water change: Use a gravel vacuum to siphon debris from the substrate without removing all the gravel at once.
- Preserve old tank water: Save 50-70% of the existing water during cleaning to maintain a stable environment and protect the nitrogen cycle.
- Match water temperature perfectly: New water added to the bowl must be within 1-2 degrees Fahrenheit of the existing water to prevent thermal shock.
- Always dechlorinate tap water: Chlorine and chloramines in tap water are toxic to bettas and must be neutralized with a water conditioner before use.
- Clean one element at a time: Never remove and clean all decorations, rocks, and filter media in the same session to avoid crashing the biological filter.
- Observe your betta’s behavior: After cleaning, watch for signs of stress like lethargy or loss of appetite, which may indicate a problem with the cleaning process.
📑 Table of Contents
- Why Proper Cleaning Matters for a Rocked Betta Bowl
- Gathering Your Supplies: The Right Tools for the Job
- The Step-by-Step Cleaning Process: From Start to Finish
- Special Considerations for Different Rock Types
- How Often Should You Clean? A Practical Schedule
- Troubleshooting: What If Something Goes Wrong?
- Conclusion: A Clean Bowl is a Happy Home
Why Proper Cleaning Matters for a Rocked Betta Bowl
Before we grab the bucket, we need to understand what we’re actually cleaning and why the method matters so much. A betta bowl with rocks isn’t just a pretty vase with a fish in it. It’s a miniature, living ecosystem. Those rocks are doing a critical job.
The Rocks Are a Biological Filter
Every surface in your betta’s bowl—the glass, the decorations, and especially the rocks—is coated in a beneficial, invisible film of bacteria. This is the good bacteria. Its sole job is to process your betta’s toxic waste. When your fish breathes, it releases ammonia. When it eats, waste produces more ammonia. Ammonia is deadly. The good bacteria on your rocks convert that ammonia first into nitrites (still bad) and then into nitrates (much less toxic in low amounts). This is the nitrogen cycle, and it’s the foundation of a healthy aquarium. If you scrub all your rocks with soap or remove and replace them all at once, you wipe out this bacterial colony. The cycle crashes, and ammonia will spike, poisoning your betta.
Physical Debris Traps
The second role of the substrate (the fancy word for your rocks or gravel) is as a physical trap. Food particles, bits of shed skin, and general detritus sink and settle between the stones. If left to accumulate, this debris decays, consuming oxygen and producing more ammonia, overwhelming your biological filter. The goal of cleaning is to remove this physical waste without removing the biological bacteria. This is the core principle.
Betta Sensitivity: Stress is the Enemy
Bettas are beautiful but delicate. They are highly sensitive to changes in their environment. Sudden changes in water temperature, pH, or mineral content cause stress. A stressed betta is a susceptible betta, prone to diseases like fin rot or ich. A proper cleaning is, therefore, a minimal-change process. We aim to disturb the bowl’s environment as little as possible while still removing the gunk. This means gentle siphoning, using the same source of treated water, and never doing a full, dramatic overhaul.
Gathering Your Supplies: The Right Tools for the Job
You don’t need a fancy, expensive setup. In fact, the simpler, the better for a single betta in a bowl. Having everything ready before you start will make the process smooth and quick, minimizing stress for everyone. Let’s assemble your cleaning kit.
Visual guide about How to Clean a Betta Fish Bowl with Rocks
Image source: buyaquariumfish.com
Essential Tools
- A Gravel Vacuum/Siphon: This is the #1 most important tool. It’s a simple plastic tube with a wide, open end and a narrow tube that you suck on to start the siphon. It allows you to clean the rocks by vacuuming debris out while the gravel stays in place. You can find these at any pet store for under $10. Look for a thin, flexible model that can fit into small bowls.
- Two Clean Buckets or Containers: Designate one as the “dirty” bucket for the old, siphoned-out water and debris. The other is your “clean” bucket for holding the fresh, treated water you’ll add back. Never use buckets that have held cleaning chemicals.
- Water Conditioner (Dechlorinator): Non-negotiable. Brands like Seachem Prime or API Stress Coat are excellent. This neutralizes chlorine, chloramines, and heavy metals in tap water. Without it, tap water will burn your betta’s gills.
- Algae Scraper or Pad: A plastic blade or non-scratch pad for the glass walls. Avoid metal scrapers as they can scratch the glass and create more hiding places for algae.
- A Small Net: For temporarily moving your betta if you feel it’s necessary or for catching any loose debris.
- Paper Towels or a Clean Cloth: For wiping the outside of the bowl and any water spills.
- Thermometer: Crucial for ensuring your new water temperature matches the old water exactly.
What You Should NOT Use
This is a critical list. Put these items in the trash, not in your betta bowl:
- Soap, Detergent, or Dishwashing Liquid: Even a tiny residue is fatal. The surfactants destroy fish gills.
- Bleach or Disinfectants: Absolutely toxic. They will kill everything, including your fish.
- Vinegar or Acids (for routine cleaning): While a diluted vinegar solution can be used for stubborn hard water stains on glass outside the tank, it must be rinsed with obsessive thoroughness. Never use it inside the bowl with fish present.
- Abrasive Scrubbers (like steel wool): They scratch glass, creating etchings where algae loves to grow, and can shed tiny metal particles.
- Any “Cleaner” labeled for aquariums that isn’t a water conditioner: Stick to your siphon and water changes for the interior.
The Step-by-Step Cleaning Process: From Start to Finish
Alright, supplies are ready. Your betta is swimming about, curious. Let’s begin. The entire process should take no more than 15-20 minutes for a standard 1-2 gallon bowl. Speed and gentleness are key.
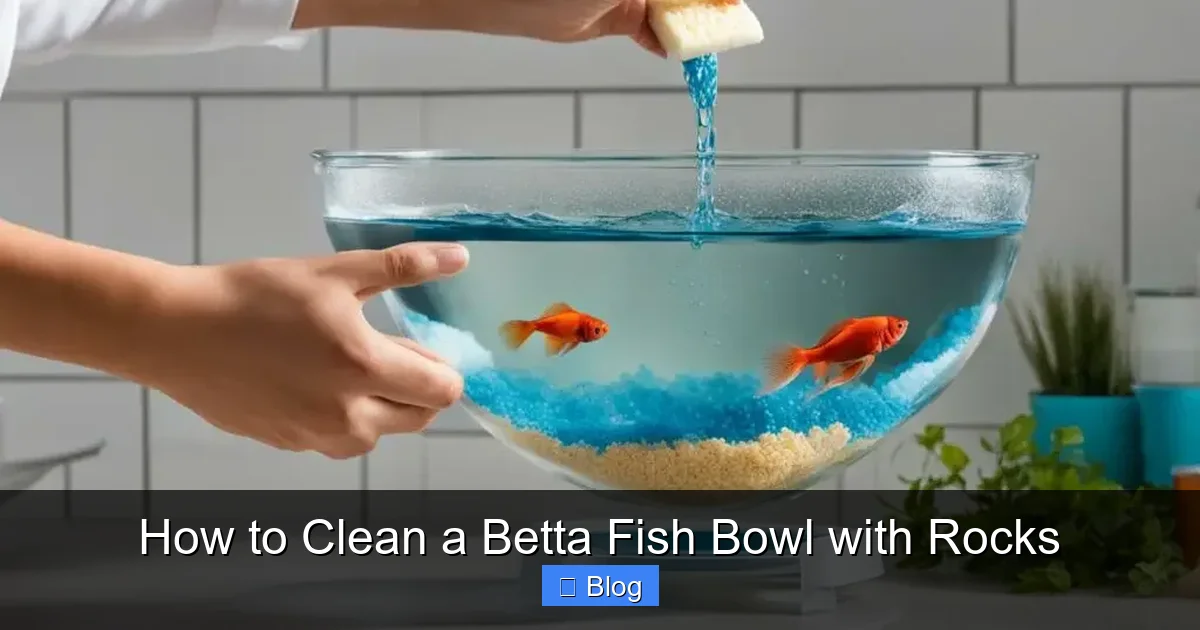
Visual guide about How to Clean a Betta Fish Bowl with Rocks
Image source: bettafishworld.com
Step 1: Prepare the New Water
This is the first thing you should do, hours or even a day before. Fill your “clean” bucket with tap water. Add the correct dosage of water conditioner according to the bottle instructions (usually 1 drop per gallon, but follow your product). Stir gently. Let this water sit. This serves two purposes: it allows the conditioner to fully neutralize the chemicals, and it lets the water temperature adjust to your room’s ambient temperature. We will still need to match it to the tank water precisely with a thermometer later.
Step 2: The Gentle Fish Relocation (Optional but Recommended)
For a small, simple bowl, you can often clean around a curious betta. However, if your bowl is very small (under 1 gallon) or your betta is particularly skittish, it’s kinder to move it temporarily. Using your clean net, gently scoop your betta out. Place it in a small, clean container (like a separate cup or small bowl) that already has some of its bowl water in it. Cover it loosely with a cloth to prevent jumps. Keep this holding container in the same room to maintain temperature.
Step 3: The Siphon and Vacuum: Cleaning the Rocks
This is the core of the process. Assemble your gravel vacuum. Place the wide end into the bowl, pushing it gently into the rocks. Hold the narrow end over your “dirty” bucket and give it a few quick sucks to start the siphon. Water will now flow from the bowl into the bucket.
Now, methodically work your way through the rocks. Gently stir and agitate the top layer of gravel with the vacuum tip. You’ll see a cloud of debris—old food, fish poop, detritus—get sucked up into the tube. Move the vacuum to a new spot. The goal is to clean about one-quarter to one-third of the substrate with each water change. If you clean it all at once, you remove too much good bacteria. By rotating which section you clean each time (e.g., front left this week, back right next week), you maintain a healthy bacterial colony throughout.
Pro Tip: Don’t plunge the vacuum too deep. Most debris accumulates in the top half-inch of gravel. A shallow, swirling motion is most effective. Stop siphoning when you’ve removed about 30-50% of the bowl’s total water volume. You’ll see the water in the bowl getting noticeably clearer as you remove the dirty water.
Step 4: Cleaning Decorations and the Bowl Walls
With the water level lowered, it’s easy to access the decorations. If your castle or plastic plants have visible algae or gunk, take them out. Do not use soap. Rinse them thoroughly in the bucket of old, siphoned-out “dirty” water you just collected. The dirty water is perfect for this—it has no soap and will remove loose debris. For stubborn algae on glass, use your algae scraper or a non-scratch pad, also rinsed in the old water. Wipe the inside walls from top to bottom. Rinse your scraper frequently.
Step 5: The Final Rinse and Check
Give the now-cleaned rocks and decorations one last rinse with the remaining old water in your dirty bucket. This ensures any last loose particles are gone. Look at your bowl. Is the glass clear? Are the rocks relatively free of visible debris? Good. Now, use a paper towel to wipe the outside of the bowl and any spills on your table or stand. A clean exterior makes the whole setup look fantastic.
Step 6: Re-filling: The Temperature is Everything
This is the most critical step for your betta’s comfort. Take your thermometer and check the temperature of the water still in your betta’s bowl (or its temporary holding cup). Then, check the temperature of your prepared, conditioned “clean” water. They must be identical. If they are off by even a degree or two, you need to adjust. You can add a little warm tap water (conditioned!) to the clean bucket, or let it sit longer to cool/heat to room temp. Never add boiling water directly.
Once matched, slowly and gently pour the clean, conditioned water back into the bowl. Try to pour it against a glass wall or over a decoration to minimize disturbance and prevent a sandstorm of settled gravel. Fill it to the original level.
Step 7: The Grand Return
If you moved your betta, now is the time. Using the net, gently transfer it back into its freshly cleaned home. Do not dump the water from its holding cup into the bowl; net the fish. Close the lid (if it has one) to prevent jumps, and let your betta acclimate for a few minutes. Then, turn the light on and enjoy.
Special Considerations for Different Rock Types
Not all rocks are created equal. The type you have can slightly alter your cleaning technique.
Visual guide about How to Clean a Betta Fish Bowl with Rocks
Image source: i.pinimg.com
Smooth River Rocks or Polished Gemstones
These are the easiest. Their smooth, non-porous surfaces don’t harbor debris as deeply. Your gravel vacuum will work efficiently, sucking up waste sitting on top. A gentle swirl is usually sufficient. They also rinse clean very easily in your bucket of old water.
Porous Lava Rock or Pumice Stone
These are fantastic for biological filtration because their holes and crevices are bacterial havens. However, they can also trap fine particles deep inside. When vacuuming, you may need to hold the vacuum tip closer and move it more slowly over these areas to extract the trapped debris. Be gentle, as you don’t want to dislodge the rocks themselves. The benefit of this extra bacterial surface outweighs the slightly more involved cleaning.
Natural, Uncoated Stones from Outside
Extreme caution: If you collected rocks from a garden or stream, they must be properly sterilized before ever being put in the bowl. To clean them, scrub vigorously with a stiff brush under running water. Then, boil them in a separate pot for 10-15 minutes to kill any pathogens or parasites. Let them cool completely. Once in the established tank, clean them as you would any other rock, using the siphon method. Never use soap on them, ever.
How Often Should You Clean? A Practical Schedule
Frequency depends on your bowl size, your betta’s appetite, and whether you have a filter. But a good rule of thumb for a small, unfiltered bowl (1-2 gallons) with rocks is: a 30-50% water change with gravel vacuuming once per week.
For a slightly larger, filtered bowl (2.5+ gallons), you might stretch to every 10-14 days, but never skip vacuuming the rocks during a water change. The debris will always settle there. Watch your water clarity. If it gets hazy between changes, you may need to adjust your feeding (overfeeding is the #1 cause of dirty bowls) or clean a bit more frequently. Consistency is more important than occasional deep cleans. Little and often is far better for your betta than rare, massive disruptions.
Troubleshooting: What If Something Goes Wrong?
Even with the best intentions, you might face a hiccup. Here’s how to handle common issues.
My water is still cloudy after cleaning!
This is usually caused by fine particles stirred up from the gravel that are too light for the siphon to catch. Solution: Be patient. A good mechanical filter (a small sponge filter is perfect for bettas) will pull these particles out of the water column within a few hours. If you don’t have a filter, avoid over-vacuuming, which just stirs more up. The cloud should settle overnight.
My betta is acting stressed after the clean (hiding, clamped fins).
First, don’t panic. Check your water parameters! The most likely culprit is a temperature mismatch or a pH swing from using water that wasn’t properly conditioned or from a different source. Ensure the new water was exactly the same temperature. Test your tap water and conditioned water. If you used bottled spring water, its pH might differ from your tap water. For future cleanings, stick to one consistent water source (treated tap water is usually best). Ensure you saved enough old tank water to blend with the new.
There’s a weird film on the water surface.
This is often a protein film from organics in the water. It’s not usually harmful but is unsightly. Gently lay a paper towel on the surface and lift it off. You can also increase surface agitation slightly with a small air stone (on a very low setting) to break it up. A proper weekly water change should prevent its buildup.
Remember, the goal is a stable, clean environment. If you cause a major cycle crash (by cleaning everything with soap), the only solution is large, frequent water changes (25% daily) until the cycle rebuilds, which can take weeks. This is why the gentle method is so vital.
Conclusion: A Clean Bowl is a Happy Home
Cleaning your betta fish bowl with rocks doesn’t have to be a daunting chore. It’s a simple, ritualistic act of care that directly translates to your fish’s health and vibrancy. By understanding that your rocks are a living filter, arming yourself with the right tools (a siphon and conditioner are non-negotiable), and following the gentle, methodical process of partial water changes and targeted vacuuming, you become the steward of a thriving miniature ecosystem.
You’re not just changing water; you’re performing a delicate balancing act. You’re removing the physical waste while preserving the invisible bacterial life that protects your betta. You’re respecting the sensitivity of your fish by matching temperatures and using safe, dechlorinated water. This weekly 15-minute investment pays off in spades: a brilliantly clear bowl where your betta’s fins flare beautifully against the clean glass, and its colors pop against the pristine rocks. You’ll have peace of mind knowing you’re providing the best possible life for your aquatic companion. Now, grab your siphon, check that thermometer, and get ready to enjoy the sparkling results of a job well done.
Frequently Asked Questions
Can I use soap or detergent to clean the rocks and bowl?
No. Even a tiny residue of soap, detergent, or any household cleaner is lethal to betta fish. These chemicals destroy their protective slime coat and damage their gills. Always use only clean water and a gravel vacuum for cleaning. For algae on glass, use a dedicated algae scraper or a non-scratch pad rinsed in old tank water.
How often should I clean the rocks in my betta bowl?
You should vacuum the rocks during every water change. For a small, unfiltered bowl (1-2 gallons), this means a 30-50% water change with gravel vacuuming once per week. For a larger, filtered bowl, every 10-14 days is often sufficient. Consistency is key to preventing waste buildup without destabilizing the environment.
Is tap water safe for bettas if I just let it sit out overnight?
No. Letting tap water sit out does not reliably remove chlorine or chloramines, which are both commonly used by water treatment plants. Chloramines, in particular, do not evaporate. You must use a liquid water conditioner/dechlorinator to neutralize these chemicals before adding tap water to your betta’s bowl.
Can I use any type of rock I find outside in my betta’s bowl?
Only if you properly sterilize them first. Rocks from outside can carry harmful bacteria, parasites, and pollutants. You must scrub them thoroughly, then boil them for 10-15 minutes in a separate pot to kill any pathogens. Let them cool completely before adding to the tank. Avoid rocks that fizz in vinegar (indicating calcium carbonate), as they can alter water hardness and pH dangerously.
Do I need to remove all the rocks to clean them properly?
No, and you should never do this. Removing all the rocks at once strips away nearly all the beneficial bacteria that form your biological filter, causing a toxic cycle crash. Instead, use a gravel vacuum to clean only a portion (1/4 to 1/3) of the substrate during each water change, rotating sections each time.
My betta is stressed after a water change. What did I do wrong?
The most common causes are a temperature mismatch (new water not within 1-2°F of old water) or a pH/mineral content swing from using a different water source. Always use a thermometer to match temperatures precisely. Use the same source of treated tap water consistently. Ensure you saved enough old tank water (50-70%) to blend with the new water, maintaining stable water chemistry.