How to Take Better Fishing Photos
Taking better fishing photos is easier than you think. With the right camera settings, lighting, and composition techniques, you can turn ordinary fishing trips into a gallery of memorable catches. This guide covers everything from gear choices to editing tips that make your fishing photos stand out.
There is something magical about a great fishing photo. It captures the thrill of the catch, the beauty of the water, and the joy of spending time outdoors. Whether you are a seasoned angler or just starting out, how to take better fishing photos is a skill that will level up your memories and maybe even your social media game.
Most people think you need expensive gear to take stunning fishing shots. That is not true at all. With a few simple techniques and the right mindset, you can take photos that make people feel like they are right there on the boat with you. This guide will walk you through everything you need to know.
We will cover camera basics, composition tricks, lighting hacks, and editing tips. By the end, you will have a clear roadmap to take your fishing photography from blurry snapshots to frame-worthy shots. Let us get started.
Key Takeaways
- Use natural light: Shoot during golden hour for the best lighting on the water.
- Keep your camera ready: Action happens fast, so preset your settings before the fish bites.
- Focus on the story: Great fishing photos tell a story, not just show a fish.
- Invest in waterproof gear: A waterproof camera or housing protects your equipment near water.
- Edit with purpose: Simple edits like cropping and adjusting exposure make a big difference.
- Practice makes perfect: The more you shoot, the better your fishing photography skills will get.
📑 Table of Contents
- Why Fishing Photos Matter
- Gear You Need for Fishing Photography
- Camera Settings for Fishing Photos
- Lighting Tips for Better Fishing Photos
- Composition Techniques That Work
- Common Mistakes to Avoid
- Editing Your Fishing Photos
- Tips for Different Fishing Situations
- How to Take Better Fishing Photos: Final Thoughts
Why Fishing Photos Matter
Fishing is about more than just catching fish. It is about the experience. The early mornings. The quiet moments on the water. The thrill when the line goes tight. Fishing photography helps you preserve all of those moments in a way that words simply cannot.
Good photos also help you share your passion with others. When you post a great shot of a freshwater catch or a beautiful sunset over the lake, you inspire other people to get outside and enjoy the sport. Plus, looking back at your fishing trip photos years later brings back all those feelings.
What Makes a Fishing Photo Great
A great fishing photo does three things. It shows the fish clearly. It captures the environment around you. And it tells a story. Think about the photos you have seen that really stand out. They probably had one or more of these elements.
- Clear subject: The fish or the angler is the main focus.
- Good lighting: Natural light makes everything look better.
- Interesting background: The water, sky, or landscape adds depth.
- Emotion: The photo makes you feel something.
When you keep these four things in mind, your photos will improve dramatically. You do not need a professional camera to achieve this. Even a smartphone can produce amazing results when you follow these principles.
Gear You Need for Fishing Photography
You do not need a lot of expensive equipment to take great fishing photos. But having the right tools does make a difference. Here is what you should consider bringing on your next trip.
Camera Options
Your smartphone is probably the most convenient camera you own. Modern phones have excellent cameras that handle most situations well. If you want to step up, a compact digital camera or a mirrorless camera gives you more control over settings like aperture and shutter speed.
For those who want the best quality, a DSLR camera with a waterproof housing is ideal. This setup lets you shoot underwater or in rainy conditions without worrying about damage. Whatever you use, make sure you know how to adjust the basic settings quickly.
Waterproof and Protective Gear
Water and electronics do not mix well. A waterproof camera is a game-changer for fishing photography. If you use a regular camera, invest in a waterproof pouch or housing. These are affordable and will save you from costly accidents.
Also consider bringing a microfiber cloth. Water droplets on your lens can ruin a shot. A quick wipe between photos keeps your images crisp and clear. A small tripod or phone mount can also help you take steady shots from the boat or shore.
Camera Settings for Fishing Photos
Understanding your camera settings is one of the biggest keys to how to take better fishing photos. You do not need to be a photography expert. Just learning a few basics will make a huge difference.
Shutter Speed for Action Shots
Fishing action happens fast. A fish jumping out of the water or a reel spinning by the rod needs a quick shutter speed. Set your camera to at least 1/500 of a second for action shots. This freezes the motion and keeps your photos sharp.
If you are shooting with a smartphone, use the burst mode. This lets you take multiple shots in quick succession. You can then pick the best one. It is a simple trick that works wonders for catching that perfect moment.
ISO and Lighting
ISO controls how sensitive your camera is to light. On bright sunny days, keep your ISO low (around 100-200). This keeps your photos clean and noise-free. On cloudy days or during early morning and evening, you may need to raise your ISO to 800 or higher.
Watch out for grainy photos. If your images look noisy, lower the ISO and let in more light instead. Finding the right balance takes practice, but your eye will get better over time.
Focus and Composition
Always focus on the fish or the angler, not the background. Most cameras let you tap the screen to choose your focus point. Use this feature. A sharp subject with a soft background creates a professional look.
For composition, try the rule of thirds. Imagine your frame divided into nine equal squares. Place your main subject along the lines or at the intersections. This simple trick makes your photos more visually interesting and balanced.
Lighting Tips for Better Fishing Photos
Lighting is everything in photography. The wrong lighting can turn a great catch into a flat, boring photo. The right lighting can make even a small fish look impressive.
Golden Hour Magic
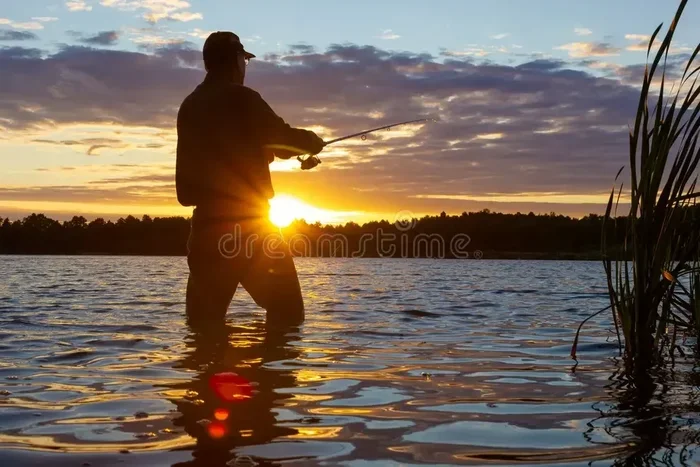
The best time to take fishing photos is during golden hour. This is the hour after sunrise and the hour before sunset. The light is warm, soft, and flattering. It also creates beautiful reflections on the water.
If you can, plan your photo sessions around these times. Early morning fishing trips double as photography sessions. You get to enjoy the calm of dawn and come home with stunning photos at the same time.
Overcast Days Are Your Friend
Do not put away your camera just because it is cloudy. Overcast skies act like a giant softbox. The light is diffused and even, which means no harsh shadows or blown-out highlights. Cloudy days are actually great for fishing photography.
One thing to watch out for is dull, gray light. If the sky looks flat, try to position yourself so the fish is against a brighter background. This adds contrast and makes the subject pop.
Avoid Harsh Midday Sun
Midday sun creates strong shadows and squinty eyes. If you must shoot during the middle of the day, look for shaded areas. Under a tree or on the shaded side of a boat gives you softer, more even light.
You can also use a polarizing filter. This attachment reduces glare off the water and makes colors more vibrant. It is a small investment that makes a big impact on your fishing photos.
Composition Techniques That Work
Composition is how you arrange the elements in your photo. Good composition guides the viewer’s eye to the most important part of the image. Here are some techniques that work especially well for fishing photos.
Tell a Story
The best fishing photos tell a story. Instead of just snapping a picture of a fish, show the whole scene. Include the fishing rod, the tackle box, the hat, or the smile on the angler’s face. These details make the photo feel alive and personal.
Think about what made this moment special. Was it the size of the catch? The beautiful location? The excitement of the moment? Capture that feeling in your frame. A photo that tells a story is a photo people will remember.
Use Leading Lines
The water, the shoreline, the fishing line, and the rod all create natural leading lines. Use these to draw the viewer’s eye toward your subject. For example, position the fishing rod so it points toward the fish in the frame.
This technique adds depth and dimension to your photos. It makes the viewer feel like they are looking into the scene rather than at a flat image. Leading lines are one of the simplest yet most powerful composition tools you can use.
Get Low and Close
Most people take fishing photos from standing height. Try getting lower. Crouch down or sit on the dock. Shooting from a lower angle makes the fish look bigger and more dramatic. It also reduces glare from the water surface.
Get close to your subject when possible. Fill the frame with the fish or the action. A tight crop on a beautiful catch is much more impactful than a wide shot where the fish is just a tiny speck.
Common Mistakes to Avoid
Even experienced photographers make mistakes. Here are some common ones to watch out for when you are out on the water.
- Shooting into the sun: This creates silhouettes and washes out details. Keep the sun behind you or to the side.
- Dirty lens: Water, fish slime, and dirt get on your lens fast. Wipe it often for clear shots.
- Missing the moment: Fish are fast. Be ready to shoot the instant something happens.
- Too much zoom: Digital zoom reduces quality. Move closer instead of zooming in.
- Ignoring the background: A cluttered background distracts from your subject. Choose clean, simple backgrounds when possible.
By avoiding these mistakes, you will see an immediate improvement in your photos. It is all about being prepared and staying aware of what is happening around you.
Editing Your Fishing Photos
Editing is the final step in creating great fishing photos. You do not need fancy software. Free apps like Snapseed, Lightroom Mobile, or even your phone’s built-in editor work perfectly well.
Basic Edits That Make a Big Difference
Start with these three adjustments. First, boost the exposure slightly. This brightens the photo and brings out details. Second, increase the contrast a little. This makes the subject stand out from the background. Third, crop the photo to improve the composition. Cut out any distracting edges or empty spaces.
You can also adjust the white balance to make the colors warmer or cooler. Warmer tones work well for sunrise and sunset shots. Cooler tones can give midday photos a clean, crisp look. Keep your edits subtle. The goal is to enhance the photo, not change it completely.
Before and After Examples
Here is a simple example. You take a photo of a bass caught at dawn. The original shot is a bit dark and the colors look flat. After editing, you increase exposure by 20%, warm up the white balance, and crop slightly to focus on the fish. The result is a vibrant, eye-catching photo that captures the beauty of the moment.
Editing is not about faking the scene. It is about bringing out what was already there. A little effort in post-processing goes a long way toward making your fishing photos look professional.
Tips for Different Fishing Situations
Every fishing trip is different, and so are the photo opportunities. Here are some tips for specific situations you might encounter.
From a Boat
Boats move, which makes photography tricky. Brace yourself against the railing or seat. Use a camera strap to keep your gear secure. If the water is choppy, wait for a calm moment to take your shot. The glass-like surface creates beautiful reflections that make your photos pop.
Also, remember that safety comes first. Always secure your camera before standing up or moving around the boat. A floating camera strap is a great investment for boat photography.
From the Shore
Shore fishing gives you more stability, which is great for photography. Use a tripod or rest your camera on a stable surface. This lets you use slower shutter speeds for softer, more artistic shots of the water and sky.
Look for interesting foreground elements like rocks, docks, or reeds. These add depth and context to your shoreline fishing photos. They also help tell the story of where the fishing happened.
Catch and Release
If you practice catch and release, timing is everything. Have your camera ready before you bring the fish in. Take the photo quickly and gently release the fish back into the water. Wet your hands first to protect the fish’s slime coat.
Keep the fish in the water as much as possible for the photo. Holding it just above the surface can create a dramatic effect while keeping the fish safe. This approach lets you get the shot and protect the fish at the same time.
How to Take Better Fishing Photos: Final Thoughts
How to take better fishing photos comes down to three things: preparation, practice, and passion. Prepare your gear and settings before you head out. Practice your composition and lighting techniques on every trip. And most importantly, bring the passion you already have for fishing into your photography.
The best fishing photos come from people who genuinely love being on the water. That love shines through in every shot. Whether you are using a smartphone or a professional camera, the most important tool is your eye for the moment.
Start applying these tips on your next fishing trip. Bring a friend along to help spot photo opportunities. Review your shots at the end of the day and think about what worked and what did not. Over time, you will develop your own style and your photos will improve naturally.
Remember, the goal is not just to capture a fish. It is to capture the feeling of the day. The breeze. The water. The thrill of the catch. When you focus on telling that story through your photos, you will create images that last a lifetime.
So grab your camera, head to your favorite fishing spot, and start shooting. The water is waiting, and your next great photo is just a cast away.
Frequently Asked Questions
What is the best camera for fishing photography?
A waterproof action camera or a smartphone with a good camera works great for most fishing trips. If you want more control, a mirrorless camera with a waterproof housing is a solid choice. The best camera is the one you will actually bring with you.
How do I take clear photos of fish in the water?
Get low to the water surface and shoot at a slight angle. Use a fast shutter speed to freeze motion. A polarizing filter helps reduce glare and makes the fish more visible beneath the surface.
What time of day is best for fishing photos?
Golden hour, which is the first and last hour of sunlight, provides the warmest and most flattering light. Overcast days also work well because the light is soft and even with no harsh shadows.
Do I need expensive gear to take good fishing photos?
No. A smartphone with a good camera can produce excellent fishing photos. The key is understanding basic composition and lighting. You can always upgrade your gear later as your skills improve.
How can I protect my camera near water?
Use a waterproof camera or a waterproof pouch for your gear. Bring a microfiber cloth to wipe off water and fish slime. Always use a secure strap to prevent drops. A floating camera strap adds extra safety on boats.
What should I do if the fish is too far away to photograph clearly?
Move closer if it is safe to do so. If you cannot get closer, use burst mode to capture multiple shots and pick the sharpest one. Avoid digital zoom, which reduces image quality. Instead, crop the photo during editing.