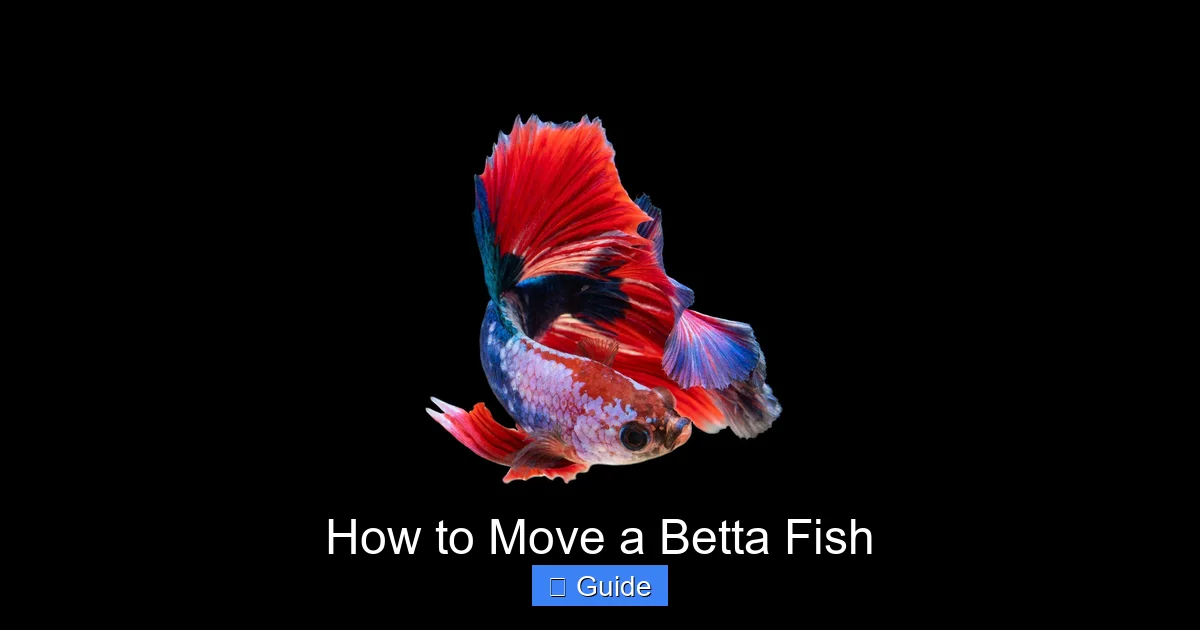
How to Move a Betta Fish
Moving a betta fish requires careful planning to minimize stress and prevent injury. The key is to use a clean, secure transport container with a small volume of their familiar water, maintain a stable temperature, and avoid rapid changes. Always prioritize a gentle acclimation process to the new tank’s water parameters. Following a structured approach before, during, and after the move ensures your vibrant companion arrives safely and thrives in its new home.
Key Takeaways
- Fast your betta briefly: Withhold food for 24-48 hours before moving to keep its digestive system empty and water cleaner during transit.
- Choose a secure, appropriate container: Use a clean plastic container with a lid or a dedicated fish bag, ensuring it’s large enough for the fish to turn but not so large that water sloshes dangerously.
- Use familiar, clean water: Fill the transport container with a portion of the betta’s existing tank water (about 25-50%) to maintain stable water chemistry and reduce shock.
- Maintain consistent temperature: Insulate the transport container with towels or a cooler to prevent extreme temperature fluctuations, which are a major stressor.
- Acclimate slowly and carefully: Never dump your betta into the new tank. Use the drip or floating cup method to gradually introduce it to the new water parameters over 30-60 minutes.
- Monitor closely after the move: Observe your betta for signs of stress (lethargy, clamped fins, loss of color) for several days and maintain excellent water quality in the new setup.
- Avoid common pitfalls: Never use water from a different source (like tap water from a new location) in the transport container, and never overcrowd the carrier with tank decorations or gravel.
📑 Table of Contents
- Understanding Your Betta’s Unique Needs: Why Moving Requires Special Care
- Pre-Move Preparation: The Foundation of a Successful Transport
- Choosing the Right Transport Container: Bags vs. Containers
- The Moving Process: A Step-by-Step Guide for Moving Day
- Acclimating to the New Tank: The Drip Method is King
- Post-Move Care: Monitoring and Recovery
- Special Considerations: Long-Distance Moves, Air Travel, and Multiple Fish
Understanding Your Betta’s Unique Needs: Why Moving Requires Special Care
Betta fish, with their flowing fins and bold personalities, are beloved pets. However, their beauty comes with a reputation for being somewhat delicate, a trait rooted in their natural history. Native to the shallow, slow-moving rice paddies and stagnant ponds of Southeast Asia, bettas have evolved to survive in warm, oxygen-poor water. They possess a labyrinth organ, allowing them to breathe atmospheric air, but this adaptation doesn’t make them invincible to stress. In fact, bettas are highly sensitive to environmental changes, particularly water quality, temperature, and water chemistry. A sudden shift in any of these can suppress their immune system, making them susceptible to diseases like fin rot or dropsy.
When you decide to move a betta fish, you are essentially uprooting it from the only world it knows. The process—packing, transit, and settling into a new tank—is a cascade of potential stressors: vibrations, jostling, temperature swings, and new water parameters. The goal of this guide is not just to get your betta from Point A to Point B, but to do so in a way that respects its fragile physiology and psychology. By understanding why each step is crucial, you move from simply following instructions to truly caring for your aquatic companion. This comprehensive guide will walk you through every phase, from the days leading up to the move to the final, peaceful moments of watching your betta explore its new kingdom.
Pre-Move Preparation: The Foundation of a Successful Transport
The work of moving a betta fish begins long before you pick up the transport container. Rushing into the moving day without a plan is the single biggest mistake new betta owners make. Proper preparation minimizes the unknowns and creates a buffer against stress. Think of it as building a calm, predictable routine for your fish in the midst of your own chaotic moving schedule. This phase is about controlling what you can: the fish’s health, the water it travels in, and the equipment you have on hand.

Visual guide about How to Move a Betta Fish
Image source: infoanimales.net
The Critical 24-48 Hour Fast
Yes, it might feel cruel to withhold food from your betta, but it is one of the most important steps. Betta fish are opportunistic feeders in the wild and have small digestive tracts. Food that isn’t digested before the move will sit in their gut and begin to decompose. This process releases ammonia and other waste products directly into the small, enclosed transport container. In a confined space, even a tiny amount of ammonia can become toxic very quickly, poisoning your fish and severely degrading water quality. A 24 to 48-hour fast ensures the digestive tract is empty. For most healthy adult bettas, this short period is perfectly safe and significantly reduces the bio-load in the transport vessel. Do not extend the fast beyond 48 hours without consulting a veterinarian.
Water Preparation: Your Betta’s Liquid Lifeline
The water you use in the transport container is not just a medium to hold the fish; it’s a chemical buffer. The absolute best choice is water from your betta’s current, established tank. Take 1-2 gallons of this water a day or two before the move. This water is already conditioned, dechlorinated, and cycled. It contains beneficial bacteria and has a stable pH and temperature that your betta’s body is accustomed to. Using brand new tap water from your destination, even if treated with dechlorinator, introduces a completely new chemical profile. The shock of switching from familiar tank water to new, untreated water in a tiny bag can be devastating. Store this saved tank water in a clean, airtight container until moving day.
Gathering Your Supplies: The Betta Moving Kit
Create a dedicated “Betta Moving Kit” well in advance. This prevents last-minute scrambling and ensures you have everything you need. Your kit should include:
- The Transport Container: A clean, plastic food-grade container with a secure lid (drill air holes if needed) or a high-quality, thick fish bag designed for long-distance transport. Avoid glass.
- Saved Tank Water: The 1-2 gallons prepared earlier.
- Insulation: Several small towels, paper towels, or a small cooler. This is for temperature regulation.
- rubber Bands: To secure bags if using them.
- Water Conditioner: A small bottle, just in case you need to add a drop to new water during acclimation.
- Net: A soft, mesh net for transferring the fish.
- Thermometer: A small stick-on or digital thermometer to monitor transport temperature.
- Small Cups or Containers: For the acclimation drip method.
- Paper Towels: For cleanup and extra padding.
- Permanent Marker: To label containers with your name and “LIVE FISH.”
Choosing the Right Transport Container: Bags vs. Containers
The debate between using a traditional plastic bag versus a rigid container is common. Both can work, but each has distinct advantages and risks. Your choice should depend on the distance of the move, ambient temperatures, and your personal ability to handle the container safely. The wrong choice can lead to leaks, oxygen deprivation, or excessive sloshing that injures your betta’s delicate fins.
Visual guide about How to Move a Betta Fish
Image source: wallpaperaccess.com
The Classic Plastic Bag: Pros and Cons
Pros: Plastic bags are lightweight, take up minimal space, and allow for a good seal. They are often provided by pet stores. The flexible nature means they can be cushioned easily within a box. For very short trips (under 1 hour) in mild weather, they can be sufficient.
Cons: They are prone to leaks if squeezed or snagged. They offer no structural protection from crushing. Oxygen exchange is limited to the air trapped inside; a betta can quickly deplete this in a warm environment. They can also roll and slosh, causing stress. If using a bag, double-bag it for security. Fill the inner bag 1/3 with your saved tank water and the same volume of air (or pure oxygen if available). Place this bag inside a second, identical bag, sealed in the same way. Then place the double-bagged fish into a small, rigid container (like a Tupperware) to prevent rolling and provide insulation.
Rigid Plastic Containers: The Safer, More Reliable Choice
For any move longer than a very short trip, a small, clean plastic container with a secure lid is the superior option. Think of a clean, new food storage container or a small, dedicated aquarium transport box.
Pros: They are leak-proof and crush-proof. They prevent excessive water movement, which is crucial for a long-finned betta to avoid fin damage. They provide a stable, dark environment that can reduce stress. They are easier to pack in a car and can be nestled in towels for insulation.
Cons: They are bulkier and heavier. You must ensure there is adequate air space above the water (at least 2-3 inches) and that the lid has air holes drilled into it. Never fill the container to the brim. A 1-quart or 1/2-gallon size is usually perfect for a single adult betta. Line the bottom with a damp paper towel for cushioning and to prevent slipping.
The Moving Process: A Step-by-Step Guide for Moving Day
This is the execution phase. Your careful preparation now pays off. The process can be broken down into two parts: the capture and packing just before you leave, and the management of the transport container during the journey itself. The overarching principle throughout is to be quick, calm, and gentle. Your betta will sense your energy, so a calm, deliberate pace is contagious.
Visual guide about How to Move a Betta Fish
Image source: wallpaperaccess.com
Step 1: Capture and Container Loading
On the day of the move, about 30-60 minutes before you plan to leave, it’s time to transfer your betta. First, turn off all filters and heaters in the main tank to prevent accidents when you reach in. Using your soft net, gently herd your betta into a corner and scoop it up. Do not chase it wildly around the tank. A quick, confident motion is best. Immediately transfer it from the net into your prepared transport container (which already contains 1/3 to 1/2 of the saved tank water). The net should not be placed inside the transport container; use it only as a tool to move the fish. Once the betta is in, place the lid on securely. If using a bag, follow the double-bagging procedure described earlier.
Step 2: Securing and Insulating for Transit
This step is non-negotiable for temperature control. Place the sealed transport container in the center of a small towel. Fold the towel over the top and sides, creating a padded nest. You can then place this bundle inside a small cooler or a sturdy cardboard box lined with more towels. The goal is to create a thermal mass that resists rapid temperature changes. In summer, this keeps the water cool; in winter, it provides warmth. Place the insulated container in a location in your vehicle where it will be level, secure, and out of direct sunlight or air conditioning vents. The footwell of the back seat or the floor behind the front seats are often good spots. Never place it on a seat where it can slide around during braking.
During the Journey: Monitoring and Environment
For trips longer than 30 minutes, it’s wise to check on your betta periodically. Look for signs of distress: frantic swimming, gasping at the surface (a sign of low oxygen), or lying motionless on the bottom. If the water appears very cloudy or the fish is clearly struggling, you may need to perform an emergency partial water change with more of your saved tank water (have a few extra cups ready in a sealed bottle). Keep your vehicle’s temperature moderate. Do not blast heat or AC directly on the transport box. If you must leave the car for an extended period (like during a long-haul flight connection), make arrangements to keep the fish with you in the cabin, never in a checked luggage compartment.
Acclimating to the New Tank: The Drip Method is King
You have arrived. The transport container is intact, and your betta is seemingly okay. The most critical phase is now upon you: introducing your betta to its new, permanent tank. The single biggest mistake is dumping the betta and its transport water directly into the new tank. The water parameters (pH, hardness, temperature, ammonia/nitrite/nitrate levels) in your new tank, even if cycled, will be different from the old. A sudden change is a severe shock. The drip acclimation method is the gold standard for bettas and most sensitive fish because it allows for a slow, controlled mixing of waters.
Setting Up for the Drip Method
You will need your transport container (with fish and water), a clean bucket or large bowl, and air line tubing with a control valve (or you can use a simple siphon and control flow with your fingers). First, place the transport container next to the new tank. Fill a clean bucket or bowl with enough new tank water to eventually hold all the water from the transport container plus the fish. This container will be the “mixing vessel.” Gently net your betta from the transport container and place it into this bucket of new tank water. Do not add the transport water to the new tank yet. Now, using the tubing, start a very slow siphon from the new tank into the bucket with your betta. The goal is a drip rate of about 1-2 drops per second. This allows the new tank water to slowly mix with the old transport water in the bucket, gradually changing the chemical environment around your betta. This process should take at least 30 minutes, and 60 minutes is even better for a very sensitive fish.
Alternative: The Floating Cup Method
If you are acclimating directly in the new tank (which is acceptable if the tank is fully cycled and parameters are stable), you can use the floating cup method. Place the entire transport container (open lid) into the new tank so it floats. This allows the water inside the transport container to slowly equalize in temperature with the tank water. After 15-20 minutes, begin using a cup or small baster to slowly add small amounts (a few ounces) of new tank water to the transport container every 10-15 minutes. After about an hour of gradual dilution, you can then net the betta from the transport container and gently place it into the new tank. Dispose of the old transport water; do not pour it into the new tank, as it may contain concentrated waste products from the stress of the move.
Post-Move Care: Monitoring and Recovery
The acclimation is complete, and your betta is now swimming in its new home. But the move is not over. The next 72 hours are a critical recovery period. The stress of relocation has likely suppressed your betta’s immune system, making it vulnerable. Your job now is to provide a pristine, stable, and low-stress environment to allow its defenses to rebound.
The First 24 Hours: Observe, Don’t Interfere
Turn the tank lights off for the first full day. Light is another stressor, and darkness will encourage rest. Do not feed your betta for the first 24 hours after arrival. Its system is still recovering, and feeding will just add to the ammonia load in the new tank. Use this time for quiet observation. Where is it swimming? Are its fins fully extended? Is it showing interest in you? Normal behavior includes exploring the tank, flaring at its reflection, or resting on a plant leaf. Concerning signs include lethargy (sitting on the bottom for hours), clamped fins (held tightly against the body), rapid gill movement, rubbing against objects (indicating itch/irritation), or a loss of vibrant color. If you see severe distress, check water parameters immediately.
Water Quality is Paramount
Do not perform a water change in the new tank for at least 48 hours after the move. The goal is stability. Any disturbance during this recovery window is detrimental. However, you must have a fully cycled tank waiting. If you are moving into a brand new, uncycled tank, the move becomes exponentially more dangerous due to the risk of ammonia spikes. After the initial 48-hour rest period, perform a small (25%) water change with dechlorinated water that matches the tank’s temperature. Continue to monitor ammonia, nitrite, nitrate, and pH daily for the first week using a liquid test kit, which is more accurate than test strips. Be prepared to perform additional small water changes if parameters waver.
Special Considerations: Long-Distance Moves, Air Travel, and Multiple Fish
Not all moves are created equal. A local move across town presents different challenges than a cross-country drive or an international flight. Similarly, moving a community tank or multiple bettas requires adjusted logistics. Planning for these scenarios is what separates a good move from a great, safe one.
Moving Long Distances or by Air
For car trips over 4-6 hours, you will need to plan for water changes mid-journey. You cannot let the fish sit in the same small volume of water for that long. You will need a second, identical transport container with fresh, pre-mixed water (50% old tank water, 50% new dechlorinated water at the correct temperature). About halfway through the trip, in a calm, controlled environment (like a rest stop bathroom), you can perform a quick transfer. Net the betta from the old container and place it into the new one. Discard the old water. This is a stressful procedure, so only do it if absolutely necessary. For air travel, contact the airline well in advance about their live animal policies. You will typically need an IATA-approved crate and may have to ship your betta as checked baggage. Research this meticulously, as temperature extremes in cargo holds are a major risk.
Moving Multiple Bettas or a Community Tank
Never transport multiple bettas in the same container. They are territorial and will fight, even in a stressed state. Each betta needs its own separate, insulated transport unit. For a community tank with other peaceful fish, you have two options: 1) Transport each fish individually in smaller bags/containers (impractical for large numbers), or 2) If the tank is large enough, you can attempt to move a group of small, hardy fish together in a single, larger container filled with enough water for them to spread out, but this carries a higher risk of aggression and poor water quality. For a community tank, it is often safer and less stressful to break it down, transport fish individually, and then re-stock the new tank slowly over several weeks after it is fully cycled.
Frequently Asked Questions
Can I use a regular plastic shopping bag to move my betta?
No. Regular plastic bags are thin, prone to leaks, and can release harmful chemicals. Always use thick, fish-safe plastic bags designed for transport, or preferably, a rigid, clean plastic container with air holes.
Should I clean my betta’s new tank before moving it in?
The new tank must be fully set up, filled with dechlorinated water, and fully cycled before the betta arrives. A cycled tank has beneficial bacteria that process fish waste. Moving a betta into an uncycled tank is extremely dangerous due to toxic ammonia and nitrite spikes.
How long can my betta stay in the transport container?
Aim to keep transport time under 4 hours. With proper insulation and a suitable container, a betta can be safe for 6-8 hours in a worst-case scenario. For longer journeys, you must plan for intermediate water changes as described in the long-distance section.
Do I need to acclimate my betta if I used old tank water in the transport container?
Absolutely. Even if you used old water, the parameters of the new tank (pH, temperature, mineral content) will be different. The drip or floating cup acclimation method is still essential to prevent osmotic shock and temperature shock.
What are the signs that my betta is stressed from the move?
Common signs include clamped fins, loss of bright color, lethargy (hiding at the bottom), frantic swimming, gasping for air at the surface, and loss of appetite. Mild stress is normal, but if these signs persist beyond 48-72 hours in a clean, cycled tank, investigate water quality and parameters immediately.
Can I use a battery-powered air pump in the transport container?
For very long transports (5+ hours), a small, battery-powered air pump with a tiny air stone can be beneficial to increase oxygen levels. However, it adds complexity and noise. For most moves, a container with ample air space and proper insulation is sufficient. If you use a pump, ensure the air flow is very gentle to avoid stressful water movement.