How to Swap Out a Betta Fish Tank
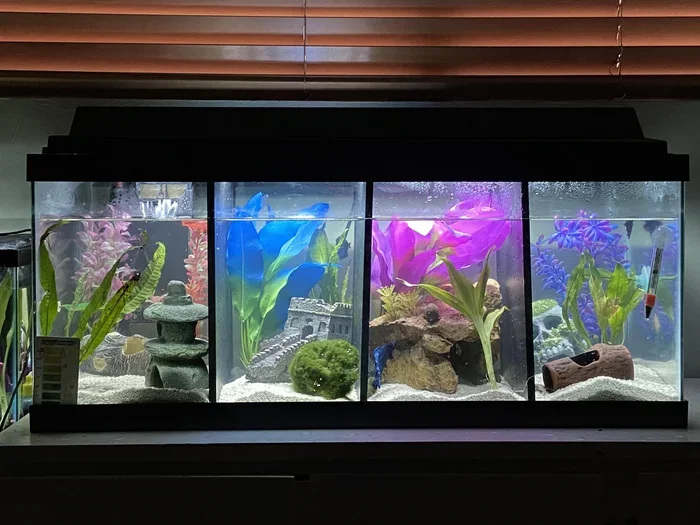
Swapping out a betta fish tank means more than just moving water around — it is about giving your fish a fresh, healthy home. This guide walks you through every step of the process, from preparing the new tank to safely transferring your betta. You will learn the best techniques, common mistakes to avoid, and pro tips that make the swap easy and stress-free for both you and your fish.
There comes a time in every betta fish owner’s journey when you need to swap out a betta fish tank. Maybe your current tank is getting too small, the equipment is aging, or you simply want a fresh start. Whatever the reason, doing a tank swap the right way matters a lot.
A botched swap can stress your fish, crash your water parameters, and even lead to illness. But when you do it correctly, the process is straightforward and actually quite rewarding. Your betta gets a nicer home, and you get peace of mind knowing everything was done safely.
In this guide, we break down the entire process into clear, easy-to-follow steps. You will learn how to prepare the new tank, how to move your fish without harm, and how to keep water quality stable throughout the transition. Let us dive in.
Key Takeaways
- Plan ahead: Have the new tank fully set up and cycled before you move your betta.
- Use the right tools: A gravel vacuum, bucket, water conditioner, and net make the swap smooth.
- Match water parameters: Temperature and pH should be nearly identical between the old and new tanks.
- Acclimate your betta: Gradual transition reduces stress and prevents shock.
- Clean as you go: Scrub the old tank while transferring everything to keep both habitats pristine.
- Monitor after the swap: Watch your betta closely for the first 24-48 hours for any signs of distress.
📑 Table of Contents
Why You Might Need to Swap Out Your Betta Tank
Before you start, it helps to understand why you are doing this. A few common reasons drive the need for a tank swap.
- Upgrading to a larger tank: Bettas need at least 5 gallons, and many owners start with smaller setups. Moving up gives your fish more room to swim and better water stability.
- Worn-out equipment: Filters, heaters, and lights have lifespans. Swapping tanks lets you install fresh gear.
- Tank damage or buildup: Over time, algae, mineral deposits, and micro-cracks can make a tank less safe. A new tank solves these problems.
- Redecorating or resetting: Sometimes you just want a fresh look. Swapping lets you redesign the whole habitat from scratch.
- Health concerns: If your betta has been dealing with recurring issues, a clean tank swap can reset the environment and help recovery.
No matter the reason, the key is preparation. Rushing into a tank swap is the number one mistake people make. Take your time and follow the steps below.
Step-by-Step Guide to Swapping Out a Betta Fish Tank
Step 1: Prepare the New Tank in Advance
Your new tank should be ready to go before you even touch the old one. This means it needs to be set up, decorated, and fully cycled. A cycled tank has beneficial bacteria already established, which is critical for breaking down ammonia and nitrite.
Start by placing the new tank in its permanent spot. Make sure it sits on a level, sturdy surface away from direct sunlight and drafts. Add your substrate, decorations, and any live plants you want. Then fill it with dechlorinated water and run your filter and heater.
Let the new tank run for at least 24-48 hours before the swap. Check that the temperature stays steady around 78-80°F and that the pH is between 6.5 and 7.5. Use a liquid test kit to verify your water parameters. This waiting period is non-negotiable — it ensures the new habitat is stable and safe.
If you are unsure about cycling, check out our guide on how to cycle a fish tank for betta for a full walkthrough.
Step 2: Gather Your Supplies
Having everything ready before you start saves time and reduces stress for your fish. Here is what you need:
- A clean 5-gallon bucket dedicated to fish use only
- A gravel vacuum or siphon
- A fish net sized appropriately for your betta
- Water conditioner or dechlorinator
- A thermometer
- Clean towels or paper towels
- Your new tank decorations and equipment
- A plastic bag or container for temporary holding
Never use soap or household cleaners on any of these items. Residue is toxic to fish and can ruin your water parameters instantly.
Step 3: Transfer Your Betta Safely
This is the most delicate part of the process. You want to move your betta with minimal stress and zero harm.
First, turn off all equipment in the old tank — filter, heater, and air pump. Then gently scoop your betta into a clean container using the net. Try not to scoop too aggressively. Bettas are relatively calm fish, but sudden movements can frighten them.
Place the container in a quiet, stable spot away from direct light. Cover it loosely with a lid or plastic wrap to prevent jumping but allow air flow. Your betta will sit in this temporary home while you work on the tanks.
If you want a deeper dive on the transfer process, our article on how to transfer betta fish to a new tank covers this step in even more detail.
Step 4: Drain and Clean the Old Tank
With your betta safely out of the way, it is time to work on the old tank. Start by draining the water using a gravel vacuum. This removes debris, waste, and leftover food from the substrate.
Once the tank is empty, scrub the walls with a clean algae pad. Do not use soap. Rinse everything thoroughly with warm water. Remove any filter media and rinse it in old tank water (not tap water) to preserve the beneficial bacteria.
If you plan to keep the old tank for future use, let it dry completely before storing. If you are retiring it, make sure it is clean and ready for recycling or repurposing.
Step 5: Set Up and Fill the New Tank
Now comes the exciting part — setting up the new home. If you have not already decorated the new tank, now is the time. Add your substrate, arrange rocks and caves, and place your plants.
Fill the tank with dechlorinated water that matches the temperature of the old tank. Use your thermometer to check. Adding water that is too warm or too cold can shock your betta.
Turn on your filter and heater. Let the system run for at least an hour to ensure everything is working properly. Check for leaks around the filter intake and any seams.
For more detailed tips on getting the new tank ready, you might find our guide on how to set up a fish tank for betta fish helpful.
Step 6: Acclimate and Release Your Betta
Acclimation is the step most people skip, and it is the most important one. Your betta has been sitting in water from the old tank, and the new tank water will have slightly different parameters.
Use the drip method for the best results. Place your betta and its container water into the new tank. Then, use a tube or airline to slowly drip new tank water into the container at a rate of about 2-4 drops per second. Continue for 15-20 minutes, which doubles the volume of water in the container.
After the drip acclimation, gently net your betta and release it into the new tank. Discard the old container water — do not pour it into the new tank, as it may contain waste or pathogens.
Watch your betta for the first few minutes. A little hiding or exploring is normal. If your fish darts around frantically or lies on its side, check the water temperature and parameters immediately.
Step 7: Monitor Water Quality After the Swap
The first 24-48 hours after a tank swap are critical. Test the water for ammonia, nitrite, and nitrate levels. Even in a fully cycled tank, the swap process can temporarily disrupt the bacterial balance.
Do a partial water change of about 20% after the first day. This helps remove any accumulated waste and keeps parameters stable. Continue testing every 12 hours for the first two days.
Feed your betta lightly during this period. A small portion of food once a day is enough. Overfeeding after a swap can spike ammonia levels and cause problems.
Common Mistakes to Avoid When Swapping Tanks
Even experienced fish keepers make mistakes during a tank swap. Here are the most common ones and how to avoid them.
- Skipping the cycling process: Moving your betta into an uncycled tank is a recipe for disaster. Ammonia and nitrite spikes can be lethal within hours.
- Using tap water without conditioner: Chlorine and chloramine in tap water kill beneficial bacteria and harm your fish. Always treat water with a conditioner before adding it to the tank.
- Changing too much water at once: A sudden 100% water change destroys the bacterial colony and shocks your betta. Stick to partial changes.
- Using soap or chemicals on tank items: Residue is invisible but deadly. Rinse everything with water only.
- Rushing the acclimation process: Dumping your betta straight into new water without acclimation causes osmotic shock and extreme stress.
- Forgetting to match temperatures: Even a few degrees difference can stress your fish. Always check and match temperatures before the swap.
Avoiding these mistakes makes the entire process smoother and much safer for your betta.
How to Maintain Your New Tank After the Swap
Once the swap is complete and your betta is settled in, your job shifts to maintenance. A well-maintained tank keeps your fish healthy and reduces the need for future swaps.
Test your water parameters weekly using a liquid test kit. Keep ammonia and nitrite at zero, and nitrate below 20 ppm. Perform a 20-30% water change every week or two, depending on your tank size and stocking level.
Clean your filter media monthly by rinsing it in old tank water. Never replace all filter media at once — you need to preserve the beneficial bacteria colony. Replace only a third at a time, spaced out over several weeks.
Keep an eye on your betta’s behavior and appetite. A healthy betta is active, curious, and eats eagerly. Lethargy, loss of appetite, or faded colors can signal water quality issues or illness.
For routine maintenance tips, our guide on how often to clean a betta fish tank covers the ideal schedule in depth.
Quick Tips for a Smooth Tank Swap
- Do the swap during a calm time of day when your household is quiet.
- Keep a flashlight handy to spot your betta during the transfer.
- Take photos of the old tank setup so you can recreate a familiar environment in the new one.
- Have a backup plan in case something goes wrong, like a temporary holding container with conditioned water.
- Work efficiently but calmly — rushing leads to mistakes.
- Keep your betta’s favorite hiding spots or decorations to provide familiarity in the new tank.
These small tips make a big difference in how smoothly the swap goes and how well your betta adjusts afterward.
Expert Insight: Why Consistency Matters Most
Experienced aquarists will tell you that consistency is the secret to healthy betta fish. When you swap out a tank, you are introducing change. Bettas are not tropical fish that thrive on chaos — they prefer stable, predictable environments.
The goal of any tank swap is to minimize disruption. Keep the water parameters as close as possible between the old and new tanks. Maintain similar lighting schedules. Use familiar decorations and plants. These small consistencies help your betta feel at home in the new setup much faster.
If you are dealing with a 1 gallon betta tank upgrade or moving to a larger setup like a 10 gallon betta fish tank, the principles remain the same. Scale up your preparation and monitoring, but keep the process consistent.
Final Thoughts
Swapping out a betta fish tank does not have to be stressful. With proper planning, the right supplies, and a patient approach, you can give your betta a fresh, healthy habitat without any drama. The key is preparation — have the new tank ready, move your fish gently, and monitor water quality closely afterward.
Remember that every betta is different. Some adjust quickly to a new tank, while others need a little extra time and attention. Watch your fish closely, keep the water clean, and trust the process. You have got this.
Whether you are upgrading from a 3 gallon betta fish tank or doing a complete habitat reset, the steps in this guide will help you get it right. Your betta deserves a clean, safe, and comfortable home — and now you know exactly how to provide one.
Frequently Asked Questions
How long does it take to swap out a betta fish tank?
A full tank swap typically takes 2-4 hours, depending on the tank size and how much setup work the new tank needs. If the new tank is not yet cycled, add 24-48 hours of waiting time before moving your betta. Planning ahead is the key to keeping the actual swap day efficient and stress-free.
Can I swap tanks without removing my betta from the water?
No, you will need to temporarily move your betta during a full tank swap. The safest method is using a clean net and a holding container with water from the old tank. Keep the holding container in a quiet, stable spot while you set up the new tank. This temporary move is brief and necessary for a proper swap.
Do I need to cycle the new tank before swapping my betta in?
Yes, absolutely. A cycled tank has beneficial bacteria that process ammonia and nitrite, which are toxic to bettas. Cycling takes about 4-6 weeks, but you can speed it up with bottled bacteria starters. Never place your betta into an uncycled tank — the risk of ammonia poisoning is too high.
What water parameters should match between the old and new tank?
Temperature, pH, and hardness should be as close as possible. Aim for a temperature of 78-80°F, a pH between 6.5 and 7.5, and moderate hardness. Use a liquid test kit to verify both tanks match before the swap. Close parameter matching reduces the risk of osmotic shock and stress.
How do I know if my betta is stressed after a tank swap?
Signs of stress include hiding for extended periods, refusing food, clamped fins, rapid breathing, or lying on the tank bottom. Some brief hiding is normal for the first few hours. However, if these signs persist beyond 24 hours, test your water parameters immediately and check for temperature or parameter mismatches.
Can I reuse items from my old tank in the new one?
Yes, reusing decorations, plants, and filter media is a great idea. Familiar items help your betta feel more comfortable in the new environment. Just make sure to rinse decorations thoroughly and rinse filter media in old tank water, not tap water. This preserves the beneficial bacteria that support your tank’s nitrogen cycle.