Transporting a betta fish requires careful planning to minimize stress and ensure survival. The core principles involve fasting your fish beforehand, using a secure, clean container with conditioned water, and maintaining a stable, warm temperature throughout the journey. Always prioritize a dark, quiet environment and avoid rapid changes during transit. Upon arrival, a slow, patient acclimation process to the new tank is non-negotiable for your betta’s long-term health.
Key Takeaways
- Fast Your Betta: Withhold food for 24-48 hours before transport to keep its water clean and reduce waste buildup.
- Choose the Right Container: Use a clean, sealable plastic bag, specialized transport cup, or small, dedicated tank; avoid glass bowls.
- Condition the Water: Always fill the transport container with pre-conditioned, dechlorinated water from the source tank, not untreated tap water.
- Control Temperature Rigorously: Insulate the container and use external heat sources (like heat packs) to maintain a stable 76-82°F (24-28°C).
- Minimize Stress & Movement: Keep the container dark, level, and in a secure spot to prevent sloshing and reduce visual stimuli.
- Acclimate Slowly Upon Arrival: Never dump your betta in. Use the drip or floating bag method to equalize temperature and water chemistry over 30-60 minutes.
📑 Table of Contents
- Introduction: Why Transporting a Betta Fish Is a Big Deal
- The Preparation Phase: What to Do BEFORE You Move
- Choosing the Right Transport Container: Bags, Cups, or Tanks?
- Water Quality and Temperature Management During Transit
- During the Journey: The Rules of the Road (or Sky)
- Arrival and Acclimation: The Final, Most Important Step
- Special Considerations: Long-Distance Moves, Flights, and Emergencies
Introduction: Why Transporting a Betta Fish Is a Big Deal
So, you need to move your betta fish. Maybe you’re heading to a new home, going on a vacation, or even just bringing your new aquatic friend home from the pet store. It seems simple enough: put the fish in a bag of water and go, right? Wrong. Transporting a betta fish is one of the most stressful events you can subject your aquatic pet to, second only to a severe illness. Bettas are delicate, labyrinth fish with specific needs. A botched transport can lead to extreme stress, a compromised immune system, shock, and even death.
The goal of any betta transport is to create a temporary, stable, and low-stress environment that mimics, as closely as possible, the calm conditions of its home tank. This isn’t just about getting from point A to point B; it’s about protecting the fragile equilibrium of your fish’s body. In this complete guide, we will walk through every single step—from the 48 hours before you leave to the moment your betta is safely settled in its new home. We’ll cover container selection, water management, temperature control, and the critical art of acclimation. By the end, you’ll have the confidence and knowledge to transport your betta fish safely, whether it’s a 10-minute drive across town or a cross-country flight.
The Preparation Phase: What to Do BEFORE You Move
Success in transporting a betta fish is decided long before you pick up the carrier. The 24-48 hours leading up to the journey are crucial for ensuring your betta is in the best possible condition to handle the stress of travel. Rushing this phase is a common and often fatal mistake.
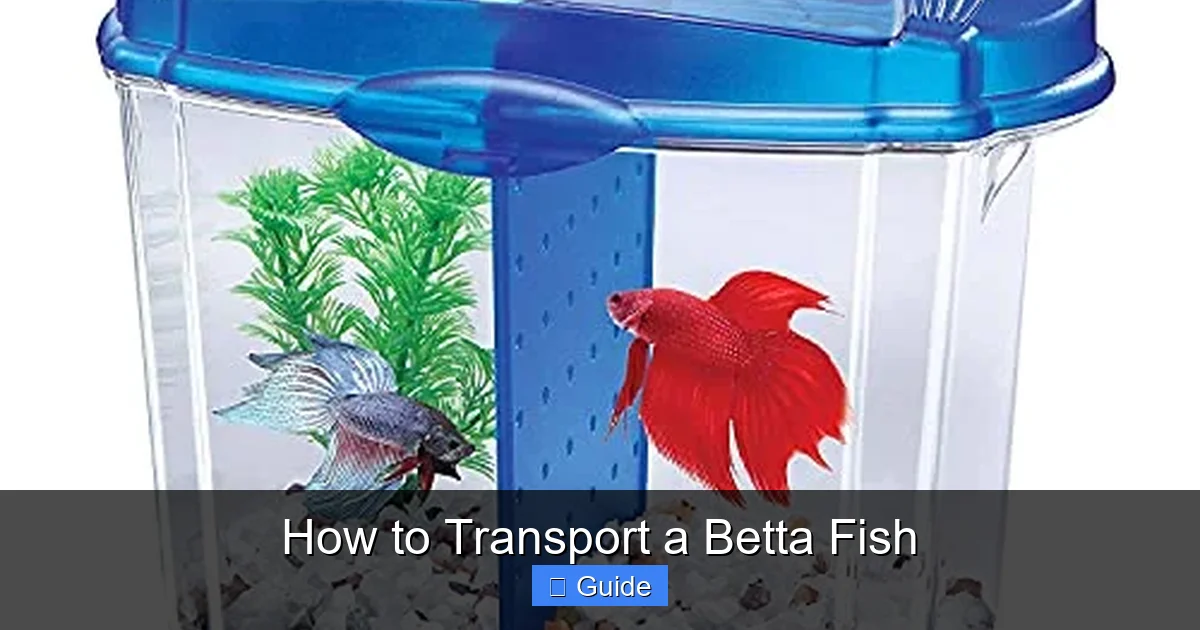
Visual guide about How to Transport a Betta Fish
Image source: m.media-amazon.com
The Critical Fast: Why and For How Long
The single most important pre-transport step is fasting your betta. You should stop feeding your fish at least 24 hours before the planned move, and 48 hours is even better for longer journeys. Why? A betta’s digestive system is slow. An empty stomach means two key benefits: first, it significantly reduces the amount of ammonia and waste your fish will produce while in the small, closed transport container. In a confined space, even a tiny amount of waste can quickly become toxic as ammonia levels spike. Second, a fasted fish is less active and less likely to thrash around, which reduces its own stress and the risk of injury. Think of it as putting your betta’s digestive system on pause so its only mission is to stay calm. Do not worry about your betta “starving”; a short fast of 2-3 days is perfectly safe for a healthy adult betta and is far less dangerous than the water quality crisis an unfed fish can cause in a bag.
Gathering Your Supplies: The Transport Kit
You cannot wing this. Assemble your complete transport kit at least a day before. Here is your essential checklist:
- Primary Container: A clean, sealable plastic bag (like the ones from the pet store, doubled for safety), a dedicated plastic transport cup with a lid (often sold for this purpose), or a small, clean, dedicated Kritter Keeper or tupperware container with air holes. Never use a glass bowl or a container that has ever held chemicals.
- Water Source: A clean container to hold pre-conditioned water from your betta’s source tank for filling the transport vessel.
- Water Conditioner: A bottle of your regular dechlorinator/water conditioner (like Seachem Prime). You will use this to treat the transport water.
- Insulation & Padding: A small cooler, a cardboard box, towels, or fleece blankets. These are for temperature regulation and physical cushioning.
- Heat Source (for cold weather):strong> Chemical hand warmers (the non-toxic, gel kind), or a heated wrap designed for travel. Never use an electrical heating pad directly against the plastic container.
- Rubber Bands & Tape: For securing bags or lids.
- Test Kit (Optional but Recommended): A small liquid ammonia test strip to check water quality before sealing and after a long trip.
Water Preparation: The Foundation of Safety
The water in your transport container is a tiny, closed ecosystem. It must be perfect from the start. Do not use straight tap water unless you have treated it. Tap water contains chlorine, chloramines, and heavy metals that are lethal to fish. Always use water from your betta’s established source tank, as it is already conditioned and has beneficial bacteria. If you are moving to a brand new location with completely different water parameters, the acclimation process at the destination becomes even more critical. Fill your transport container with enough water to fully cover the betta when it’s upright, but not so much that it can swim freely and crash into the sides. For a standard betta in a bag, 1/3 to 1/2 full is ideal. For a cup, fill it to about 2/3. This limited water volume helps reduce waste concentration and makes the container easier to handle.
Before filling, add your water conditioner to the clean transport water according to the dosage instructions. This neutralizes any chlorine or chloramines that might be present. If your trip is very long (over 4-6 hours), consider using a water conditioner that also detoxifies ammonia (like Seachem Prime), as it will bind any ammonia that does form, rendering it harmless for up to 48 hours.
Choosing the Right Transport Container: Bags, Cups, or Tanks?
The container you choose depends heavily on the length and nature of your trip. There is no one-size-fits-all answer, but there are clear winners and losers.
Visual guide about How to Transport a Betta Fish
Image source: aquariumsphere.com
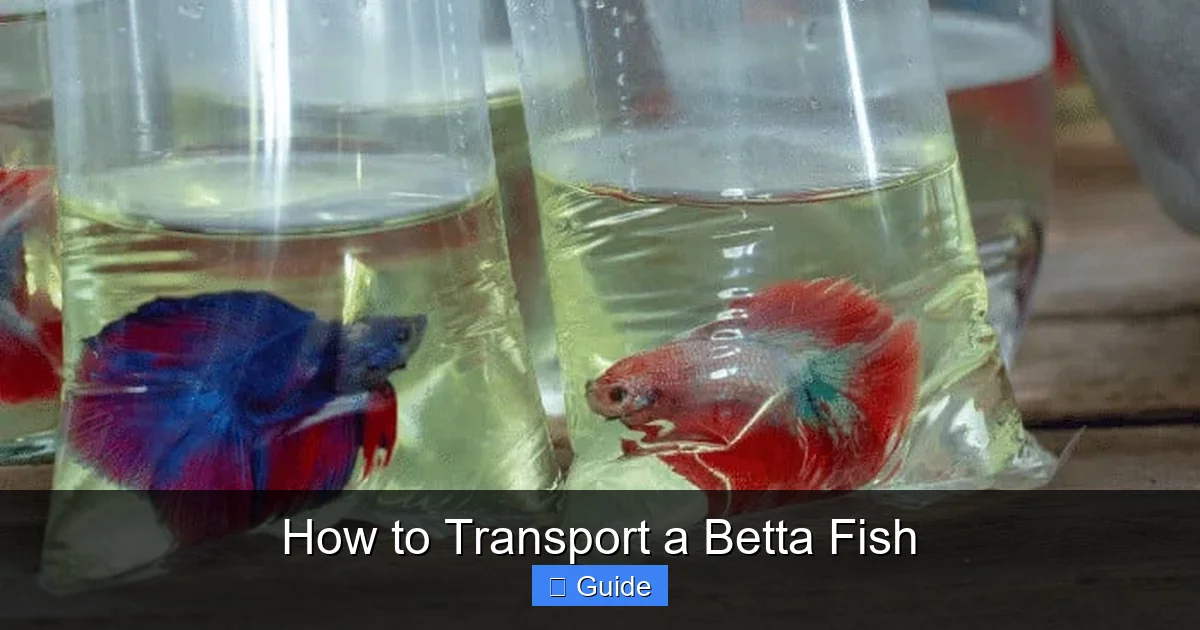
The Classic Double-Bag Method
The double-bag method is the standard for pet stores and short trips (under 4 hours).
- How to: Place your betta in a clean, sealable plastic bag with the prepared water. Fill the bag so the fish is surrounded by water, then push out as much air as possible and seal it tightly with a rubber band. Place this first bag inside a second, identical bag, fill it with a small amount of water (just to cushion), push out air, and seal it. The double layer prevents catastrophic leaks.
- Pros: Extremely lightweight, flexible, and easy to pack. Uses minimal water. Good for air travel as it can be tucked into a pocket.
- Cons: Very poor insulation. Temperature can fluctuate wildly in a car or plane cabin. Limited oxygen exchange; the fish consumes oxygen quickly. Not suitable for trips longer than 4-5 hours in moderate temperatures. High risk of puncture if not handled carefully.
Dedicated Transport Cups & Kritter Keepers
These rigid plastic containers with lids are a superior choice for most car trips and moves.
- How to: Fill the cup with prepared water. Gently net your betta and place it inside. Secure the lid. Some lids have air holes; if not, you must drill or punch small ventilation holes in the lid.
- Pros: Excellent physical protection from bumps and punctures. Better insulation than a bag (especially if placed inside a padded box). More stable, reduces sloshing. Can be easily secured with a seatbelt. Allows for a slightly larger water volume, which helps dilute waste. Some models have built-in air pumps, but these are overkill for short trips.
- Cons: Heavier and bulkier than a bag. Must be kept perfectly level to prevent leaks from the lid seal.
The Small, Temporary Tank
For very long journeys (6+ hours) or extremely temperature-sensitive situations (e.g., an outdoor move in winter/summer), using a small, clean 1-2 gallon plastic tank with a lid can be the safest bet.
- How to: Treat the water in the tank as you would for a full setup. Use a battery-powered air stone for aeration on very long trips. The larger water volume provides a massive buffer against ammonia spikes and temperature changes.
- Pros: The gold standard for water quality and temperature stability. The fish has more space, reducing stress. Easier to monitor.
- Cons: Very heavy and cumbersome to carry. Requires significant space in the vehicle. Risk of spills during sudden stops if not secured perfectly.
Practical Example: For a 2-hour car ride to a new apartment, a dedicated transport cup inside a padded small cooler is perfect. For a cross-country flight with a 6-hour drive to the airport and a 5-hour flight, the small plastic tank method, checked as luggage with ample padding and heat packs, is worth the extra effort.
Water Quality and Temperature Management During Transit
Once your betta is sealed in its container, your control is limited. Therefore, the conditions you establish at the start must last. Two factors are paramount: water quality (ammonia control) and temperature stability.
Visual guide about How to Transport a Betta Fish
Image source: articles.hepper.com
The Ammonia Threat
Even a fasted betta will produce a tiny amount of ammonia through its gills. In a closed system with limited water, this ammonia can rapidly reach toxic levels. This is why the pre-trip fast and the use of a water conditioner that detoxifies ammonia (like Prime) are so important. For trips over 2 hours, you can add a tiny drop of your ammonia-detoxifying conditioner to the sealed bag/cup *after* it’s closed, just to be safe. Do not open the container to add anything during the journey unless it’s an absolute emergency, as this introduces stress and potential contaminants.
Temperature is Everything
Bettas are tropical fish. Their ideal temperature range is 76-82°F (24-28°C). Temperature shock—either too cold or too hot—is a leading cause of transport death. The small water volume in a bag or cup will match the ambient air temperature within minutes.
- For Cold Weather (Below 70°F / 21°C): Insulation is your best friend. Place the sealed bag or cup inside a small, insulated cooler, or wrap it tightly in towels or a fleece blanket. Use chemical hand warmers (the kind that activate when exposed to air) placed *outside* the insulation, wrapped in a towel so they don’t directly touch and overheat the plastic container. You can also use a hot water bottle filled with *warm* (not boiling) water, wrapped in a towel, placed next to the container inside the insulation. The goal is to create a thermal buffer zone.
- For Hot Weather (Above 85°F / 29°C): The risk is overheating. Use the same insulation principle, but with cold packs or a frozen gel pack, again ensuring they do not touch the container directly. Park in the shade, use the car’s AC, and never leave the container in a parked car. A small, battery-powered USB fan aimed at the insulated box can also help circulate air.
- Monitoring: If possible, use a small, waterproof stick-on thermometer on the outside of the container to check the water temperature at stops.
Key Tip: The container should feel warm to the touch from your hand, but not hot. If it’s cold, it’s too cold. If it’s uncomfortably warm, it’s too hot.
During the Journey: The Rules of the Road (or Sky)
How you handle the container during transit is just as important as the prep. Your betta is now in a fragile, confined state.
Secure Placement is Non-Negotiable
Find the most stable, level spot in your vehicle. The floor behind the front seats is often good. For a car, use a seatbelt to buckle the transport cup or cooler in place. For a bag, place it in a rigid box (like a shoe box) filled with crumpled paper or cloth to prevent rolling, and then secure the box. The container must not be able to slide, tip, or be crushed. Every sudden stop or turn will violently shake the water, stressing your fish immensely.
Light, Noise, and Vibration Control
Bettas are easily stressed by external stimuli.
- Darkness: Cover the container with a dark cloth, towel, or place it inside a dark box. Darkness is calming and reduces the fish’s visual awareness of its chaotic movement.
- Quiet: Keep the container away from loud music, shouting, or heavy items that might rattle. If on a plane, place it under the seat in front of you to minimize vibration and noise from the engines.
- Minimize Handling: Do not jiggle, peek at, or play with the container. Leave it alone. Your betta can sense vibrations and movement.
What to Absolutely Avoid
- Direct Sunlight: This is a heat trap and will cook your fish in minutes.
- Air Conditioning Vents or Heaters: Direct blasts of extreme temperature air are deadly.
- The Trunk of a Car: Temperatures can become dangerously extreme, and it’s noisy and bumpy.
- Checked Luggage on a Plane: The cargo hold is not temperature-controlled and can be terrifyingly cold or hot. If you must fly, carry the container on with you in a personal item that fits under the seat. Call the airline ahead for specific live animal policies.
Real-World Scenario: You’re driving 5 hours to your new home. Your betta is in a double-bagged cup, inside a small padded cooler, on the floor behind the passenger seat, covered with a towel. The car’s AC is on a comfortable setting. You stop for gas, but you do not open the cooler to “check on” the betta. You arrive, and only then do you begin the next phase.
Arrival and Acclimation: The Final, Most Important Step
You’ve made it! The journey is over, but your job is not. The moment you open that transport container is the second most dangerous moment for your betta. The water in its small world is likely different in temperature, pH, and hardness from the new destination tank. A sudden dump into new water causes osmotic shock and temperature shock, which can be fatal. Acclimation is the slow, deliberate process of equalizing these parameters.
The Floating Bag Method (For Most Situations)
This is the standard, gentle method.
- Turn off the lights in the new tank and dim the room to reduce stress.
- Gently place the *unopened* sealed transport bag or cup into the new tank. It should float.
- Let it float for 15-30 minutes. This allows the temperature of the water inside the bag to slowly equalize with the tank water through the plastic wall.
- After temperature equalization, carefully open the bag or cup. Using a clean cup or turkey baster, slowly add small amounts (about 1/4 cup) of the new tank water to the transport container every 10-15 minutes for the next 30-60 minutes. This slowly adjusts the fish to the new water chemistry.
- Once you have added an amount of new tank water roughly equal to the original transport water volume, you can gently net your betta from the transport container and release it into the new tank. Do not pour the transport water into the new tank, as it may contain high concentrations of waste or medication from the source tank.
The Drip Acclimation Method (For Extreme Parameter Differences)
Use this if your betta is coming from a very different water source (e.g., store to home, or a move to a region with drastically different tap water).
- Set up a clean drip line. You can use air line tubing from a fish tank setup. Start a siphon from the new tank into the transport container.
- Control the drip with a knot in the tubing or a clamp so it flows at 2-4 drops per second.
- Allow the drip to continue until the water volume in the transport container has at least doubled or tripled. This can take 1-2 hours.
- Then, net the betta and transfer it to the new tank.
Post-Acclimation: Observation and Care
Do not feed your betta for at least 24 hours after arrival. Its digestive system is still stressed, and it may not eat anyway. Turn the lights off for the rest of the day. The next day, offer a tiny meal and observe closely. Look for normal behavior: active swimming, flaring at you, building bubble nests. Watch for signs of stress: lethargy, clamped fins, loss of color, rapid breathing, or hiding. Maintain pristine water quality in the new tank with frequent small water changes (25% every other day for a week) to help your betta recover fully from the ordeal.
Special Considerations: Long-Distance Moves, Flights, and Emergencies
Not all transports are created equal. Here’s how to adapt your plan for extreme scenarios.
Cross-Country Car Moves (8+ Hours)
This is a marathon, not a sprint. You must treat the transport container as a temporary, living aquarium.
- Container: A small, dedicated plastic tank (2-5 gallons) is strongly recommended. It provides the water volume needed to dilute waste over many hours.
- Aeration: For trips over 6 hours, use a battery-powered air pump with a small air stone. This provides vital oxygen.
- Water Changes: If possible, plan stops where you can perform a 50% water change with fresh, pre-conditioned water from a source you trust (like bottled spring water that has been dechlorinated). This resets the water quality. Bring jugs of your pre-treated home tank water if possible.
- Temperature: This is your biggest battle. Invest in high-quality insulation (a small soft-sided cooler) and reliable heat packs/cold packs. Monitor temperature with a stick-on thermometer frequently.
- Schedule: Drive during cooler parts of the day in summer, and warmest parts in winter. Plan your route to avoid being stuck in traffic for hours in temperature extremes.
Air Travel: A Last Resort
Flying with a betta is high-risk. Cargo holds are not for living creatures.
- Carry-On Only: You must carry the container on the plane. It must fit under the seat in front of you. A small, rigid transport cup inside a padded pouch is your best bet.
- Call the Airline: Get their specific policy in writing. Some require special permits or have size/weight restrictions.
- Security: You will have to remove the fish from its container for X-ray. This is incredibly stressful. Talk to the TSA officer, explain you have a live fish, and ask if you can do it in a private area. Have a second, identical container with clean water ready to quickly transfer the fish while you repack the first.
- No Water Additives: Do not use any medications or sedatives. They are illegal and dangerous.
- Hydration: The air on planes is very dry. Keep your own water bottle handy and periodically drip a few drops onto the insulation around the container to maintain humidity.
Emergency Transport (Vet Visit, Sudden Move)
If you have no time to prepare, do this immediately:
- Grab a clean plastic bag, cup, or small bucket.
- Fill it with room temperature, dechlorinated tap water (use your conditioner now!).
- Net your betta and place it inside. Double-bag if using plastic.
- Place the container inside a padded box or wrap in towels.
- Keep it level, dark, and at a stable room temperature. Drive carefully. Skip the acclimation at the vet if it’s an emergency; they will have systems to handle it. For a sudden move to a new home, perform the full acclimation ritual as described above as soon as you arrive.
Frequently Asked Questions
How long can a betta fish survive in a transport bag?
In a properly sealed double-bag with enough air and at the correct temperature, a betta can survive for 4-6 hours. With a larger volume of water and cooler temperatures (slowing metabolism), survival time can extend to 8-10 hours. However, this is a maximum limit, not a goal. Always aim for the shortest possible transport time.
Can I use tap water for transport if I don’t have conditioned water?
You must use dechlorinated water. If you are caught without pre-conditioned water, you can fill your transport container with tap water and immediately add the correct dose of liquid water conditioner. It works instantly. Never, ever use untreated tap water, as chlorine and chloramines will kill your betta within minutes.
What’s the best container for a short car ride?
A dedicated, rigid plastic transport cup with a ventilated lid is the best balance of safety, insulation, and ease for a car ride of 1-4 hours. Place this cup inside a small padded cooler or box lined with towels for extra temperature stability and security.
How do I keep the water warm without a heater?
Insulation is key. Place the sealed container inside a small cooler or wrap it tightly in towels or a fleece blanket. For cold weather, use chemical hand warmers (activated) placed outside the insulation layer, or a hot water bottle wrapped in a towel next to the container. The goal is to slow heat loss, not to cook the fish.
My betta is already stressed from being moved. How can I tell if it’s going to be okay?
Immediate signs of severe distress include frantic swimming, gasping at the surface, loss of buoyancy (floating upside down), or extreme lethargy. If your betta is simply clamped, hiding, and pale but otherwise breathing normally, it is likely stressed but not in immediate danger. The true test is the 24-48 hours after arrival and proper acclimation. If it begins to eat, swim normally, and regain its color, it is recovering.
Do I need to add oxygen to the bag?
No. The air you sealed in the bag contains enough oxygen for a betta for the duration of a typical transport (a few hours). Do not try to inject more air or use an oxygen tablet, as this can cause dangerous pressure changes. For very long transports in a tank, a battery-powered air stone is a good idea.