How to Take Better Fishing Pictures
Taking better fishing pictures is easier than you think. With the right gear, timing, and composition, you can turn ordinary fishing trips into a gallery of memorable shots. This guide covers everything from camera settings to editing tips that will make your fishing photos stand out.
There is something magical about a day on the water. The sun bouncing off the waves, the tug on your line, and the thrill of the catch. But too often, those moments fade from memory because the pictures never turned out right. Blurry fish, dark skies, and awkward angles can ruin what should be a great keepsake.
If you have ever wondered how to take better fishing pictures, you are in the right place. This guide breaks down everything you need to know. From choosing the right gear to framing your shots like a pro, you will find practical tips that work on any budget. Whether you fish from a boat, a kayak, or the shore, these techniques will level up your photography game fast.
The goal is simple. You want photos that capture the excitement, the beauty, and the pride of your time on the water. Let us dive in and make that happen.
Key Takeaways
- Use natural light: Shoot during golden hour for the best lighting on the water.
- Invest in a waterproof camera: A good setup protects your gear and captures action shots.
- Focus on composition: Rule of thirds and clean backgrounds make a big difference.
- Capture the moment: Quick reflexes and burst mode help you get the perfect catch shot.
- Edit with intention: Simple adjustments in post-processing can transform your fishing photos.
- Tell a story: Great fishing pictures include context, emotion, and the full experience.
📑 Table of Contents
Why Taking Better Fishing Pictures Matters
Fishing is more than a hobby. It is a passion. It is a way to connect with nature, spend time with family, and challenge yourself. And just like any meaningful experience, it deserves to be documented well. Great fishing pictures do more than show off a catch. They tell a story.
Think about the last time you scrolled through photos and stopped at one that made you feel something. That is the power of a good picture. When you learn how to take better fishing pictures, you preserve memories in a way that feels alive. You can almost smell the lake, hear the reel click, and feel the pull on the line.
There is also a social side to this. Sharing your fishing photos online brings joy to friends and fellow anglers. It sparks conversations, builds community, and inspires others to get outside. So improving your photography skills has benefits that go way beyond just having nice images.
Build Your Confidence Behind the Camera
Many people avoid taking fishing photos because they feel they lack skill. But here is the truth. You do not need expensive equipment or years of experience. You just need a few simple techniques and the willingness to practice. Every great photographer started somewhere. And with the tips in this guide, you will see noticeable improvement fast.
Choose the Right Gear for Fishing Photography
You do not need a professional studio setup to take great fishing photos. But you do need gear that can handle the environment. Water, sun, and wind are your biggest challenges. So your equipment choices should account for all three.
Waterproof and Weather-Resistant Cameras
A waterproof camera is the single best investment you can make for fishing photography. These cameras are built to survive splashes, rain, and even full submersion. Some models are small enough to fit in your pocket, which makes them perfect for casual fishing trips. Look for cameras with good optical zoom so you can capture fish at a distance without getting too close.
If you already own a smartphone, consider investing in a waterproof phone case. These are affordable and do a great job of protecting your device. Many modern phones also have excellent cameras built in, so you may be surprised at what you can achieve with the right setup.
Lenses and Accessories That Help
For those using a dedicated camera, a versatile zoom lens is your best friend. A lens that covers a range from wide-angle to telephoto gives you flexibility. Wide-angle shots work great for landscapes and the full fishing scene. Telephoto lets you zoom in on the fish, the bait, or the action on the water without disturbing the moment.
A sturdy strap is another must-have. You do not want to drop your camera in the water while fighting a fish. A wrist strap or a neck strap with a secure latch keeps your gear safe. Polarizing filters also help reduce glare on the water and make colors pop in your photos.
When it comes to fishing gear itself, better fishing reels can also play a role in getting cleaner photos. Smooth reel action means fewer tangles and a more visually appealing fight when you are capturing the moment on camera. If you are looking to upgrade your setup, check out whether better fishing reels are worth the investment.
Master Composition and Framing
Composition is the art of arranging elements in your frame. It is what separates a snapshot from a photograph. Good composition guides the viewer’s eye and creates a sense of balance and interest. The good news is that it is easy to learn.
The Rule of Thirds
The rule of thirds is the most fundamental composition tool. Imagine your frame divided into nine equal boxes by two horizontal and two vertical lines. Place your subject along these lines or at their intersections. This creates a more dynamic and visually appealing image than centering everything.
For fishing photos, try placing the horizon on the upper or lower third line rather than dead center. If the sky is dramatic, give it more space. If the water and the action are the focus, let the water take up more of the frame. This simple shift makes a huge difference.
Use Natural Frames
Look for natural frames within your environment. Overhanging trees, bridge pillars, or even your fishing rod can create a frame around your subject. This adds depth and draws attention to the main point of the photo. It also gives your images a more professional and polished feel.
Keep Backgrounds Clean
A cluttered background distracts from your subject. When possible, position yourself so that the background is simple and uncluttered. A clear patch of sky, a calm stretch of water, or a solid shoreline works well. Before you press the shutter, scan the edges of your frame to make sure nothing unwanted is creeping in.
Get Low and Close
One of the easiest ways to improve fishing photos is to change your angle. Get low to the water level. Shooting from a low angle makes the fish look larger and more dramatic. It also creates a sense of immersion that puts the viewer right in the action. Do not be afraid to kneel, sit, or even lie down for the perfect shot.
Timing and Lighting Make All the Difference
Light is the foundation of every great photo. And when you are fishing outdoors, the light changes constantly. Learning to work with natural light will instantly improve your results.
Shoot During Golden Hour
Golden hour refers to the period shortly after sunrise and just before sunset. During these times, the light is soft, warm, and directional. It creates beautiful shadows and brings out rich colors in the water and sky. This is the best time to take fishing photos. The light is forgiving, and the atmosphere is magical.
If you fish early in the morning or late in the evening, you are already in the perfect window for photography. Plan your shooting time around these golden hours whenever possible.
Avoid Harsh Midday Sun
Midday sun creates harsh shadows and blown-out highlights. It is the worst time for photography, especially on the water where glare is intense. If you must shoot during the middle of the day, use a polarizing filter to cut through glare. Position yourself so the sun is behind you or to the side for the most flattering light.
Overcast Days Can Be Golden
Do not put your camera away on cloudy days. Overcast skies act like a giant softbox, creating even, diffused light with no harsh shadows. Colors appear more saturated, and the water takes on a beautiful, moody tone. Some of the best fishing photos I have ever seen were taken on overcast afternoons.
Weather and Fishing Conditions
Weather does not just affect the light. It also affects the fish and the overall fishing experience. Many anglers notice that fish behavior changes with the weather. If you have ever wondered whether it is better to go fishing before or after rain, the answer depends on the species and the water conditions. Rain can stir up the water and make fish more active, which also creates more exciting photo opportunities. Just make sure your gear is protected.
Capture the Action: Fishing Photos That Tell a Story
The best fishing pictures are not just about the fish. They tell the story of the entire experience. The preparation, the waiting, the excitement, and the reward. To capture this story, you need to think about what moments matter most.
Get the Catch Shot
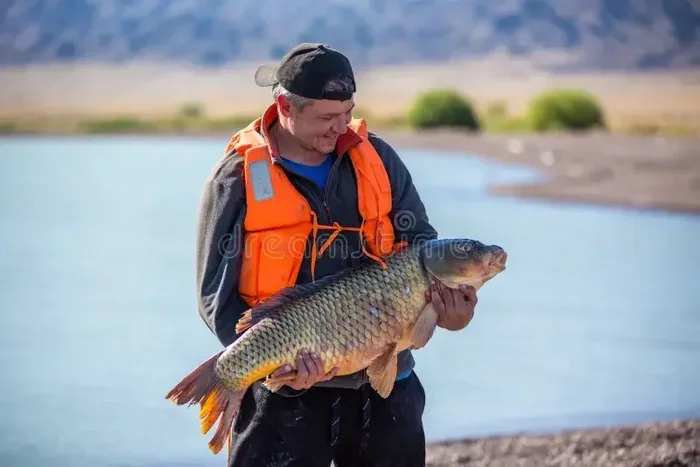
The classic catch-and-release photo is a staple of fishing culture. To get a great one, hold the fish horizontally rather than vertically. This is better for the fish and looks more natural in the photo. Keep your hands away from the gills and use a wet hand or a rubber net to protect the fish’s slime coat.
Have someone else take the photo if possible. This lets you focus on the fish and the moment. If you are alone, use a timer or a remote shutter release. Set your camera to burst mode so you can capture multiple frames and pick the best one later.
Show the Process
Do not just photograph the end result. Capture the process too. The bait on the hook, the reel in action, the line going tight, the splash when the fish hits. These behind-the-scenes moments add depth and authenticity to your fishing photo collection. They make viewers feel like they were right there with you.
Some of the most popular fishing content online shows the full journey from cast to catch. If you are building a following or simply want to share your passion, showing the process is key. You can even find inspiration by learning how to get better fish in Stardew Valley if you enjoy combining gaming with real-world fishing content.
Include People and Emotion
Fishing is a social activity for many people. Include friends, family, or even your fishing buddies in your photos. Candid shots of people laughing, concentrating, or celebrating a catch are often more powerful than posed photos. These images carry emotion, and emotion makes people stop scrolling.
Action Shots and Movement
Capturing movement is one of the biggest challenges in fishing photography. Use a fast shutter speed to freeze the action. If your camera allows it, set it to sports or action mode. For splash shots, pre-focus on the spot where you expect the action to happen and shoot in bursts.
Patience is your best friend here. Action shots often require multiple attempts. Keep trying, and you will eventually capture that perfect moment of the fish breaking the surface or the line slicing through the water.
Edit Your Fishing Photos Like a Pro
Post-processing is not about tricking the viewer. It is about enhancing what was already there. A few simple edits can bring your fishing photos to life and make them look professional.
Start with Basic Adjustments
Begin by adjusting the exposure. If your photo is too dark or too bright, a simple exposure fix can transform it. Next, tweak the contrast to make the image pop. Increase the saturation slightly to bring out the blues of the water and the greens of the scenery. But do not overdo it. Subtle edits always look better than heavy-handed ones.
Crop and Straighten
Cropping is a powerful tool. It lets you remove distractions and focus on the subject. Straighten the horizon if it is crooked. These small adjustments make a big difference in how professional the final image looks. Most free editing apps make these steps easy, even for beginners.
Sharpen and Reduce Noise
If your photo was taken in lower light, it may have some grain or noise. Use noise reduction tools to clean it up. Then apply a touch of sharpening to bring out details in the fish, the water texture, and the surrounding landscape. Just be careful not to over-sharpen, which can make the image look unnatural.
Use Editing Apps for Quick Results
You do not need expensive software to edit your fishing photos. Apps like Snapseed, Lightroom Mobile, and VSCO offer powerful editing tools for free or at a low cost. These apps are designed for mobile devices, so you can edit and share your photos right from the water. Experiment with different filters and presets to find a style that matches your fishing aesthetic.
Common Mistakes to Avoid
Even experienced anglers make photography mistakes. Being aware of these pitfalls helps you avoid them and improve faster.
- Shooting with the sun directly behind the subject: This creates silhouettes and washes out details.
- Using flash on the water: Flash creates harsh reflections and scares fish away.
- Ignoring the background: A messy background distracts from the main subject.
- Not cleaning your lens: Water droplets and fingerprints blur your shots. Wipe your lens often.
- Taking too few shots: The more frames you capture, the better your chances of getting that perfect one.
- Forgetting the story: Photos that only show the fish lack context. Include the environment, the gear, and the people.
Quick Tips for Better Fishing Photos
- Always clean your lens before shooting.
- Carry a microfiber cloth in your tackle box.
- Use burst mode for action shots.
- Shoot in RAW format if your camera supports it.
- Keep your camera accessible, not buried in your bag.
- Practice the rule of thirds until it becomes second nature.
- Shoot during golden hour whenever possible.
- Tell a story with every photo you take.
Conclusion
Learning how to take better fishing pictures is a journey, not a destination. Every trip to the water gives you a chance to practice and improve. Start with the basics. Focus on lighting, composition, and timing. Then gradually build your skills with more advanced techniques like editing and storytelling.
The most important thing is to enjoy the process. Photography should add to your fishing experience, not take away from it. So grab your camera, head to your favorite spot, and start capturing the moments that make fishing so special. With patience and practice, you will be amazed at how quickly your photos improve. Your fishing adventures deserve to be remembered in pictures that do them justice.
Frequently Asked Questions
What is the best camera for taking fishing pictures?
A waterproof action camera or a weather-sealed DSLR works best for fishing photography. If you are on a budget, a smartphone with a waterproof case and a good camera can produce excellent results. The key is to choose gear that can handle water, sun, and wind without hassle.
How do I take sharp photos of fish?
Use a fast shutter speed to freeze motion and keep your focus on the eyes of the fish. Burst mode helps you capture multiple frames, increasing your chances of getting a sharp image. Also, try to minimize camera shake by holding steady or using a strap for support.
What time of day is best for fishing photography?
Early morning and late afternoon, known as golden hour, provide the best natural light for fishing photos. The warm, soft light enhances colors and reduces harsh shadows. Overcast days also work well because the light is diffused and even.
How can I protect my camera while fishing?
Use a waterproof camera or a waterproof phone case. Keep your gear on a secure strap so it does not fall in the water. A microfiber cloth helps you wipe off water and spray quickly between shots. Always dry your equipment after your trip.
Do I need to edit my fishing photos?
Editing is not required, but it can significantly improve your results. Simple adjustments like exposure, contrast, and cropping can make a good photo look great. Free apps make editing easy and fast, even for beginners.
How do I get better fishing photos on a tight budget?
You do not need expensive gear to take great fishing photos. Use your smartphone, practice composition techniques, and shoot during golden hour. Focus on storytelling and capturing genuine moments. The best camera is the one you have with you, so keep it accessible and start shooting.